There seems to be few things in the fly fishing world that provoke as much debate as strike indicators. The mere existence of strike indicators in the sport of fly fishing can inspire rants from fly fishing purists that rival any political rant of that friend you just hid from your Facebook feed. But even among the firmly pro indicator crowd, nymphers will argue fiercely about the superiority of one type of indicator over another.
For newbies to the sport, a strike indicator is something that is often used while fishing with nymphs (sub surface flies). It is a brightly colored, floating object that is affixed to the leader intended to give the fisherman a visual indication when the fish hits his submerged fly, or nymph. Since the nymph usually can’t be seen under the water, and since it is usually fished with a slack line to achieve a dead drift, the strike can be difficult to detect without the visual aid of a strike indicator. Strike indicators can also be helpful in making sure the nymph is drifting properly (without drag) and at the desired depth.
The obvious question usually arises when hearing this description, “Isn’t that just a bobber?” Pardon the bobber pun, but that opens a whole other can of worms. There are a number of fly fishermen who will stop just short of taking a swing at you if you call a strike indicator a bobber. I assume this animosity stems from the association of bobbers with bait fishermen and fishing live bait; and fly fishermen don’t like to think anything they do might resemble bait fishing. So they call them strike indicators. The truth is that while strike indicators are typically smaller, lighter, and made from different materials than bobbers, they pretty much accomplish the same thing.
I use the term strike indicator because I think there is enough of a difference to specify, kind of like I don’t refer to a hamburger as a sandwich. It’s just different enough. But I won’t be offended if you call a hamburger a sandwich and it won’t offend me if you call a strike indicator a bobber!
Getting re-focused specifically on strike indicators, there are a lot of different kinds, and that’s what I want to focus on here. As mentioned before, most fly fishermen have their favorites, and a lot about selecting strike indicators will boil down to
personal preference. I personally don’t think there is such a thing as the perfect strike indicator. They all have pros and cons and I use different ones for different situations. Often I don’t use one at all, but that’s a topic for another article. Below is a list of some of the more common or popular strike indicators with a description of how they work and some of their strengths and weaknesses.
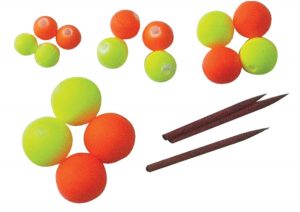 Hard Toothpick Indicators: These are usually made of cork, or balsa, or something similar. They are typically round or oval with a hole drilled in the center. The leader/tippet is inserted through the hole and the indicator may be moved to any position on the leader. Once the desired position is determined, the provided “toothpick” is inserted into the hole to hold the indicator in place.
These are great because they are buoyant, highly visible, reusable, and can easily be adjusted up and down the line to set the nymph at different depths. However, they tend to make more disturbance when they land on the water and can spook more skittish fish. Additionally, their mass makes them difficult to cast when placed on the tippet portion of the leader for shallow nymphing, though smaller ones can be purchased. They are best for deep to mid-depth nymphing and for quick and easy depth adjustment.
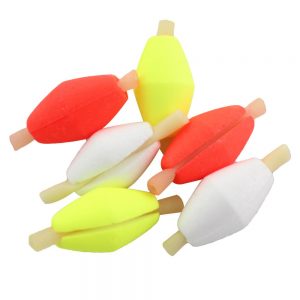 Hard Rubber Band Indicators: These are typically oval in shape and made from the same materials as the hard toothpick type indicators. Instead of having a hole and a toothpick, they have a slit that contains athick rubber band. The leader is inserted into the slit and the indicator is then rotated, allowing the rubber band to twist around the leader to hold the indicator in place.
They have pretty much the same pros and cons as the toothpick indicators. One additional advantage is they can be added or removed while the fly is still attached. However, they have a tendency to kink the leader when twisted on, and they come off the line more easily than other indicators when casting.
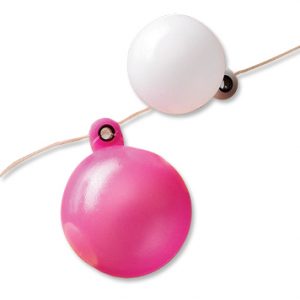
Balloon Style Indicators: The best known versions of these are the Thingamabobber and Air Lock. These are basically small, plastic balloons. They float great, are highly visible, and can be easily adjusted. They are particularly good if you need an indicator that will suspend larger, heavier flies. The Thingamaboober attaches by looping the leader through a hole and around the indicator. The Air Lock has a slot in the base where the leader is inserted and a separate piece that screws on to hold the indicator in place.
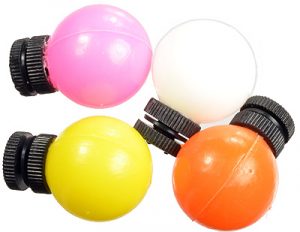
Much like the other hard indicators, when this indicator is set in the tippet section of the leader for shallow nymphing, it is difficult to cast and can create more tangles. It also lands hard on the water. It is more durable and floats better than the other hard indicators.
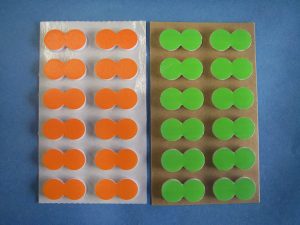 Stick-On Indicators: These are small round or oval pieces of foam that peel off and stick on to the leader. Their greatest value is that they cast easily, even when placed on the tippet and they make very little commotion on the water. So they are a great indicator for shallow nymphing. They float great and multiple indicators can be added to the line to support more weight.
The biggest downside to these is they are not reusable and they are not easily adjusted. When moved they lose a lot of their stick and then have a tendency to slide down the leader. They can usually be moved a few times before you have to trash them. Some complain that they also leave a sticky residue on the leader but I haven’t found that to be a problem.
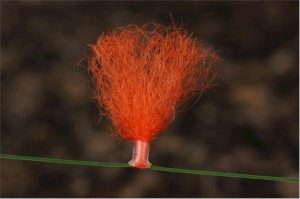 Yarn Indicators: These are made from a buoyant yarn that is often pre-treated with a waterproofing agent, but floatant may also be added. There are a number of different versions of yarn indicators, but most attach by using some sort of slip knot or loop knot. Like the stick-ons, yarn can be attached to the tippet end of the leader without the worry of a hard landing or a lot of tangles. So this is another good choice for shallow nymphing. Yarn indicators are also very sensitive, so they are great for detecting subtle strikes.
On the downside, I find them difficult to add and remove from the line and when removed, they regularly leave kinks in the line. Larger yarn indicators can be wind resistant and difficult to cast in tight places and they require a little more maintenance to keep them floating.
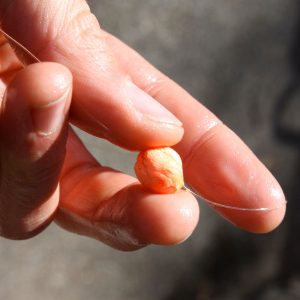 Putty Indicators: Strike putty comes in a small tub and resembles Play-Doh. You pull out a small gob or big gob depending on how big you want your indicator to be, and you smoosh and roll it on your leader. One of the benefits it that you can smoosh more on if you need more flotation for bigger, heavier flies, or you can pick some off for smaller flies and spookier fish.
I’m trying to be impartial here but I don’t like this stuff. It always comes off, especially in warm weather. It leaves a permanent indicator-colored smudge on your line when you remove it. Finally, every bit of dirt in the vicinity attaches to it, so what starts as orange strike putty soon becomes and greyish, brownish, greenish, orange strike putty.
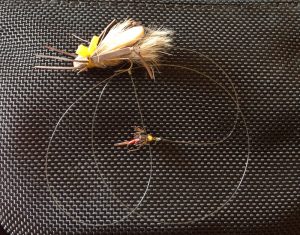 Dry Fly: In the right situations, a dry fly can serve as an edible strike indicator by adding a nymph “dropper” to it. For many, this is the go-to method because you’re essentially doubling your chances… or so it might seem. Just like any other strike indicator, a dry fly has its pros and cons.
Obviously, one of the big perks is that you have the potential to catch a fish on the nymph or the indicator, since the indicator is a fly. However, most dry flies don’t have near the buoyancy as an actual strike indicator, so if you’re needing to get heavier nymphs near the bottom of a deeper run, the dry fly will routinely get dragged under. In such a scenario, you’re not fishing the dry fly or the nymph very well, and hardly doubling your chances.
The best scenario for fishing a dry fly with a dropper is when you don’t need to get your nymph very deep, and you can fish a dry fly buoyant enough to support the nymph’s weight. I immediately think of pocket water. Another scenario might be in flatter water during a hatch, where you could put a nymph with little to no weight behind a dry fly to suggest an emerger.
The takeaway from all of this should be that there is not one strike indicator that is going to be perfect for every situation. You will likely need a variety to meet a variety of conditions. As with most things, much of it will boil down to personal preference and you should play around with a few different types to find what best meets your needs.
