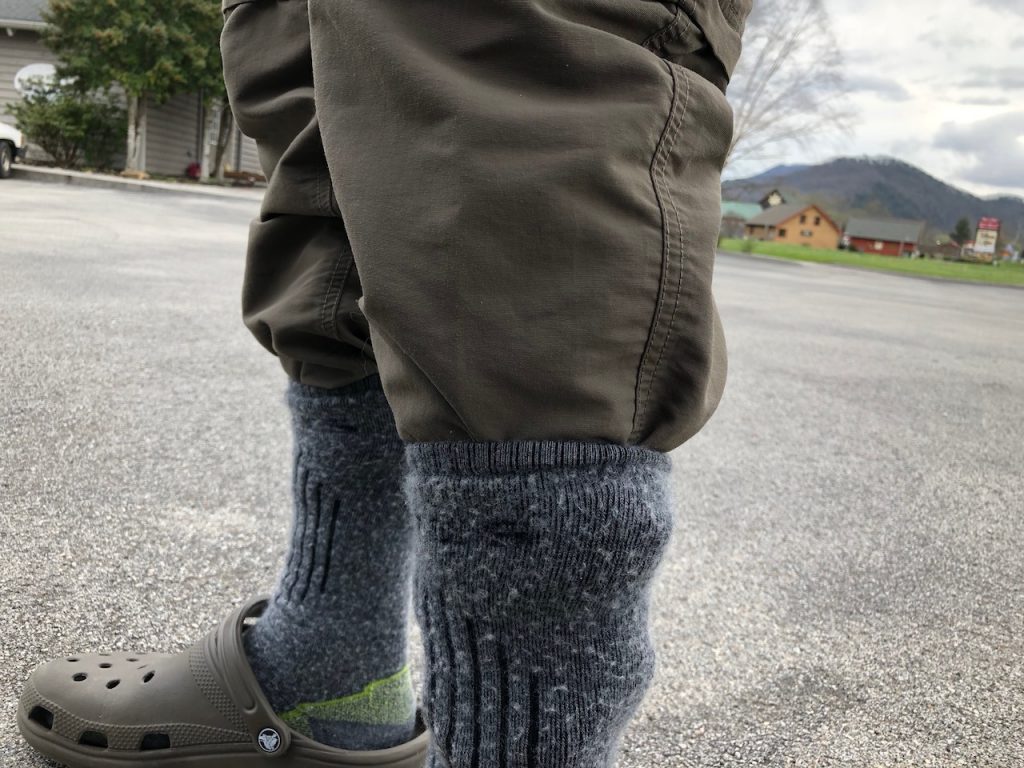
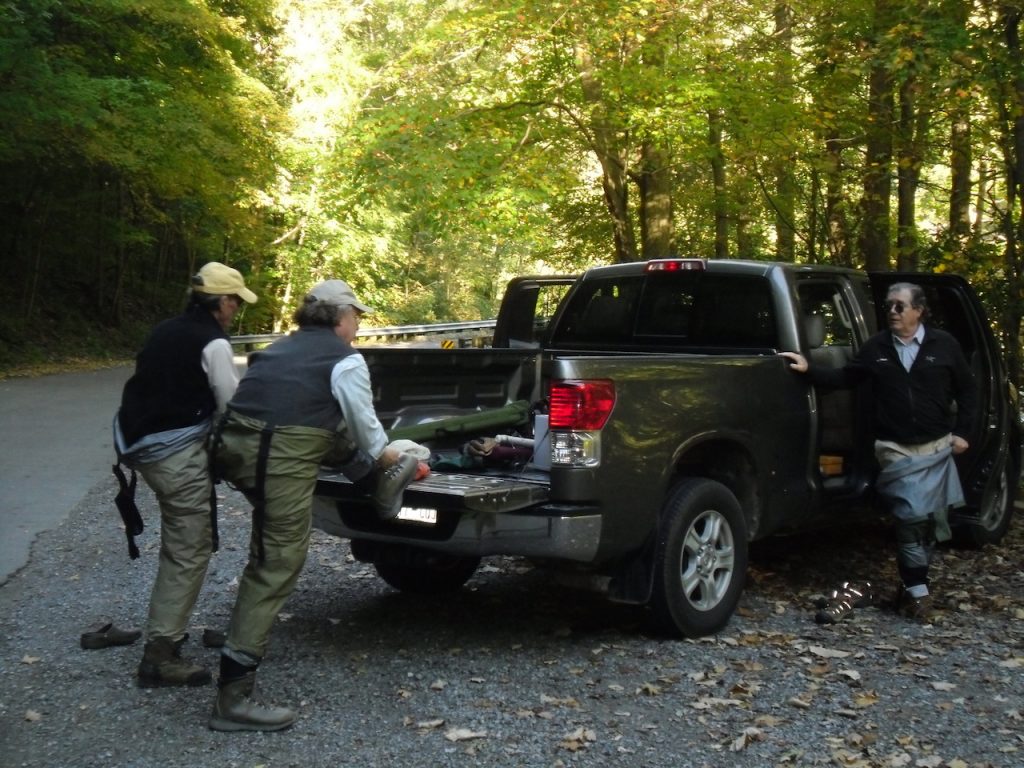
Prepare your boots and waders before putting them on. Walking around on the neoprene feet of your waders looking for boots and other gear is a good way to damage them. Have your boots ready to step into as soon as you slip on your waders and consider having a mat to stand on. Also, tucking your pant legs into your socks ahead of time will prevent them from “riding up” your legs when you put on your waders.
“On the Fly” is a feature in my monthly newsletter offering quick fly fishing tips to make your life on the water a little easier…
I recently saw a post on Facebook from a gentleman who had broken two fly rods on one trip. Another person commented about “having the record” for taking the most broken rods back to his local fly shop. They proceeded to boastfully go back and forth about this as if it was some sort of badge of honor. Accidents happen and rods do break from time to time, but I had guided one of these gentlemen and it was no secret why he had broken so many.
When we first met, I cringed as he pulled his rod from the trunk of his car. It was not in a tube and there were a variety of items piled on top of it. I’ve seen a lot of rods break over the years, but I’ve never seen a single one break while it was in the tube. If you knew him, it would come as no surprise that he forgot to bring a reel for the rod, so he ended up using one of mine.
When he caught his first fish, he removed the hook and literally threw the rod on a rocky bank about ten feet away in preparation for a photo. I let it slide but when it happened again on the second fish, he got the “lecture.” Not only was he damaging the rod every time he did that but also the reel. Actually, he wasn’t doing the fly line any favors either!
Whether it’s cars, tools, fly fishing gear, or anything else, I was always taught that if you take care of your gear, your gear will take care of you. While taking care of your gear often means simply handling it responsibly in the field, simple maintenance out of the field can greatly extend the life of valuable fishing gear and insure that it’s ready to perform when you need it to. And what better time than winter for inspection and a little preventive maintenance?
Rods:
Fly rods don’t require a lot of maintenance. Basically, don’t heave them into rocks every time you catch a fish and keep them in a tube for storage and travel. However, be careful not to store them wet for an extended amount of time in an airtight tube. Simple off-season maintenance includes checking rod guides and wraps for any damage. If you notice a loose guide or a wrap beginning to fail, you can send it back to the manufacturer for a preventive repair, rather than waiting for the guide to come off while you’re fishing. When you are doing this, also check the ferrules (where the rod pieces join) for a good, snug fit. If any seem loose, apply a small coating of wax to the male end.
Reel Lube
Reels: Fly reels are pretty low maintenance, too. First, check to make sure the reel is turning smoothly. If it’s not, be sure that there’s not too much line on it. If there’s not excessive line preventing it from turning smoothly, you likely have a bent frame or dented spool. If it’s minor, your local fly shop might be able to fix that. Otherwise, it will need to go back to the manufacturer.
Assuming the reel is turning properly, all it really needs is a cleaning and “tune-up.” Remove the spool and rinse it and the frame with water. Wipe away any excessive grime build-up and apply a small amount of reel lube around the gears. Allow the reel to dry before putting back into storage.
Fly Line Dressing
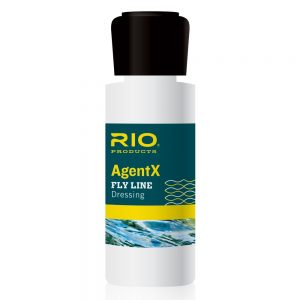
Fly Lines: Fly lines probably require more maintenance than any other piece of equipment. You don’t have to completely remove it from the reel, but pull out at least the first forty feet of fly line. You can pull out the entire amount if you wish, but most people don’t use more than the first forty feet and it’s what will need the most attention.
Spread it out someplace other than the ground, such as between a couple of trees in the back yard. Take a small container and fill it with water and a couple drops of dishwashing liquid. Dip a clean cloth or paper towel in the liquid and run the cloth back and forth over the fly line. You’ll likely see a dark, grimy stain on the cloth after you do. Repeat this process with a clean cloth until you no longer see a stain, then do it one more time with just water and no soap.
Now that your line is clean, you’ll want to treat it with something to keep it slick and prevent cracking. There are specific fly line treatments available at fly shops for this. Just rub into the line using the same method described above. Or something I like to use is ArmorAll. You buy the wipes and simply run the wipe up and down the line several times.
These steps should keep your line floating better, allow it to shoot through the rod guides better, and simply make it last longer. It wouldn’t hurt to do this periodically throughout the year, but at least once a year. It depends on how much you fish and where you fish. Fly lines used on scummy lakes and ponds will need more frequent attention than lines used in clear mountain streams.
Waders: Most wader care needs to happen throughout the season and that mostly involves being careful of thorns, etc. Probably the most damage occurs to waders when people are putting them on or taking them off at the truck. I regularly see fishermen put on their stockingfoot waders and then walk around looking for the boots or other items. This is just an invitation for gravel or other pointy objects to puncture the feet of the waders. The feet of my waders never touch the ground – boots are on the ground ready, foot goes into wader, wader goes into boot. If you’re not comfortable doing the “one leg hop,” keeping a mat to stand on is a great idea.
Also be sure not to store waders wet. Hang them to dry when you get home, preferably not in direct sunlight. Occasionally washing them through the year will help with their breathability and water repellency. Wash them on gentle cycle with a mild detergent. I recommend Ivory Snow, a detergent commonly used for baby clothing.
Winter is a great time to repair any leaks and/or treat with DWR. If you have major punctures or tears in your waders, you’re probably better off sending them to the manufacturer for repair or replacement. But most folks just encounter minor leakage caused by a pinhole or seam leak, and that’s pretty easy to fix yourself.
First, try to narrow down the location of the leak. For instance, if you’ve been getting damp on the inside of your right leg from the knee down, chances are pretty good that the leak is somewhere around the inside right knee. Sticking with that example, make sure the waders are completely dry, turn them inside out, and generously spray rubbing alcohol all around the suspected leak area. Still keeping the waders inside out, fill the right leg past the knee with water and look closely in the area where you sprayed the alcohol. You should see discoloration where the leak is. Mark that spot with a permanent marker.
Now that we know where the leak is, it’s time to repair. Again, allow the waders to dry completely. Where you made the mark with the marker, liberally smear Aquaseal on the area. Aquaseal is available at most fly shops and many camping/outdoor stores, and often, a small tube of it comes with your waders. Put the treated area of the waders in direct sunlight to cure. When the Aquaseal feels “solid,” the waders should be immediately ready to go. However, I’d move them inside to a dry place and wait 24 hours before using.
Treating your breathable waders with a DWR is a great winter project. As a matter of fact, if you have a breathable rain jacket, grab it and treat it at the same time. DWR (Durable Water Repellant) is basically going to allow the water to “bead” and roll off the fabric rather than absorb into it. I’ve had old waders and jackets that I never treated that, even though they were still waterproof, were absorbing so much water that they felt heavy and even clammy. DWR is good stuff. There are a few brands out there and can usually be found at camping/outdoor stores. I’ve personally had good luck with ReviveX Spray-on Repellant.
Start by washing the waders and/or jacket with a mild detergent as described above. Hang the garment(s) and spray evenly and thoroughly with DWR while the garment is still wet. I usually apply a little heavier around seams and stress areas such as the knees and crotch area on waders. On jackets, I put a little more emphasis on the shoulder area. You can then simply allow it to air dry where it’s hanging or put it in the dryer on low/medium for about an hour.
That about covers the big stuff. I also like to use winter to go through fly boxes and remove rusty hooks. Those have a way of contaminating the entire box after a while. And it’s a great time to go through your first aid kit and make sure everything is up to date, put new batteries in the flashlight, etc. Then, when spring rolls around, all you have to do is fish!
The arrival of November usually means cold weather is not too far off, but it doesn’t mean that you have to quit fishing. Certainly the fishing for wild, mountain trout can slow down significantly as water temperatures fall, but tailwater trout and really any stocked trout will continue to feed well, even in the coldest of temperatures. In recent years, winter guide trips to Delayed Harvest streams have become a favorite of many clients, mainly because of the potential for really big trout.
In East Tennessee, the average winter day is not unbearably cold – at least not compared to many other places in the U.S. The coldest month of the year here is January where, in towns like Knoxville and Maryville, the average high is 46-degrees and the average low is 29-degrees. However, this is deceiving in a couple of ways. When most folks view this forecast, they don’t take into consideration that you’re only going to experience that high temperature for a couple hours out of the day. Additionally, in the case of Delayed Harvest waters, we’re usually fishing mountainous areas where there’s a little more elevation and the sun spends a lot of the day low and behind the ridgeline. In other words, you can easily shave another 5-degrees off those highs and lows and when you throw in a little wind, you’ve got a pretty darn cold day on the water.
So, a typical full day trip in the winter will go from about 9 to 5. If the forecast is for a high of 46-degrees, that will be more like 40-degrees on the stream, and you’ll reach that high temperature probably around 3pm. That means for the majority of the day, you’ll be fishing in temperatures in the 30’s. Unless you grew up someplace like Alaska, North Dakota, or Maine, that’s cold! Don’t get me wrong, it can be a ton of fun and it never feels as cold when the fish are biting, but to better enjoy your day on the water, you better know how to dress. Below are a few tips to prepare for a winter fly fishing trip.
Dress in Layers: You hear this advice a lot from the weather person on your local news but I don’t think they usually understand the difference in dressing in layers and simply dressing warm. If I’m just going out in the cold for a while, I can just throw on a heavy coat and a hat and be set. However, when I’m going to spend the day outside in the cold, I’m likely to experience a variety of changing temperatures and conditions. Dressing in layers allows me the flexibility of adding or removing layers as conditions and activity levels change.
How to Layer: There are three basic layers to consider. The first are the
Long underwear with turtleneck top
garments closest to your body, and their main objective should be to wick moisture from your body. If your body gets wet, from perspiration or anything else, you’re going to be cold, no matter what you’re wearing as an outer layer. Consider wearing a thin, synthetic “liner sock” on your feet and synthetic long underwear for your legs, arms and torso. Long underwear with a turtleneck top is a bonus as it gives an added layer on your neck.
The next layer is the insulating layer that is designed to keep you warm. Depending on how cold it is, this could actually consist of multiple layers. For the feet, a thick, heavy wool or fleece sock should be sufficient. The 3mm neoprene foot on the wader is also going to serve as insulation. For the legs, a fleece pant designed for cold wading is great and I also like traditional fleece lined pants. Up top, I typically wear a mid-weight fleece pullover followed by a heavier fleece pullover or jacket. As the day warms, I might remove the heavier fleece. Again, it’s a bonus if one or both of these upper layers covers the neck.
The third and final layer is the shell. Its purpose is to protect from wind and moisture. For your lower half, the waders serve as your shell. Up top, I just add a light to mid-weight rain jacket. The hood will act as a shell layer for your head.
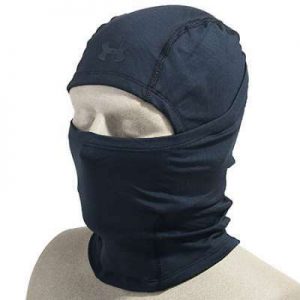
The Extremities: By extremities, I’m mostly talking about your head and your hands. These can be the most challenging and most important to protect. The challenge with the head is to keep it warm without interfering too much with necessary senses like sight and sound. For that reason, I HATE wearing a hood, though sometimes it’s necessary on rainy days.
Under Armour Infrared Hood
I layer my head with a product from Under Armour called an infrared hood. It’s the same thin-layered garment you see football quarterbacks wearing under their helmets in cold weather games. It covers the entire head, including the ears, but doesn’t interfere with hearing like earmuffs do. It also has a piece that can be pulled up to cover the face on particularly cold, windy days. Because it is relatively thin, I can wear a traditional ball cap over it on milder days or a warm stocking cap on colder days. This is one of the best pieces of cold weather fishing gear I’ve found!
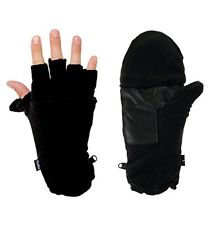
Fold-back Fingerless Mittens
The hands and fingers are the toughest part. Trying to keep warm while maintaining the necessary finger dexterity for fly fishing is one that I haven’t totally figured out. While there are fleece gloves and mitts with fold-back hand and finger pieces, they still leave your fingers exposed while fishing and the fold-back piece is just one more thing for your fly line to hang on. I prefer just standard wool or fleece fingerless gloves. They keep my hands warm and if the fingers start getting too cold, I take a break and put my hands in my pockets.
Adjusting Layers: Most of this is common sense. If you’re cold, add a layer. But it’s important to pay attention to your activity level because you don’t want to be too insulated while active and start to perspire. Perspiration during cold weather, once you become less active, can create a cold that’s hard to come back from and it’s a common cause of hypothermia when not addressed.
One of the biggest mistakes I see people make is overdressing for the car ride to the stream. Wearing too much in the car can cause you to perspire, particularly your feet, and you’re going to be cold all day. Wear the bare minimum of layers in the car, from head to toe, and add the additional layers when you reach the stream.
Fabrics: You may have noticed repeated references to fleece or synthetic fabrics. That’s a really important piece of the puzzle for staying warm, dry, and comfortable. Synthetic materials like fleece are not only more breathable, but offer insulating properties even when wet. Wool does the same thing though it is often heavier. This is important with all of your clothing in case you take a dunk in the stream, but it is particularly important with your gloves, as your hands will constantly be exposed to water while fishing.
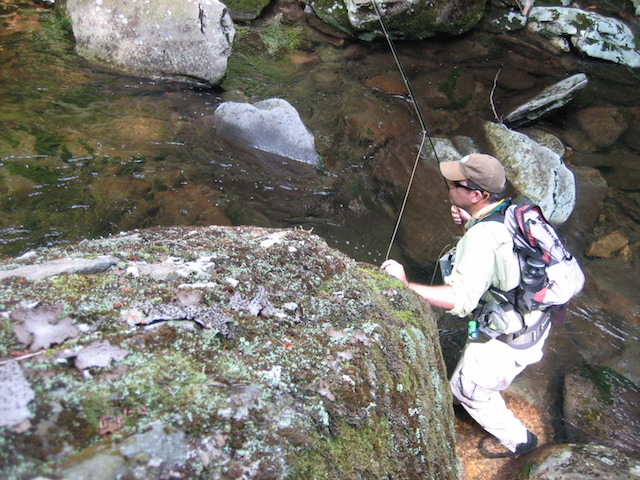
June is here and that means things begin to make another seasonal change here in the mountains. I always look forward to warmer weather because I get to shed the waders and enjoy the feel of cool mountain stream water on my legs and feet. I also enjoy the freedom of movement I have without waders. But the absence of waders also exposes you to a few more risks.
Mountain fishing involves moving. You move through the water, you move over boulders and you move through the woods where you encounter sharp sticks, prickly bushes and undergrowth, poison ivy, and a variety of critters. For these reasons, I always encourage people not to wear shorts when wet wading. A pair of long, synthetic “quick-dry” pants will provide you the same level of comfort while still giving your legs much needed protection.
Wading boots are also a must. I frequently see fishermen attempting to wet wade in Chacos or some other type of river sandals, and I cringe every time I do. A good pair of wading boots will not only provide you with the much-needed traction of felt soles (or Vibram), but will also offer ankle support and toe protection. You will definitely want both when navigating the rocky bottoms found in all mountain streams.
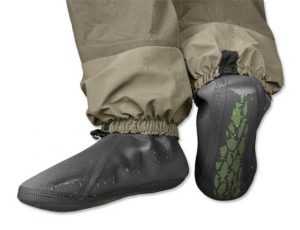
If you already have waders and boots, note that the boots are oversized to fit over the 3mm neoprene foot of the wader. Consider purchasing a pair of neoprene socks for wet wading. These will not only make your boots fit, they will provide a layer of padding and insulation.
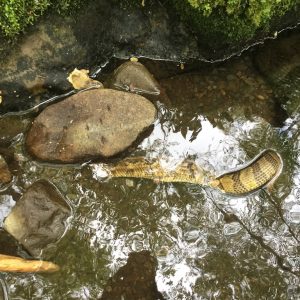
Great Northern Water Snake
Critters are another thing to be aware of when fishing in the summer months. Snakes are the biggest concern for most people but they aren’t much of an issue. While we do have two poisonous snakes in the Smokies, Copperheads and Timber Rattlesnakes, most of the snakes encountered by fishermen are harmless water snakes. I spend nearly 200 days a year in the park and probably see one or two poisonous snakes a year. The Great Northern Water Snake is a fairly large water snake that is often mistaken for a Cottonmouth, a species we do not have in the Smokies.
Senseless
On a guide trip this spring, I came across a dead rattlesnake at the edge of the stream. Someone had obviously bashed its head in with a rock. There is absolutely no reason for this, and in the national park (and I believe the state of Tennesse), it is illegal. If you encounter a snake, poisonous or otherwise, just leave it alone and move on. They don’t want anything to do with you either.
What I try to keep an eye out for more than anything else, especially during the summer months, are hornet nests. They love to build these things on low branches above streams. If you see one, steer clear and move on to the next hole. And when you do, make sure it is still well out of range of your back cast. Hooking a hornet nest can ruin your day in a hurry.
Hornet Nest
If you do accidentally get too close and get stung, DO NOT start swatting! This triggers a pheromone that signals all other hornets in the area and one or two stings can turn into dozens. Just get far away from the nest as quickly as possible.
Yellow Jackets are also common in the Smokies and typically build their nests in the ground. As with snakes, your best solution here is just to pay attention and watch where you are stepping. Of course, if you are allergic to either of these, come prepared with an EpiPen or other treatment. If you’re not allergic, most stings can be easily treated by immediately and thoroughly rinsing the area. Applying an anti-itch medication will also provide relief.
Mosquitoes, noseeums, and other biting insects are not a huge problem when you’re on the stream but can be as soon as you step away from the stream in the woods or on the trail. On the stream, you’ll mostly just be harassed by gnats that don’t bite, but love to hover around your face and get in your eyes.
The best prevention for all of these, of course, is good old-fashion bug spray. Bug sprays with higher concentrations of Deet seem to be most effective, but be careful when using them. Deet has the ability to melt plastic, and getting a healthy dose of Deet heavy bug spray on your fingers can wreck a fly line. Just avoid spraying it on your palms and finger tips. If you’re one who likes to spray your hands and rub it on your face, just spray the back of your hands and rub it in that way.
Of course, anytime you’re maneuvering through the woods, there’s a chance of picking up a tick. Deet based bug sprays will help with that, too. I still try to check myself periodically, particularly at the end of the day. If you do find one on you, there’s an easy way to remove it. Squeeze a dab of medicated lip balm (the gel type that comes in the squeeze tube) onto your finger and smear it on the tick. It will immediately release itself from your skin. Cool, huh?!? I always keep a tube of Carmex in my first aid kit for this reason.
October is the time of year I start wearing waders again in the mountains. For much of the year, usually from May through October, water temperatures are comfortable enough to wet wade, wearing only the wading boots and neoprene socks. But in winter, early spring, and late fall (or any time of year on tailwaters), you better have a decent set of waders if you want to stay comfortable on the stream.
Stockingfoot Chest Waders
In the 30 years or so that I have been fly fishing, I can’t think of any fly fishing product that has improved as much as waders. Early on, your only choices for wader materials were canvas, rubber/plastic, and neoprene. All three of these materials were pretty heavy and pretty warm. And any time you were doing anything active, like hiking or just climbing around on rocks, these things would sweat you to death. Even with less active fishing, like standing in a tailwater, these materials would roast you on a warm day.
Waders made of breathable fabrics like Gore-Tex started showing up in the mid 90’s and are now the standard. Early breathable models were not terribly durable and were prone to leaking but today’s models are not only comfortable, but when properly cared for, can withstand years of heavy use. If you’re in the market for a pair of breathable waders, here are a few things to keep in mind.
Stockingfoot Hippers
First, there are a few different styles of breathable waders. Chest high waders provide coverage all the way up to your chest. Pant waders provide coverage to your waist. And hippers provide coverage to the upper part of your thigh. When wading small mountain streams, you rarely stand in water much above the knee so hippers will handle most situations. But it seems that when wearing hippers, there is always that one deeper pool of water that you have to cross to get to the other side of the stream. It’s the same thing with tailwaters. Since you rarely wade much over the thigh in tailwaters, pant waders would be adequate most of the time but there always seems to be that one deeper spot…
I don’t like my gear to determine where I can and can’t go when fishing. For that reason, I stick with chest waders to handle all situations. Of course, if the water is too deep for my chest waders, I shouldn’t be trying to wade it anyway! And on warmer days, I can always roll the bib down on my chest high waders, essentially converting them into waist highs.
One thing to consider with breathable waders (or any loose fitting wader) is the possibility of falling in deep water. Particularly with chest high waders, this is a safety concern because the waders could fill with water and essentially drag you down. Wearing a belt around the outside of the wader will create an air pocket to prevent this from happening. Pretty much any chest wader sold today will come with a belt. Wear it!
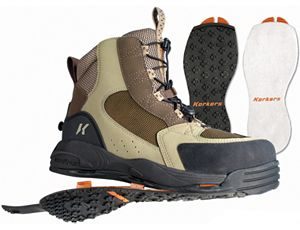
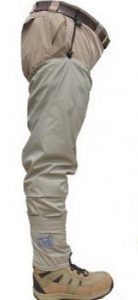
Another big difference in waders is whether they have a boot foot or stocking foot. Boot foot waders have a boot attached to the wader. They’re convenient because you can just slip the waders on and you’re ready to go. However, this is typically just a loose fitting rubber boot. They are heavy and clumsy, and they provide very little in the way of ankle support. If you’re standing still most of the day, these will probably be adequate. But in places like the Smokies where you’re moving a lot from spot to spot, usually over very uneven terrain, you will hate these. You’ll be compromising comfort and safety.
Neoprene Stocking Feet
I prefer stocking foot waders. These have a neoprene foot to provide a little insulation on your feet. You wear a separate pair of wading boots over this neoprene boot. Going this route allows you to wear a lighter, form fitting boot that you lace up just like a hiking boot, providing far more comfort and ankle support when walking on uneven terrain. Additionally, you can wear the boot without the wader in warmer months when you may choose to wet wade. I’ll talk more specifically about wading boots in a future article.
If you’re fishing in colder weather, it is important to remember that breathable waders are designed to keep you dry but, other than the neoprene foot, provide very little in the way of insulation. You will want to layer accordingly under the wader based on your weather conditions. Just keep in mind that breathable waders are only as breathable as the fabric beneath them, so synthetic fabrics like fleece or nylon are recommended over something like denim. Find tips on dressing for cold weather in the “Winter Fishing” article on my web site.
Finally, there is the pesky little issue of price. Breathable waders are certainly not cheap. You can get a really good pair of waders for under $200 and you can spend upwards of $600. All of them will keep you dry. More expensive waders will sometimes be more durable with extra reinforcement in high wear areas like the seat and knees. Mostly though, you’re paying for extra features like pockets or zippered fronts that may be handy but not necessarily critical.
The life of any wader can be extended or shortened by how you care for them. Other than avoiding obvious things like walking through briar patches, try not to walk around in your stocking foot waders without the boots on. Either be prepared to step right into the boot when you put your waders on or carry a mat to stand on when getting dressed. Hang them up to dry after each trip and don’t store them folded. Clean them periodically according to the care label and from time to time, consider applying a coating of DWR.
When I first got into fly fishing, I didn’t have any money. At that age, you simply had to get what you could get when you could get it, and that often meant holding out until birthday or Christmas. I had a cheap rod and reel outfit and a box of flies. My fishing “vest” was my uncle’s old Marines shirt with the sleeves cut off. The bellows pockets on the front were plenty big to hold my one fly box and any other accessories. And I had a pair of fingernail clippers, Trim brand, hung around my neck on a piece of fly line. My wading gear consisted of cutoff Duckhead shorts and an old pair of Asics running shoes.
My First Pair of “Wading Boots”
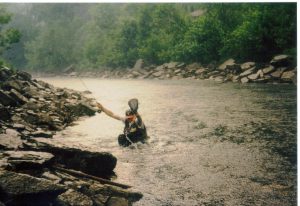
I slowly started to accumulate better gear but it wasn’t until much later that I even considered buying actual wading gear. On the smallmouth streams of central Kentucky where I cut my teeth, it just wasn’t necessary. And when I did eventually start fishing the 50-degree tailwaters for trout, I guess I was just too young and full of testosterone to notice the cold. That changed when I waded the Cumberland River tailwater one rainy November day and somehow narrowly avoided hypothermia. On the top of my list the following Christmas was a pair of neoprene waders and rubber soled wading boots – I didn’t know much about felt soles and thought the rubber soled boots would be more durable.
A Bad Step
In the mostly cobble-bottomed tailwaters where I was fishing, the rubber soles were adequate and all was right in my fly fishing world… until I went to the Smokies. That first trip to the Smokies provided me with countless views of the sky as I spent nearly every moment on my back. I’d get up, takes a step, then slip again. Seems that even
A Bad Step the best of waders don’t keep you dry when they’re full of water! It didn’t help that my first Smokies trip was to Abrams Creek, possibly the slickest stream on the planet, but it definitely made me begin to question my choice in wading gear.
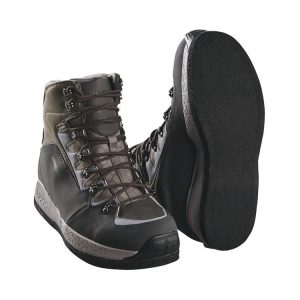
I soon replaced the rubber-soled boots with felt, and eventually began wearing breathable waders when they hit the market. And I quickly realized why countless fly fishermen chose felt soles and had been doing so for decades. They are vastly superior to rubber when it comes to providing traction on slick, rocky stream bottoms. As a matter of fact, at the time, major fly fishing companies like Orvis didn’t even offer a rubber sole option in their catalog.
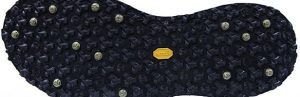
Felt Sole Boots
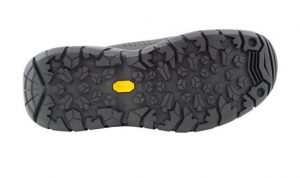
Fast forward about 30 years and look at an Orvis catalog, web site, etc. and you’ll find almost all rubber sole wading boots with only one or two felt alternatives. Why the change? The spread of exotic organisms from stream to stream.
While there are a number of different ways these exotics can be spread, many scientists pointed to felt soles as a big culprit and one that could be controlled. It sparked a movement where some
Felt Soled Boots popular fly fishing destinations added boot cleaning stations at select river access points, a few states went as far as banning felt boots, and fly fishing companies began aggressively looking for alternative bottoms to their boots.
The result has been a variety of different tread designs, all created on a Vibram rubber sole or variation thereof. Some companies, like Simms, even went so far as to discontinue production of felt sole boots entirely, while most manufacturers chose to offer both. After a short time, likely due to a significant dip in sales, Simms returned a couple of felt sole options to their product line. The problem was, despite companies’ claims that these new soles were as good as felt, many fishermen didn’t agree. In fact, some fishermen in “felt ban states” even took the whole, “I’ll quit
Typical Vibram Soles wearing felt boots when they pry them from my cold, dead feet” approach!
Typical Vibram Sole
To be fair, all of these new rubber sole designs are quite different and way better than those rubber sole boots I had 30 years ago, and they’re light years better than an old pair of running shoes. They even offer some real traction advantages to felt when it comes to trail use and scrambling up and down banks. But the fact is, they are nowhere near as good as felt when it comes to providing traction on a slick streambed. I suppose you could just call that an opinion but I like to think it’s based on more than just preference as I routinely field test many of these new boots. As part of my field-testing, I will spend some days on the water wearing the rubber sole on one foot and a felt sole on the other. Time and time again, the rubber sole slips in places where the felt does not.
Vibram Rubber with Studs
An alternative is to wear rubber soles with studs. This is probably the closest thing I’ve found to felt as far as traction on the stream bottom goes. However, these have a real tendency to slide and slip on dry rocks, posing another safety risk if you do a lot of rock hopping on smaller streams like we have in the Smokies. The other downside to studs is that they are noisy. That’s probably not a big deal on a larger, deeper, swift river, but if you’re trying to sneak up on a pool in a smaller, shallower headwater
Vibram Rubber Soles with Studs stream, you’re going to spook a lot more fish.
So, we’re kind of left with this whole responsibility vs. practicality debate. Most younger and/or newer fly fishermen are readily going with the rubber designs – some probably because they’re the current, cool thing, and others probably because they don’t know any better. They’ve never worn felt so have no basis for comparison. It’s the guys that have been around (like me) that are the problem. For us, trendy new designs aren’t nearly as important as staying upright!
Okay, maybe trendy designs aren’t that important to me, but being a responsible fisherman is, and that’s where it gets tricky. As an environmentalist, I take it very seriously. I certainly don’t want to be responsible for the spread of exotic organisms, but again, I do want to stay upright. As someone who wades creeks every single day, I need to be as sure-footed as possible not only for my own safety, but sometimes for the safety of my clients. Fortunately, with a little planning and/or extra effort, you can wear felt soles responsibly.
The biggest issue with felt is that it dries slowly. So, if you pick up some weird organism in one river system and go to another totally different river system the next day, you could transport that organism with you because it can stay alive in that wet felt. As soon as the soles dry, any organism you pick up will likely die, so for a lot of fishermen who are fishing no more than once a week, those soles have plenty of time to dry. Even so, it’s a good idea to clean them to be safe.
For someone like me, who is on the water every day, my soles almost never completely dry until the end of the season. But I don’t worry too much about it because I am constantly going to the same “system” of streams. I’d be picking up something in Little River and transferring it back to Little River! When it is a concern for me is when I’m going to be in the Smokies on Tuesday, the Clinch River tailwater on Wednesday, and back to the Smokies on Thursday. Then I run the risk of transferring something from the Clinch to the Smokies.
My solution for this is multiple pairs of boots. I have one pair of studded rubber boots for tailwaters and another pair of felt soles for the mountains. But if you don’t want to purchase two pairs of boots, you want to own felt soles, and you might want to fish the Clinch one day and the Smokies the next, cleaning your boots in between trips is a must. Many experts will tell you that if you’re fishing multiple river systems in consecutive days as described above, thorough cleaning is the surest way to prevent the spread of exotics, even with rubber sole boots. So it’s just a good habit to get into.
Again, some popular areas actually have cleaning stations for this purpose – there is one at Little River Outfitters in Townsend that’s accessible whether the store is open or not. Or if you’re going to clean them at home, thoroughly hose the boots off with water and soak them for about 10 minutes in a solution of about 5% bleach and hot water. I’d also recommend scrubbing the soles with a wire or stiff bristled brush. Then rinse one more time with the hose.
Korker Boot with Interchangeable Soles
If you’re planning a multi-day fishing trip somewhere and will be fishing numerous river systems, just throw your soak bin, brush and solution in the car and you’ll be ready to go. If you’re going to a state where felt is banned, you can certainly wear felt and take your chances with the law, but that’s a pretty big risk. Yellowstone National Park just implemented a felt ban and the
Korkers Boots with Interchangeable Soles penalty can be up to 6 months in jail and a $5000 fine. All of a sudden, the cost of a second pair of wading boots doesn’t sound so bad, does it?
Again, that’s the solution that works best for me. Or you might consider one of the Korker boot models that have interchangeable soles. You can quickly change from felt soles to rubber soles on the same boot.
As with everything I write, this is just one man’s opinion with a few facts mixed in here and there. Find a legal and responsible system that works for you. If you currently wear rubber soles and like them, by all means stick with them. If you mostly fish streams with a more cobble type bottom (like many tailwaters), you’ll probably be happy with rubber. For freestone mountain streams with larger, more slippery rocks, felt is tough to beat and continues to be my preference.
However, I am keeping an open mind and continually looking for that next great felt alternative. Technology and design for felt-alternative boots is getting better every year and I hope to personally be able to make the switch soon.
 Prepare your boots and waders before putting them on. Walking around on the neoprene feet of your waders looking for boots and other gear is a good way to damage them. Have your boots ready to step into as soon as you slip on your waders and consider having a mat to stand on. Also, tucking your pant legs into your socks ahead of time will prevent them from “riding up” your legs when you put on your waders.
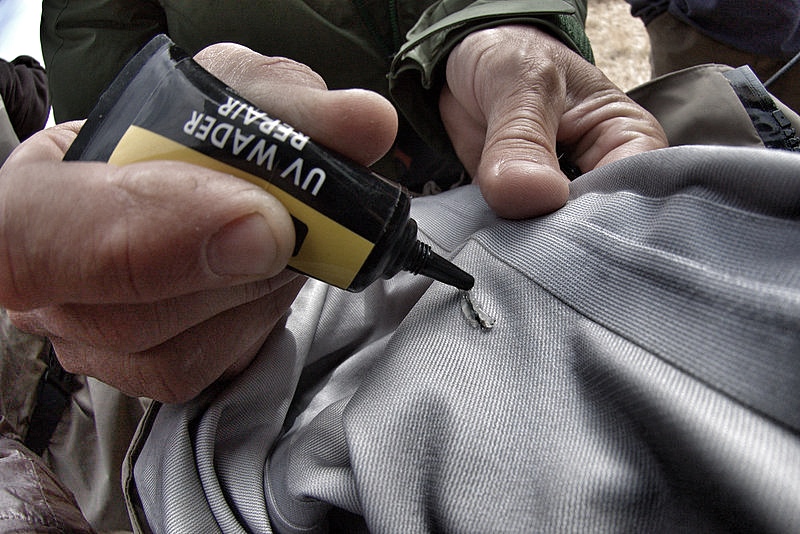 I recently saw a post on Facebook from a gentleman who had broken two fly rods on one trip. Another person commented about “having the record” for taking the most broken rods back to his local fly shop. They proceeded to boastfully go back and forth about this as if it was some sort of badge of honor. Accidents happen and rods do break from time to time, but I had guided one of these gentlemen and it was no secret why he had broken so many.
 When we first met, I cringed as he pulled his rod from the trunk of his car. It was not in a tube and there were a variety of items piled on top of it. I’ve seen a lot of rods break over the years, but I’ve never seen a single one break while it was in the tube. If you knew him, it would come as no surprise that he forgot to bring a reel for the rod, so he ended up using one of mine.
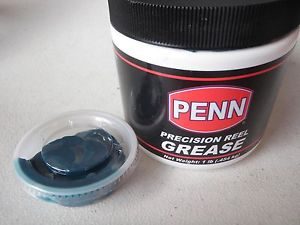
 Treating your breathable waders with a DWR is a great winter project. As a matter of fact, if you have a breathable rain jacket, grab it and treat it at the same time. DWR (Durable Water Repellant) is basically going to allow the water to “bead” and roll off the fabric rather than absorb into it. I’ve had old waders and jackets that I never treated that, even though they were still waterproof, were absorbing so much water that they felt heavy and even clammy. DWR is good stuff. There are a few brands out there and can usually be found at camping/outdoor stores. I’ve personally had good luck with ReviveX Spray-on Repellant.
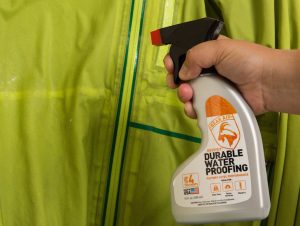 Start by washing the waders and/or jacket with a mild detergent as described above. Hang the garment(s) and spray evenly and thoroughly with DWR while the garment is still wet. I usually apply a little heavier around seams and stress areas such as the knees and crotch area on waders. On jackets, I put a little more emphasis on the shoulder area. You can then simply allow it to air dry where it’s hanging or put it in the dryer on low/medium for about an hour.
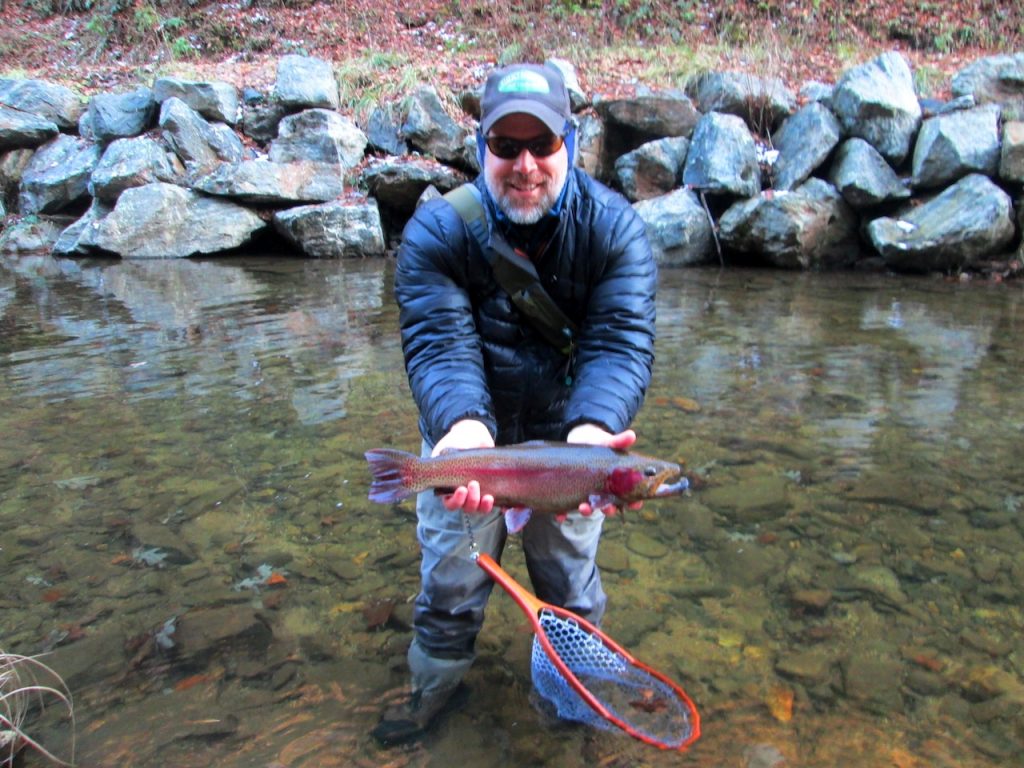 The arrival of November usually means cold weather is not too far off, but it doesn’t mean that you have to quit fishing. Certainly the fishing for wild, mountain trout can slow down significantly as water temperatures fall, but tailwater trout and really any stocked trout will continue to feed well, even in the coldest of temperatures. In recent years, winter guide trips to Delayed Harvest streams have become a favorite of many clients, mainly because of the potential for really big trout.
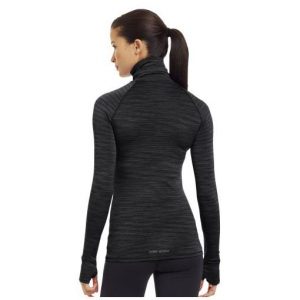


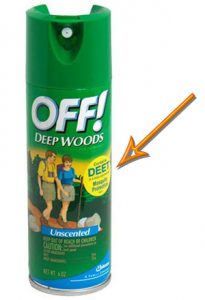 The best prevention for all of these, of course, is good old-fashion bug spray. Bug sprays with higher concentrations of Deet seem to be most effective, but be careful when using them. Deet has the ability to melt plastic, and getting a healthy dose of Deet heavy bug spray on your fingers can wreck a fly line. Just avoid spraying it on your palms and finger tips. If you’re one who likes to spray your hands and rub it on your face, just spray the back of your hands and rub it in that way.
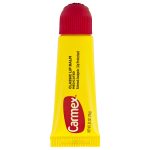 the woods, there’s a chance of picking up a tick. Deet based bug sprays will help with that, too. I still try to check myself periodically, particularly at the end of the day. If you do find one on you, there’s an easy way to remove it. Squeeze a dab of medicated lip balm (the gel type that comes in the squeeze tube) onto your finger and smear it on the tick. It will immediately release itself from your skin. Cool, huh?!? I always keep a tube of Carmex in my first aid kit for this reason.
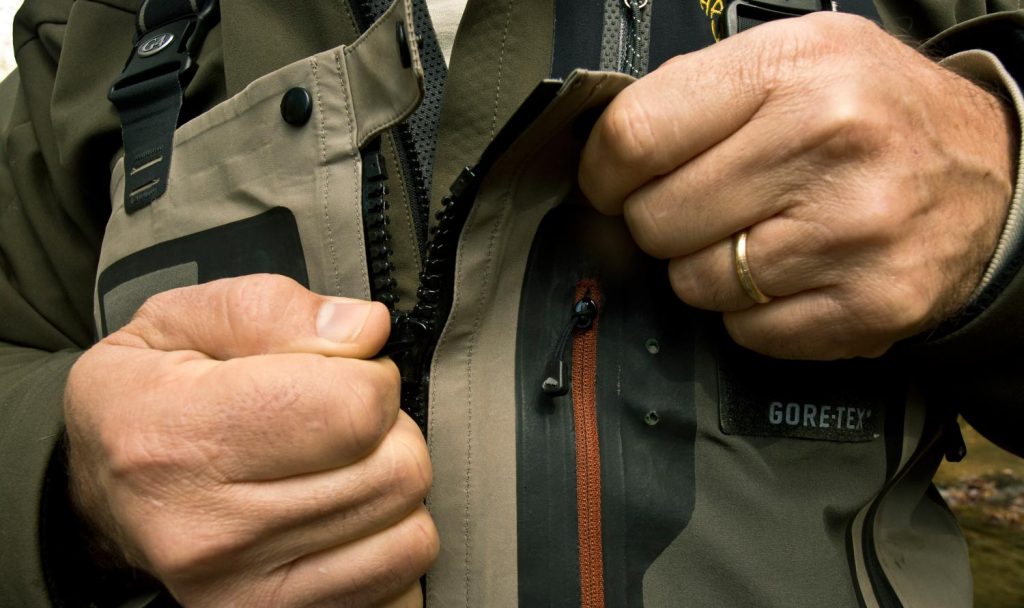 October is the time of year I start wearing waders again in the mountains. For much of the year, usually from May through October, water temperatures are comfortable enough to wet wade, wearing only the wading boots and neoprene socks. But in winter, early spring, and late fall (or any time of year on tailwaters), you better have a decent set of waders if you want to stay comfortable on the stream.
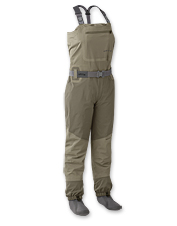
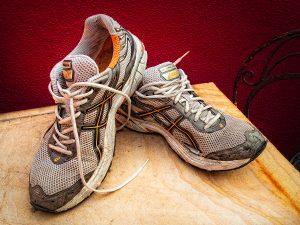
 When I first got into fly fishing, I didn’t have any money. At that age, you simply had to get what you could get when you could get it, and that often meant holding out until birthday or Christmas. I had a cheap rod and reel outfit and a box of flies. My fishing “vest” was my uncle’s old Marines shirt with the sleeves cut off. The bellows pockets on the front were plenty big to hold my one fly box and any other accessories. And I had a pair of fingernail clippers, Trim brand, hung around my neck on a piece of fly line. My wading gear consisted of cutoff Duckhead shorts and an old pair of Asics running shoes.