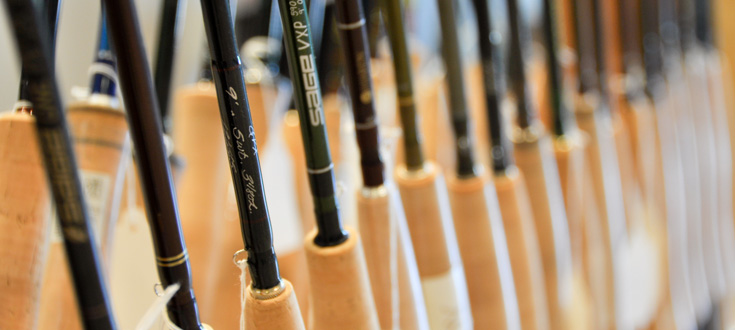
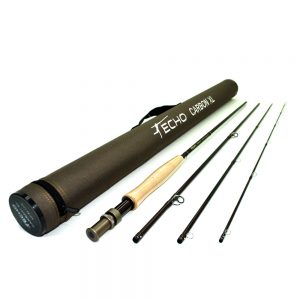
 This should probably go without saying, but the fly rod is the tool used to cast the line when fly fishing. It is also used to manipulate line on the water after the cast, to set the hook on a fish (usually), and to fight the fish after hooking it. It is certainly one of the most important pieces of your equipment and likely the piece of equipment in which you’ll invest the most money. So, what do you need to consider before making this investment? The three most important characteristics of a fly rod are its length, its line weight designation, and its action.
Fly Rod Length
While there are specialty sizes on either end, most common fly rods are going to range from 7’ to 10’ in length. Longer rods aid in keeping the line higher off the water which can be helpful when trying to achieve longer casts or when trying to cast from a lower position, like sitting in a float tube or canoe. Longer rods are also helpful when trying to reach to keep line off of faster currents. If you’re planning to regularly fish from a float tube or canoe, fish open areas like wide rivers or lakes, or fish a lot of pocket water on medium to large mountain streams, you may want to consider a 9’ to 10’ rod.
Shorter rods are most beneficial in small, brushy streams where a longer rod will be hard to maneuver. If you’re planning to spend most of your time on tiny tributaries and backcountry “blue lines,” you may want to consider a rod in the 7’ to 8’ range.
Line Weight
The next thing to consider is the line weight. Each rod is given a line weight designation like a 5-weight or a 9-weight. That just indicates what size line it is designed to cast and you typically want to match that to the fly line size. For instance, a 5-weight line will properly load a 5-weight rod and make it cast its best in most situations. Using an 8-weight line on a 5-weight rod would over-load it, resulting in an awkward, “clunky” cast. Using a 3-weight line on a 5-weight rod wouldn’t load it enough, resulting in little line control and a significant compromise in accuracy and distance.
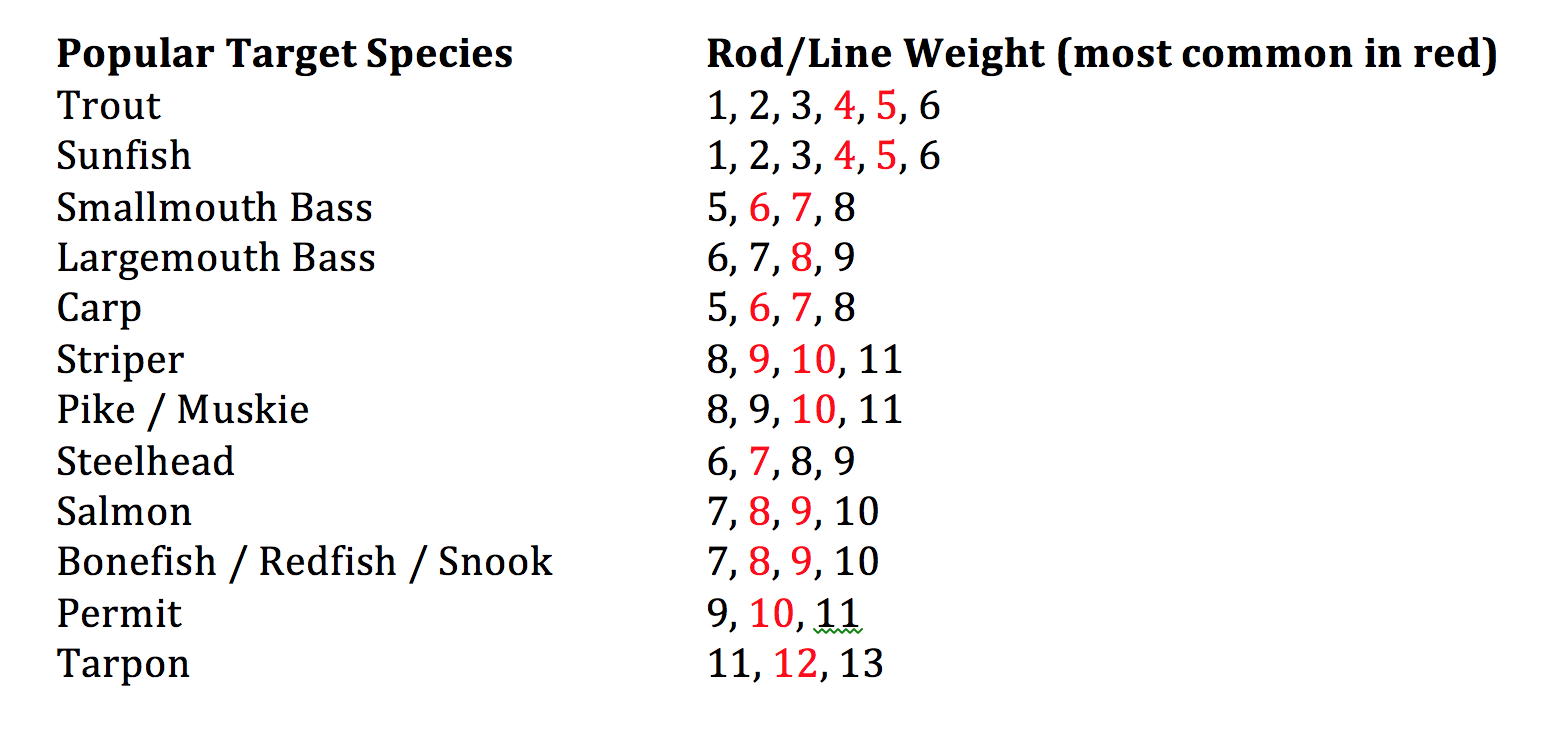
When you’re choosing the line weight of a rod, you want to consider what you will be fishing for. For trout, you are commonly using a 3 to 5-weight. For largemouth bass, you might use a 7 to 9-weight. The difference has little, if anything, to do with the size of the fish. A largemouth won’t snap a 3-weight rod. It’s more about the necessary fly sizes and the required presentations.
 For trout, we are most often fishing with smaller flies on a dead drift. Lighter lines allow for a more delicate presentation and create less drag. On the other hand, when fishing for bass, we are often trying to “punch” flies into tight areas and quickly pull fish out of areas with a lot of woody structure. And we are typically using larger, heavier, wind-resistant flies. Often, there is simply not enough weight in a 4-weight line to effectively “turnover” a larger bass bug. Rather than the line carrying the fly on a level plane during the cast, the fly travels below the line, often catching the rod tip or worse, the back of your head!
When you get into saltwater species and some large freshwater species like salmon, you may be choosing a particular rod and line weight because of the size of the fish more than the size of the fly. Yes, a 13-weight helps to cast bigger flies to tarpon, but mostly you need that size rod because its larger butt section will be necessary to fight a 150 pound fish!
The other thing that can necessitate a rod with a heavier line weight is wind. Saltwater species like bonefish, snook, redfish, etc. often aren’t particularly big and they don’t demand unusually large flies, but you encounter a lot of wind around the coast. In the American West, you tend to encounter more wind and may consequently want a 6-weight rod for trout. The accompanying chart lists appropriate rod/line weights for common game fish.
Compromise
So, you really need to consider what you’ll be fishing for and where you’ll be fishing to determine the best rod length and weight for your needs. In this part of the country, most people want to fish for bass and bluegill in streams, ponds and lakes, and they want to fish for trout in the mountains and tailwaters. But if you’re just getting into the sport, you probably don’t want to rush out and buy four different fly rod outfits. Fortunately, there is a middle ground.
If you’re the person described in the paragraph above, your ideal rod lengths might range from 7’ to 10’ and your ideal line weights might range from 4 to 7-weight. While it is impossible to get one rod that is perfect for everything, you can sometimes get one rod that is good enough for a lot of things. An 8 ½’ rod would be long enough to get by on bigger water and short enough to manage on smaller streams. A 5-weight would be light enough for trout fishing, ideal for bluegill, and adequate for bass fishing if you scale down your fly size.
Later, if you get really interested in bass fishing, maybe you add a 9’ 8-weight to your arsenal. Or if hiking into small brook trout streams becomes your thing, maybe you add a 7 ½’ 3-weight. You can certainly get by with one rod, but the more diverse your locations and species become, the more necessary it will be to have multiple rod sizes.
Fly Rod Action
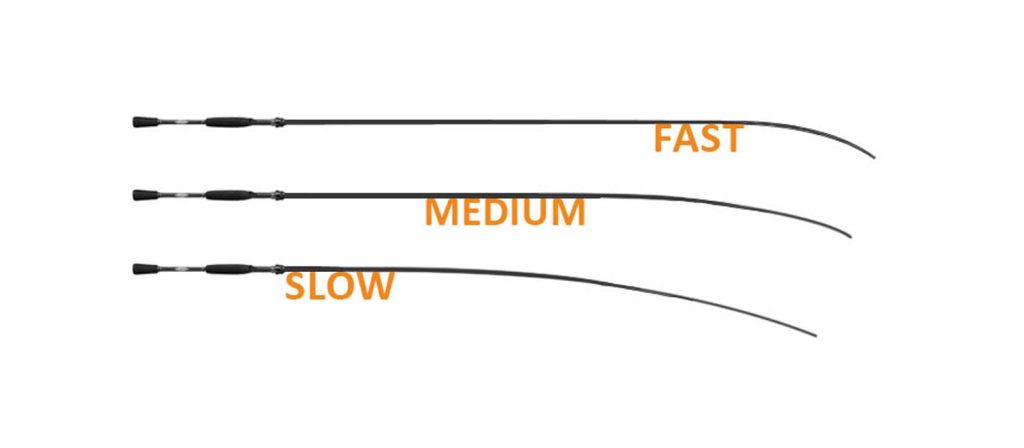
Once you’ve narrowed down the rod size, it’s time to consider the action of the rod. Rods will typically be described as slow, medium, or fast. A slow action rod feels softer and more “noodly” because it flexes closer to the butt of the rod. A fast action fly rod will feel stiffer because it flexes closer to the tip of the rod. And as you might guess, a medium action rod sort of falls in between, flexing more in the middle of the rod.
Fast action rods are capable of generating more line speed and, in the right hands, more easily achieving greater casting distance. With their stiffer butt sections, they also tend to have more “backbone” when it comes to apply pressure when fighting fish. Most fly rods that are 7-weight or heavier will only be available in a fast action.
 Slow action rods are more delicate in their delivery of the line and are more ideal for softer presentations. You tend to feel the fish more on a slow action rod and because it flexes much deeper in the rod, it is capable of better protecting very light tippets. Most rods in the 1 to 3-weight range are slower action rods. Typically, rods in the 4 to 6 weight range are available in a number of different actions.
Your own personal casting style will also be a factor in the best rod action for you. People with a more aggressive casting stroke tend to favor a fast action rod. People with a more relaxed casting stroke tend to favor a slow action rod. Experienced fly casters can pretty easily adjust their casting stroke to the rod. If you’re new to fly fishing, you may not have enough experience to even know your preference. In that case, it’s usually safest to stick to the middle and go with a medium action rod.
Fly Rod Material and Price
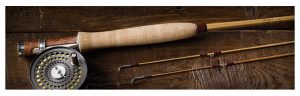 In the old days, fly rods were made from bamboo and their price depended on things like who made them and whether or not they were mass-produced. Some of the rods made by certain independent makers are extremely valuable today. Most of the bamboo rods that were mass-produced by larger companies have little value. Bamboo rods that are made today are mostly made by independent makers and have price tags in excess of $1000 largely because of the amount of time and craftsmanship that goes into making them.
Today, bamboo rods definitely still have a following much like classic cars have a following. When compared to more “modern” materials, they tend to be a little heavier and almost every bamboo rod will fall into the slow action category. I wouldn’t recommend them to a beginner looking for a rod to get into the sport but for the more seasoned fly fishing enthusiast, they sure are cool!
Fiberglass replaced bamboo in the 50’s as the most common material for fly rods. It was lightweight, and after the trade embargo with China (where rod makers got their bamboo), it was far more available and cheaper to produce. Fiberglass rods have seen a recent return in popularity because of their soft, unique action (slow). Many large rod manufacturers are currently offering select models of fiberglass rods built with more modern components.
Most rods today are made from carbon fiber (graphite) and that has been the case for probably forty years. Carbon fiber is strong and much lighter than fiberglass or bamboo. It can be made in a number of different actions and it can be made in multiple pieces while still maintaining that action.
 Bamboo rods, for instance, had/have metal ferrules (joints). To make a four-piece bamboo rod results not only in a lot of added weight, but “dead spots” at each of those joints. Carbon fiber rods have carbon fiber joints, allowing for a multi-piece rod that is still light and still maintains its action. Most carbon fiber rods today break down to four sections, allowing for easy storage and travel. Some break down into as many as seven pieces!
Today’s carbon fiber rods are priced all over the place. Some are mass-produced overseas using less expensive components (guides, reel seat, etc.) and can be found for well under $100. American made rods tend to start around $200. When you bump up to about $400, you’re getting a higher modulus graphite that will feel lighter and crisper – you’ll notice a difference. When you get into the real high-end stuff ($500-$1200), you are getting more technology as well as higher-end components, but most beginner to intermediate fly casters won’t be able to tell the difference.
Keep in mind that many of the things that influence the price of the rod won’t have anything to do with how it casts. For example, a mid to high end rod might have some exotic, $150 piece of wood used for the reel seat, while an entry level rod might use a $30 piece of walnut. One might use titanium for the guides while another might use stainless steel.
In other words, if you have the disposable income and want to spend $1200 on a rod, have at it. Just don’t expect it to necessarily cast better or catch more fish! Buy the best rod you can afford. There are some great rods in the $100 – $300 range, many with an unconditional guarantee. That’s right. Some of the major rod manufacturers provide an unconditional guarantee (or variation) on their rods. Orvis, for instance, offers a 25-year guarantee on all but one series of their rods. No matter how it breaks, they’ll fix it or replace it for 25 years! To me, it’s worth spending a little more to get a rod with a good warranty.
The bottom line is once you narrow down what size rod you need and what your budget is, it begins to boil down to personal preference. If you decide that an 8 ½’ 5-weight is what you need and you’re willing and able to spend up to $400 on it, go to the fly shop and cast every 8 ½’ 5-weight rod under $400 that they have. Any fly shop worth their salt will have a place for you to cast a rod and will gladly let you cast as many as you’d like. And when you do, one of them will just feel right.
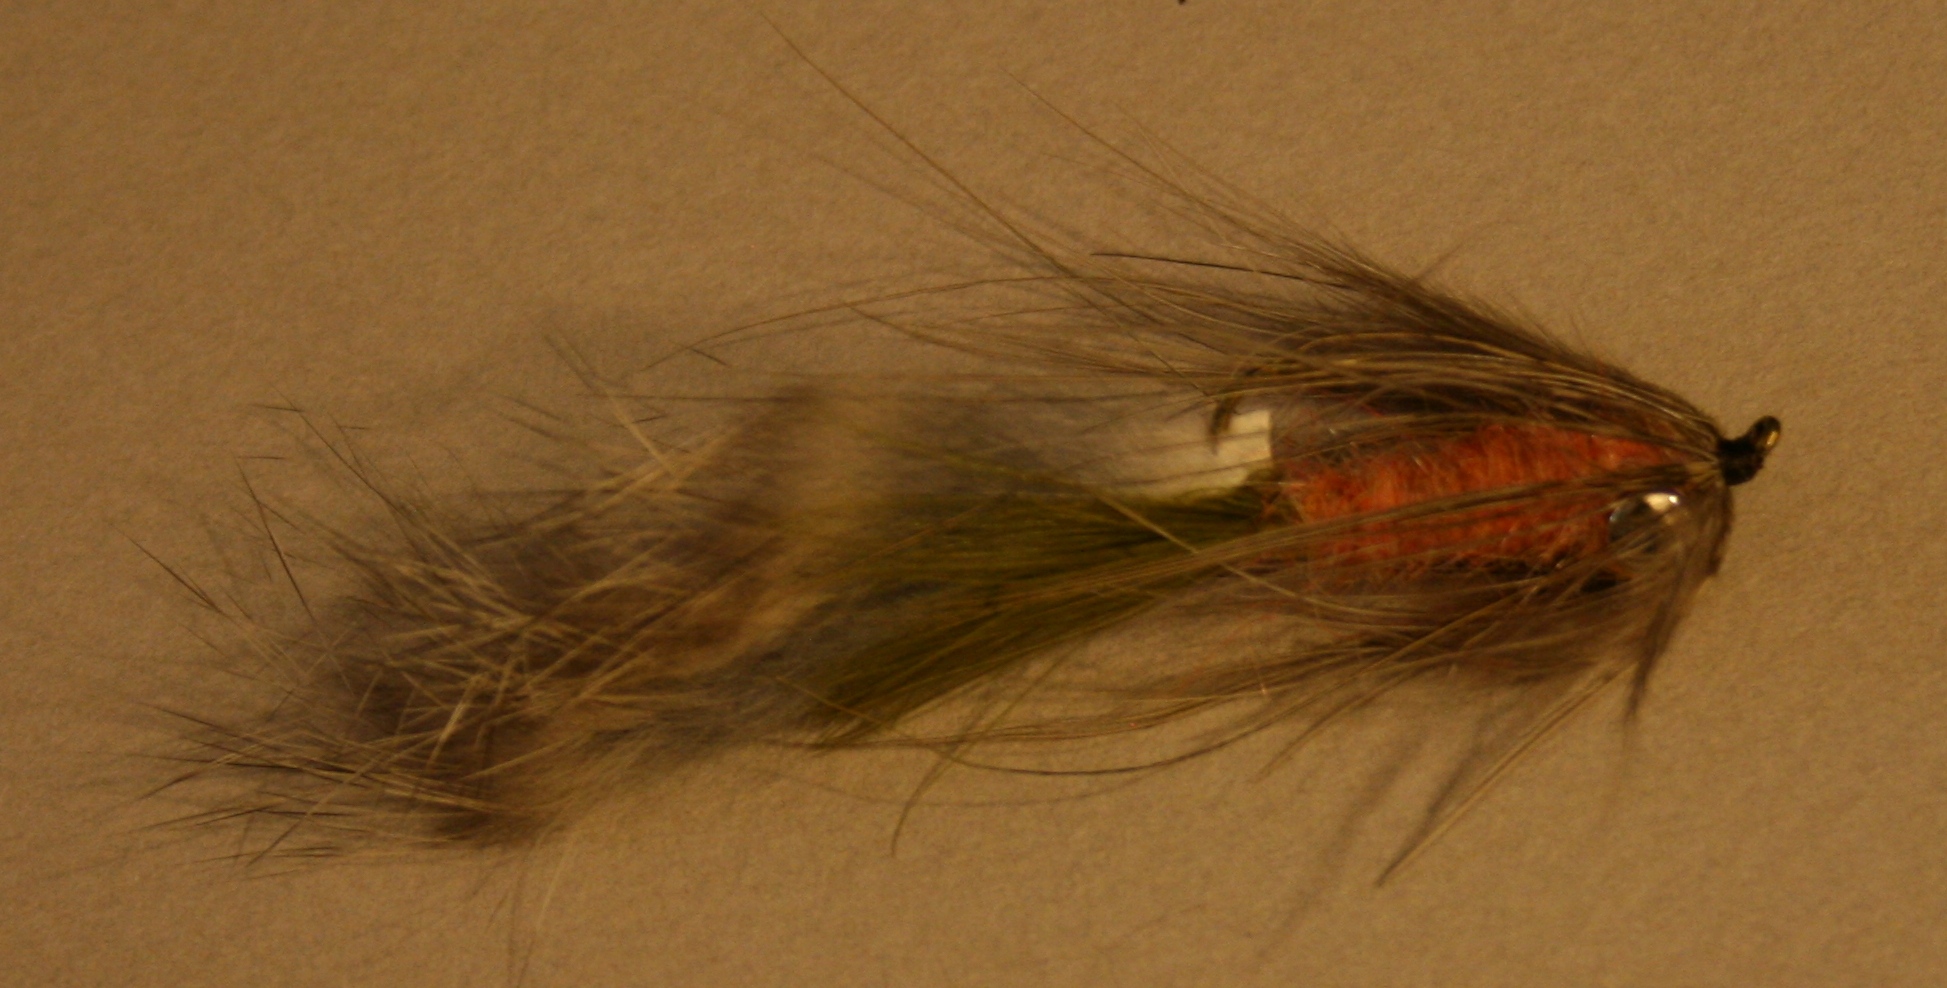 The Fleeing Crayfish was originated by fly fishing legend, Gary Borger in the 1980’s. He noted that while many crayfish pattern with ultra realistic, outstretched claws and the like looked great, most fish would eat them as they were retreating or fleeing. The design of his pattern imitates the crayfish in this moment. It has unbelievable movement and motion in the water and is a killer pattern for smallmouth and large browns.
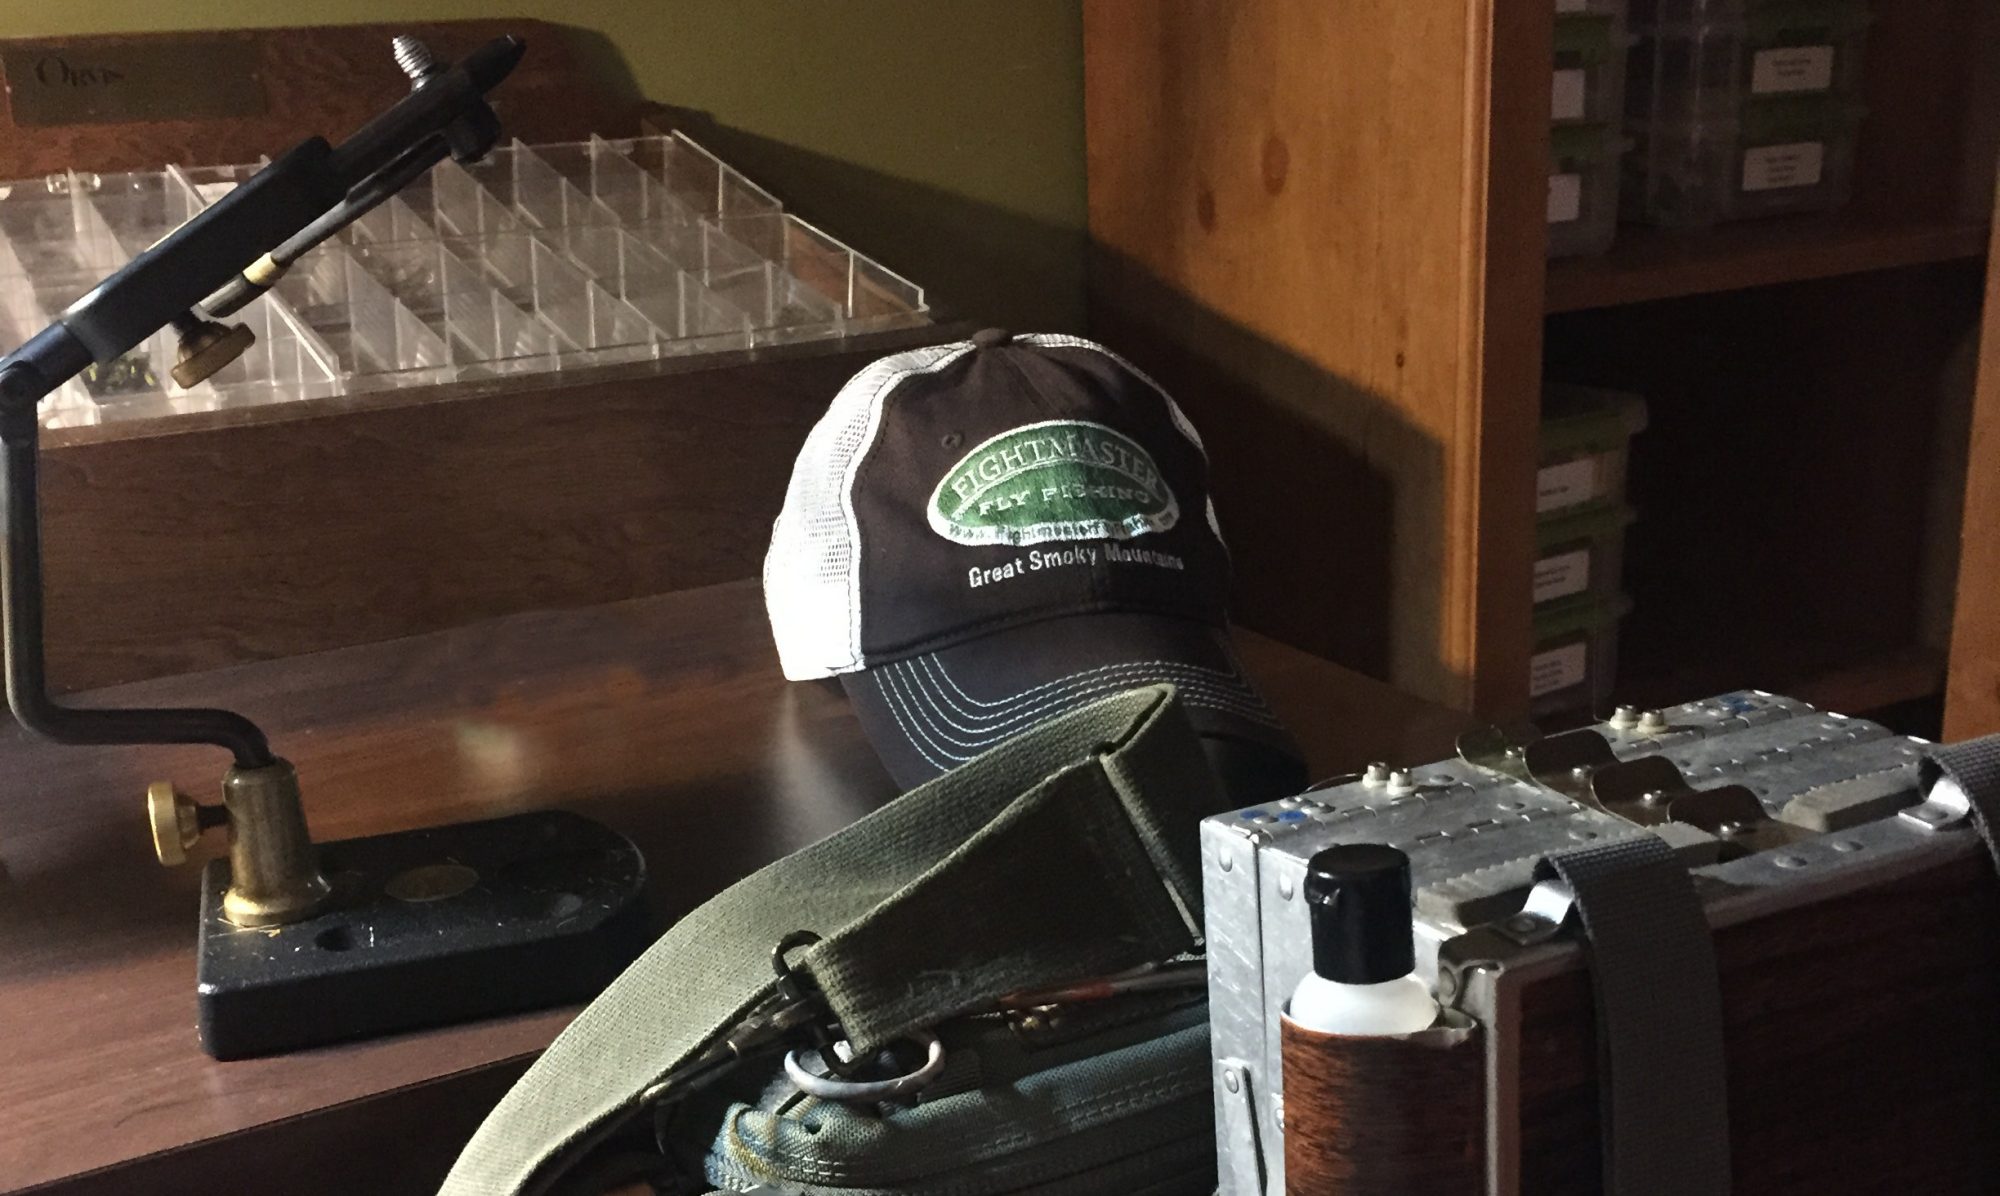
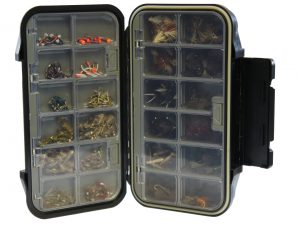
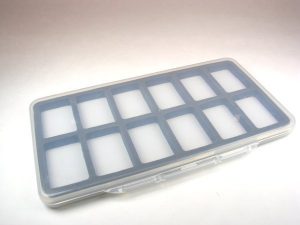
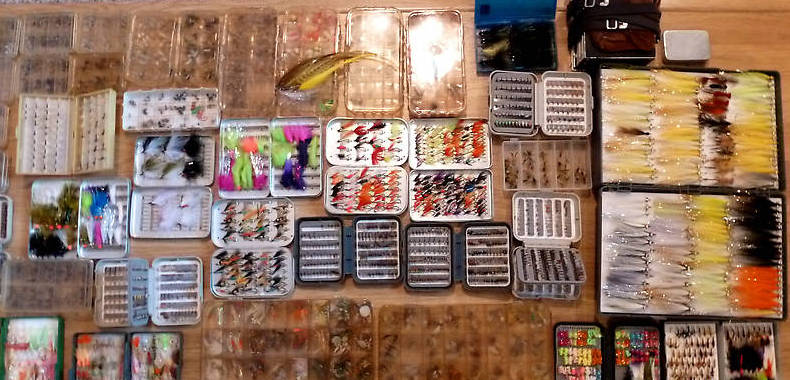 I’m a bit of an oddball. This is not exactly breaking news for most folks who know me. But to paraphrase John Gierach, “If, from time to time, people don’t walk away from you shaking their head… You’re doing something wrong.” I could certainly dedicate an entire article, or even a book, to my oddball qualities, but for this article, I am referring to one specific oddball quality. I fish and guide with a set-up that combines a pack and fly boxes all in one contraption. You’ve seen it. It’s my chest fly box, custom built by the
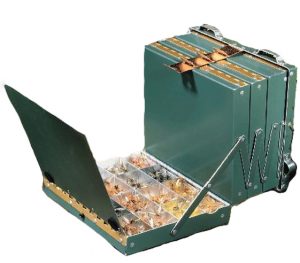
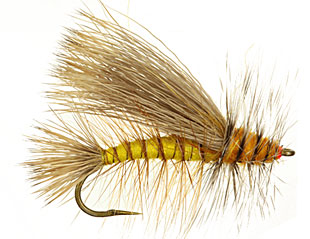
 The Stimulator was long thought to be the invention of well-known West Coast angler and fly shop owner, Randall Kaufmann. While Kaufmann is responsible for the modifications that made the fly most of us know today, the fly’s true originator is thought to be Paul Slattery, who tied a stonefly pattern called the Fluttering Stonefly to fish on the Musconetcong River in central New Jersey. This was in the early 1980’s and he soon renamed the fly after a New York City punk-rock band called The Stimulators.
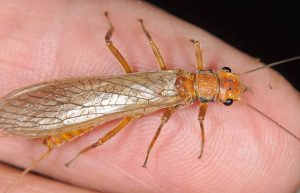
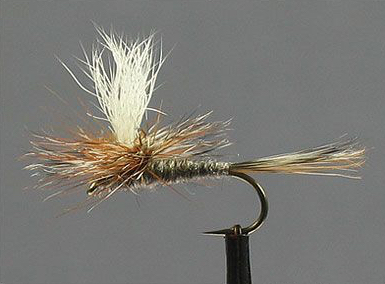
 In the Smokies, we are mainly fishing faster, choppier water and often choose bushier, more heavily hackled dry fly patterns that float well. In that kind of water, trout don’t get much time to study the fly and their view tends to be distorted by those choppy currents, so the bushier flies tend to do the trick. Even when fishing pools in the Smokies, you usually have a defined feeding channel that will have at least a little chop to it. In those situations, a parachute style fly pattern is usally adequate to provide a slightly more realistic profile.
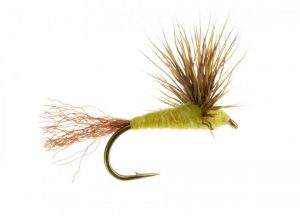 In the mid 1980’s, Craig Matthews and John Juracek took the Comparadun a step further and replaced the split microfibbet tails with a piece of antron or zelon. It essentially turned the fly into an emerger, with the antron or zelon “tail” suggesting the trailing shuck of an emerging mayfly. Of course, in any of the patterns described above, the body, wing, and tail/shuck colors can be altered to imitate different insects.
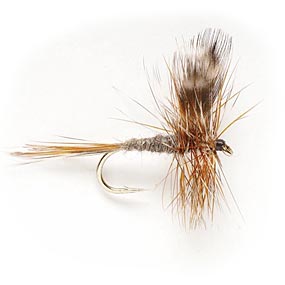
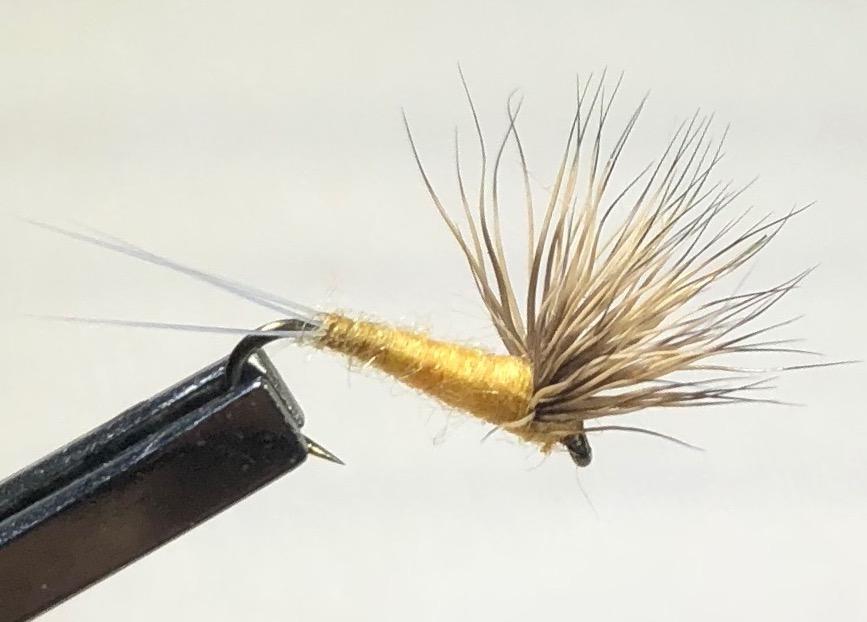
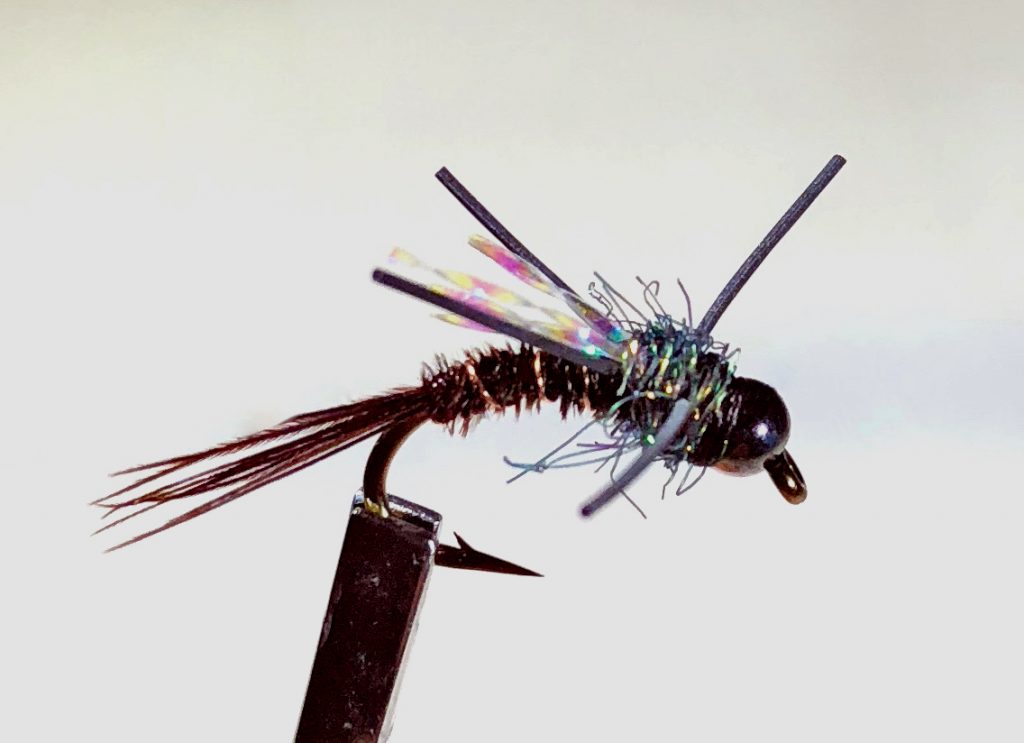
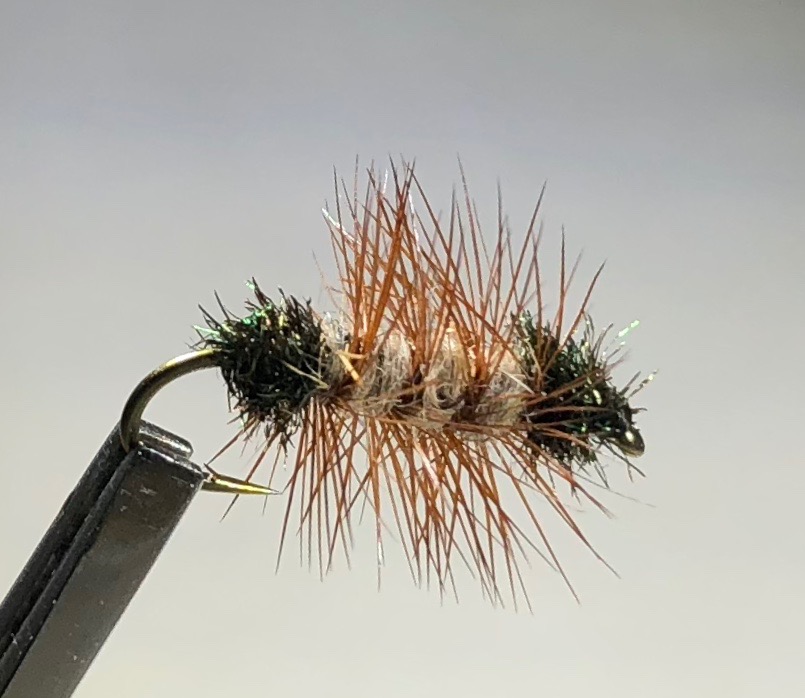 Few fly fishermen, if any, possess the knowledge and experience of Joe Humphreys. Joe is probably best known as a teacher and an author, but over his many decades in the business, he has also created a number of original fly patterns. By far, my favorite is the Humphreys’ Caddis Pupa.
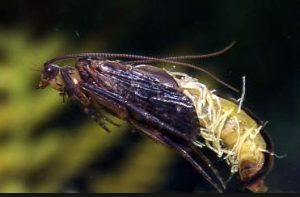
 Fly Tying is a lot like cooking in many ways. Of course, in both pursuits, you’re combining a variety of ingredients to create one final product. And the quality of those ingredients along with the skills of the person putting them together can tremendously impact the end result. But the issue of originality is also quite comparable.
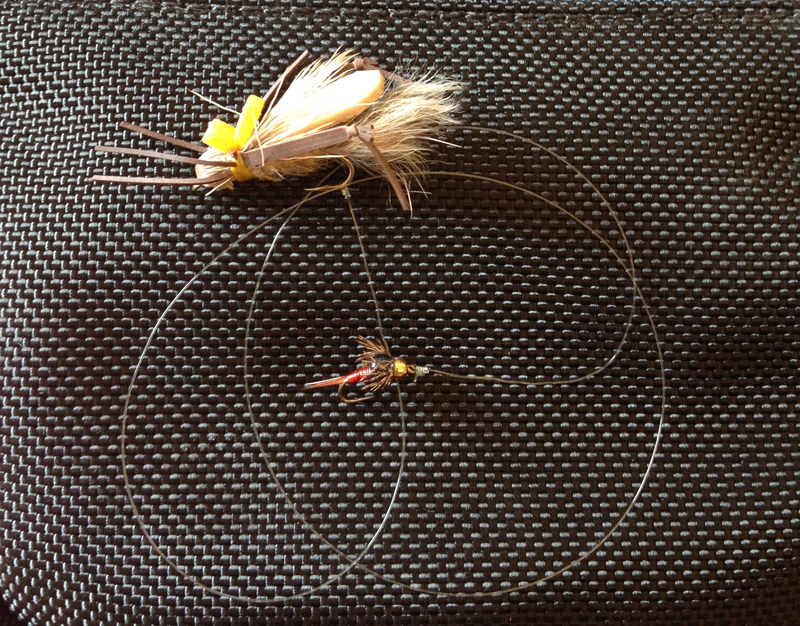 I almost always fish with two flies when I’m trout fishing. There are just so many advantages to it. Beside the obvious advantage of potentially offering two fly choices to the trout, it provides you the opportunity to simultaneously present a fly in two different feeding columns. Below, I’m going to talk about some of those strategies as well as a few different ways to rig a dropper system. As a bonus, you get to enjoy some of my horrific artwork!
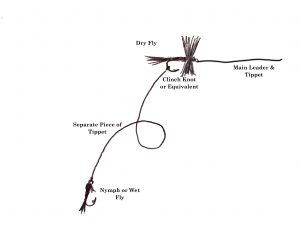 I typically rig this by tying my dry fly directly to the main leader and tippet. I’ll then take probably 18”-24” of tippet material and tie one end to the nymph, and the other to the bend of the hook on the dry fly. There are certainly a lot of variables, such as water depth or where you think the fish might be feeding, that determine how far apart you put the two flies, but the amount mentioned above is a pretty good “default setting.” I like to use a clinch knot to connect to the bend of the hook, but whatever knot you usually use to tie a fly on should work fine.
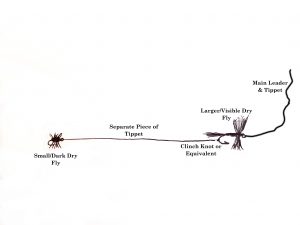 With that in mind, know that this method may not be suitable for every situation. For instance, if you need to get a nymph deep, particularly in a faster run, you’re going to need a lot of weight and using a dry fly–dropper rig is not going to be effective. You’re better off using traditional nymphing techniques for that. But for fishing hatch scenarios where fish are actively feeding on and just below the surface, or for fishing to opportunistic feeders in shallower pocket water, it’s pretty tough to beat.
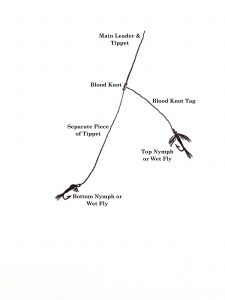 There are a few different ways to rig for this and there are numerous strategies for fly selection and placement. If I have a nymph pattern that the fish are really after, I will sometimes fish two of the exact same fly. There have even been a few occasions when I’ve caught two fish at once! But usually I’m searching and I’m trying to provide the fish with options, so I’ll most often have two different fly patterns.
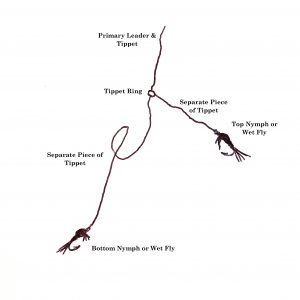 A common way to rig two nymphs that will allow the top fly to drift more freely, is to use a blood knot to attach a section of tippet to the end of your leader. When tying the knot, take care to leave one long tag end, to which you will tie the top fly. The bottom fly will be attached to the end of the new tippet section. This definitely allows the top fly to have more movement and it puts you in more direct contact with both nymphs. Though for me, this method results in a lot more tangles so I only use it for specific scenarios.