How Stuff Works: Sink Tip Fly Lines

Floating fly lines are by far the most common, and for most trout fishing situations, they are all you need. When nymphing below the surface, weight in the fly or on the leader (split shot) is enough to get the fly and leader down where it needs to be. Doing this while the fly line is still floating can be advantageous as it allows the line to be mended when necessary and provides for quicker pick up when setting the hook on a dead drift.  Even when fishing with streamers, a floating line is often adequate when stripping a weighted streamer through shallow trout streams.

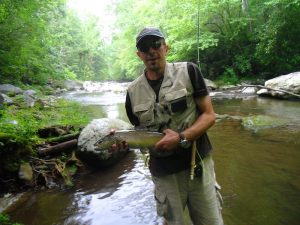
But what if you want to get a streamer down and keep it down when retrieving it through deeper, swifter water? Such scenarios might include a mountain trout stream that’s running high from recent rain, or a tailwater fishery during generation. Both of these scenarios have produced some of the largest trout I’ve ever caught. Or what if you’re wanting to fish a streamer 12’ deep in a lake for stripers?

Performing the above tasks with a floating fly line would require a very heavy fly with a long leader. And the result would be extremely difficult casting and very limited “contact” with the fly. When fishing streamers, shorter leaders allow you to better control the motion of the fly when retrieving it, and give you much quicker feedback when the fish takes it.  Additionally, because of the floating fly line, the fly would rise with every strip of the line rather than staying deep in the target area.

Breakdown of a typical sink tip line

A sink tip fly line solves these problems by allowing the front portion of the fly line to sink. Weightless flies that are easier to cast and sometimes have better “action” can be used and so can shorter leaders. And with the fly line submerged, the fly will stay down and retrieve more in a straight line rather than upward toward the surface. Full sinking lines can also be used for this task but can be clumsy to cast and nearly impossible to mend. A sink tip line more or less gives you the best of both worlds.

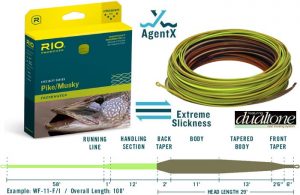
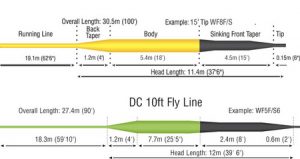
Sink tip fly lines have a number of variations. First, they will often have different lengths of sinking heads. In other words, the entire fly line will float except for the front 6’ or 15’ or whatever the case may be. In general, a shorter head will be easier to cast but a longer head will keep more of the line, and consequently the fly, down deeper. They will also come in different sink rates. Some manufacturers may provide a measurement in grains but most will be designated in a class – like a class 5. A Class 5, for instance, will typically sink at a rate of approximately 5” per second. A Class 2 will sink at approximately 2” per second. They commonly range from Class 1 (often described as an intermediate line) to Class 6.

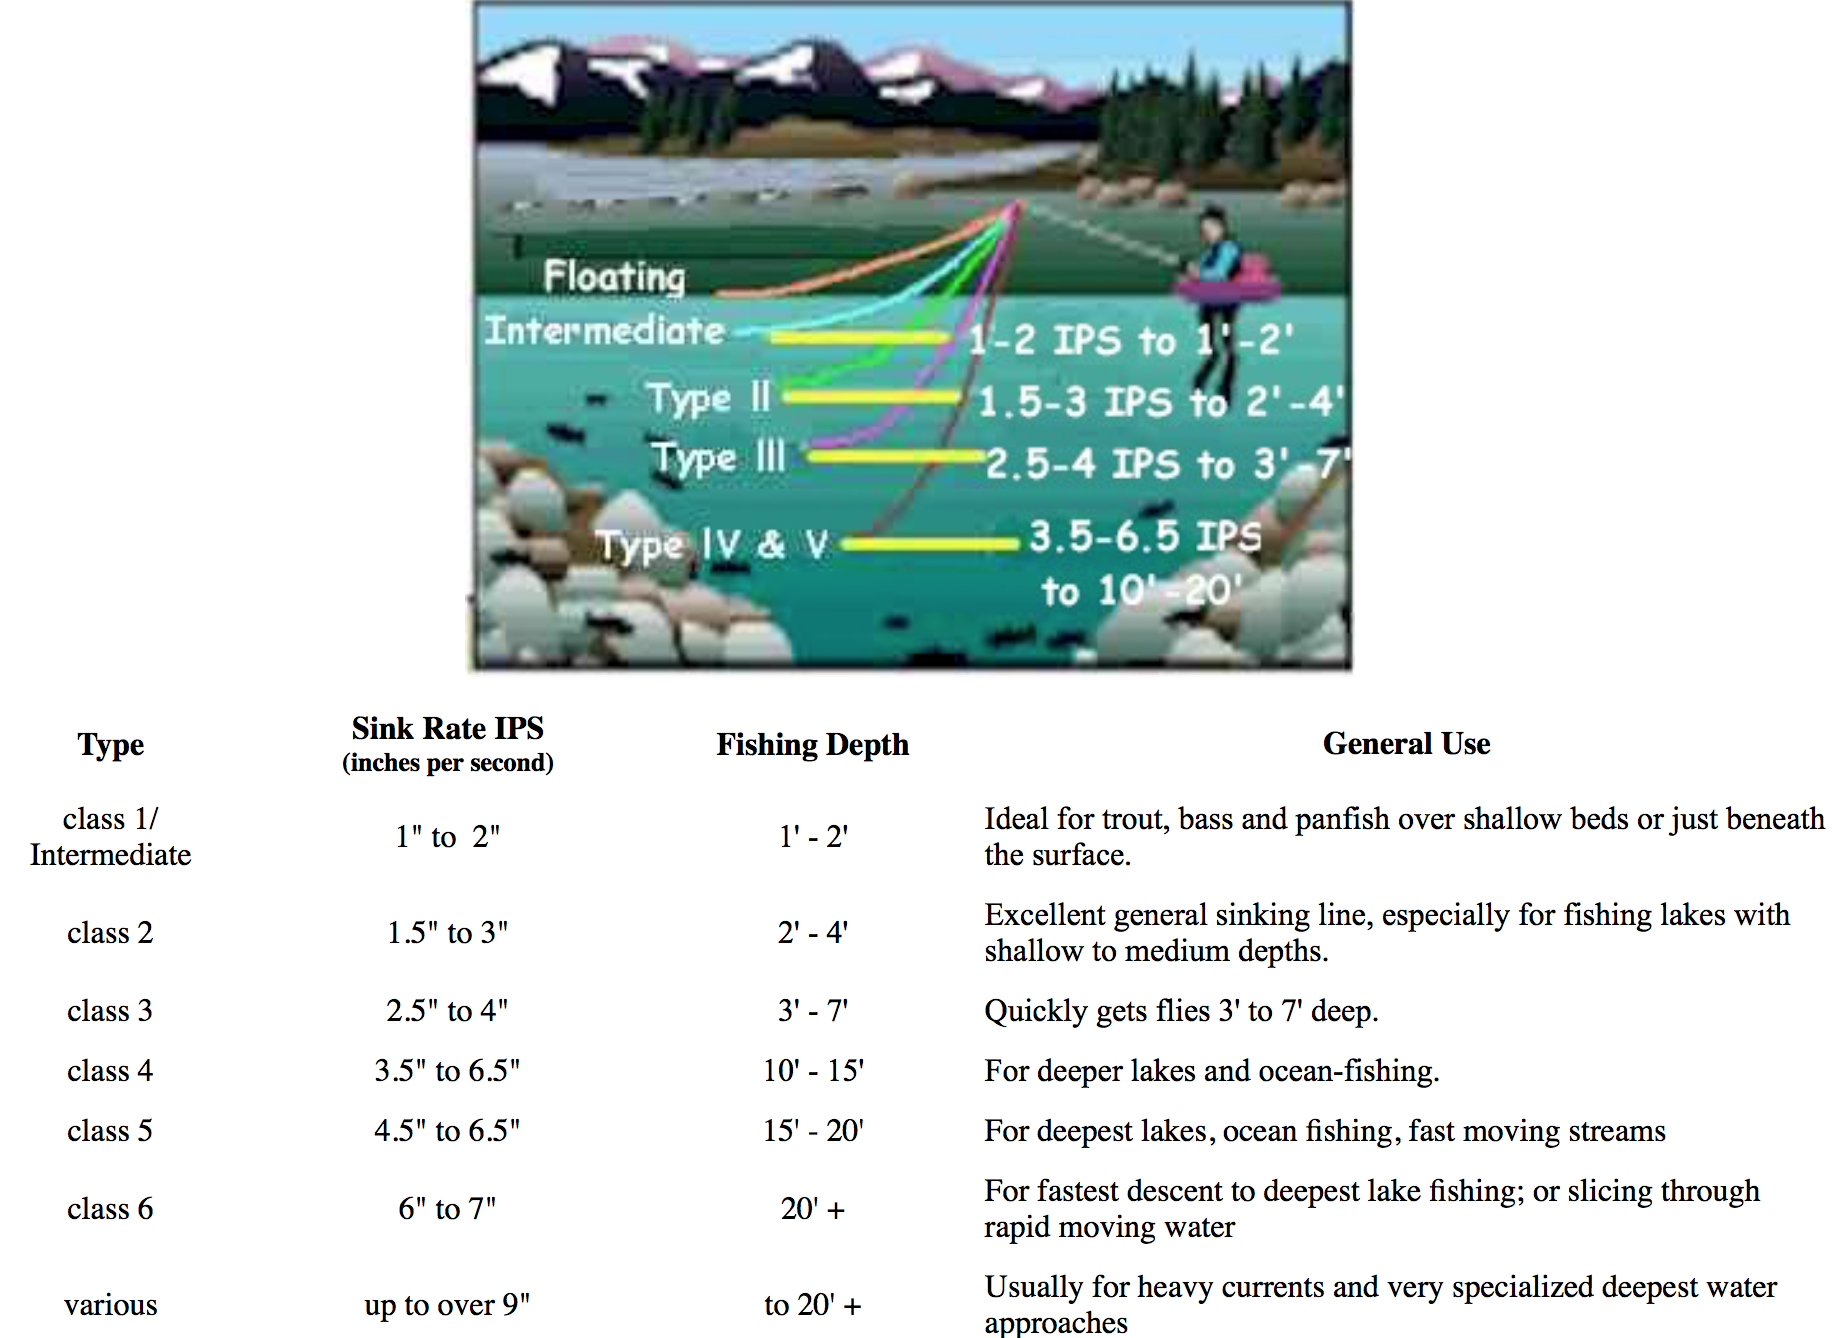
Very often, the weight classes will correspond specifically with the actual line size. For instance, you may find a 10-weight sink tip line that is a Class 5, or a 6-weight sink tip line that is a Class 3, but there may not be an option for a Class 5 6-weight.

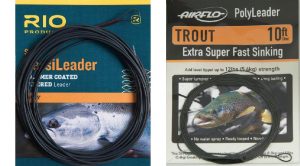
You can also find separate add-on sink tips to convert any floating line into a sink tip. This is convenient if you don’t want to carry an extra spool or if you don’t plan to fish sink tip lines frequently and don’t want the expense of an extra spool and line. However, my experience with these is that they hinge at the connection with the floating line and cast terribly.

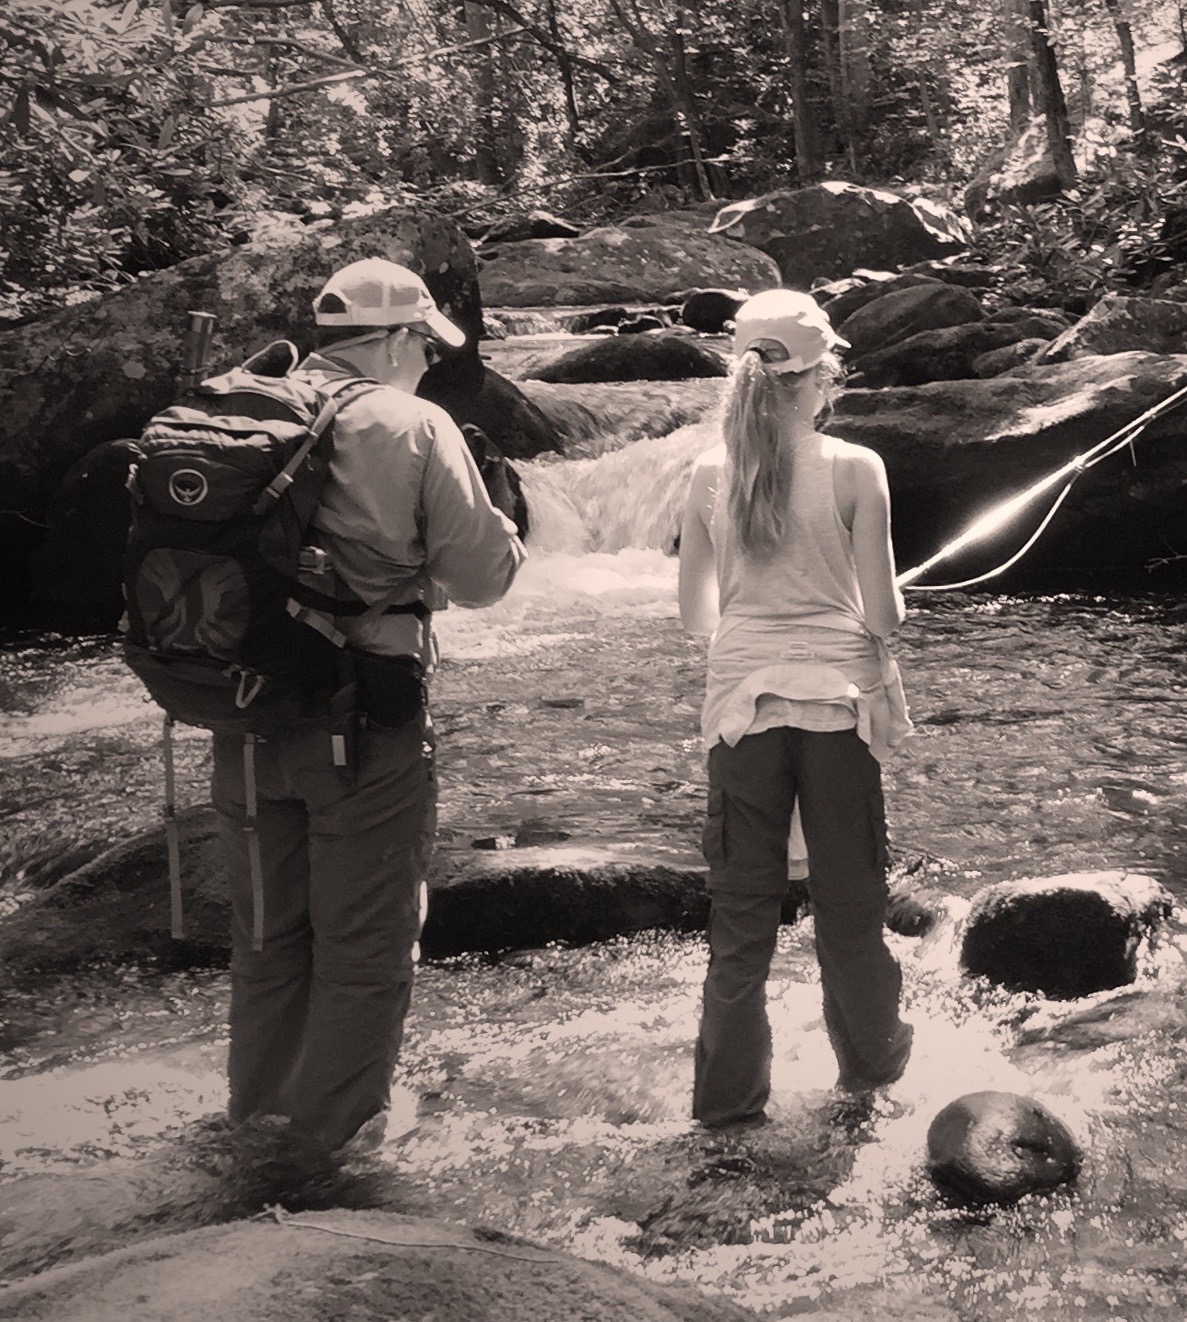
As with nearly everything in fly fishing, you need to figure out what’s best for your task at hand. Where are you going to be fishing? What are you trying to do? What size rod will you be using?

Hopefully, this sheds a little bit of light on sink tip lines. They can be terribly confusing, mainly because every manufacturer seems to have their own way of describing them. You really need to read through the fine print in the description of the lines to figure out what’s what. Your best bet is to talk to someone at a local fly shop who can really break down the differences for you.

On the Fly: Storing Wet Flies

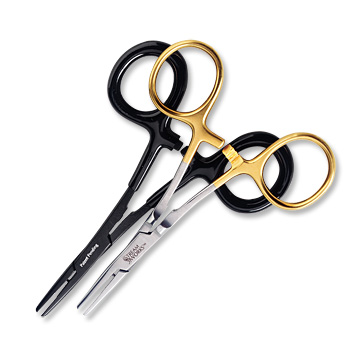
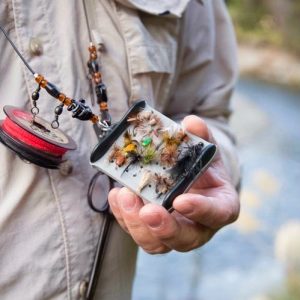
Putting wet flies back into your fly box is a great way to not only rust the hook on that fly, but every fly around it. Utilizing some sort of fleece or foam fly patch on the exterior of your pack or vest to temporarily store flies as they dry will save you a lot of headaches (and money).  An exterior fly patch also serves as a great “bullpen” for other flies you may want to to try through the day.

“On the Fly” is a feature in my monthly newsletter offering quick fly fishing tips to make your life on the water a little easier…

Flies: Pat’s Rubber Legs Micro Jig

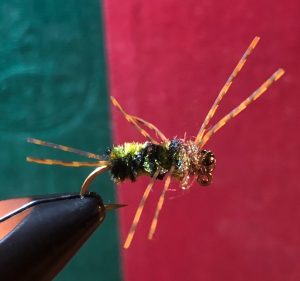
Once again, this is my variation of an existing pattern.  Pat’s Rubber Legs is a stonefly pattern created by Idaho guide, Pat Bennett. If we’re keeping it real, Pat’s pattern is really just a variation of an older pattern called a Girdle Bug. I’ve talked about this before, but what constitutes and original fly pattern and what is simply a variation on an old standard is a REALLY fine line!

The Girdle Bug also originated out west and has, for decades, been an effective imitation for stoneflies, hellgrammites and any other big meaty nymph. It is typically tied in larger sizes, most commonly #8 and bigger, and consists of lead wire, a black chenille body, and white rubber legs on the rear, front, and sides of the fly. Pat’s Rubber Legs is the exact same thing but has variegated chenille rather than solid black, and uses a material called Spanflex rather than traditional round rubber legs.

Both are great patterns. I personally don’t see any added value to the Spanflex material, but I do think the variegation provides a great and simple color contrast. Other stonefly patterns like the Bitch Creek Nymph and even my own pattern, Rob’s Hellbender Nymph, have used a weave to achieve this contrast. But there’s a lot to be said for simple, and using the variegated chenille is way simple than weaving!

While I have had a lot of success with the traditional Pat’s Rubber Legs, it, like many big stonefly patterns, has a real tendency to hang the bottom. All heavy nymphs do. Many fly tyers, including me, have tried to strategically weight flies to reduce bottom snags with varying degrees of success. Of course, fly tying, like most anything else, has evolved over the years.  And in recent years, the evolution of European Nymphing has given us the micro jig hook.

Traditionally, jig hooks were used by spin fishermen and were just too heavy to be cast effectively with a fly rod.  However, the newer micro jig hooks are not only made in smaller sizes, but they use a specially cut tungsten bead to fit on the uniquely shaped hook. The result is a hook and bead combo that allows the fly to ride hook up – most of the time. Certainly with the faster and generally varied currents found on most trout streams, you’re going to get some rotation on the fly.

To accommodate for this, I, and many other fly tyers, prefer to tie flies on these style hooks “in the round.” This means the fly will essentially look the same from any angle. Flies tied with a very distinct top and bottom can look strange when the fly isn’t oriented properly.  Tying the fly in the round insures the fish will get the proper view of the fly no matter how the hook is oriented.

I saw Pat’s Rubber Legs, with its simple, variegated body, as a perfect candidate for a micro jig style fly.  The result is a heavy fly that can be fished deep and slow with minimal bottom snags. In addition, I frequently like to incorporate just a little flash to my nymphs for a subtle suggestion of movement. For my variation of this pattern, I added a small amount of Ice Dubbing behind the head. It’s a great fly anytime of the year but particularly in the colder months of winter when deep and slow is the name of the game. Give it a try!


Pat’s Rubber Legs Micro Jig

Hook: Orvis 1P2A Tactical Jig Hook #8
Bead: Black 1/8” slotted tungsten
Thread: Brown 6/0
Body: Brown and yellow variegated chenille
Thorax: Pheasant Tail Ice Dubbing
Legs: Wapsi pumpkin barred Sili-Legs

Note: This recipe is designed to imitate the golden stonefly nymphs common throughout the Smokies. Colors can be altered to better imitate stoneflies or even hellgrammites in your local trout or smallmouth streams.

2018 Holiday Sale

The Overview: On December 3rd, the first ten people to book a guided trip or purchase a gift certificate for a guided trip will get a second guided trip free.  If you’re not one of the first ten people, you can still buy one guided trip and get a second for 50% off anytime between December 3rd and December 24th. Just mention this offer.

Read below for full details and frequently asked questions…

 How many can I buy?  The only restriction is on the free trips.  For those first ten people to contact me, there is a two-trip limit on the freebies, meaning you can buy two and get two free.  Past that, there is no limit on how many you may purchase for the 50% offer, so if you want a total of twenty guided trips, ten of them will be half price.

Do I have to book the date(s) when I purchase?  No.  While you are welcome to reserve specific dates, I can also just mail you a gift certificate.  You may book your trip(s) at a later date and apply the gift certificate.

Do all gift certificates have to be for the same person?  No.  Use two as gifts for the same person or for two different people.  Give one as a gift and keep one for yourself.  Or use them all for yourself – I won’t judge you!

How do I purchase gift certificates?  Unfortunately, I don’t currently have a way to offer this deal on gift certificates online (though I’m working on it).  To purchase, just call me at 865-607-2886 with a credit card.  I’ll get some basic information, like who the certificates are for, and mail them to you.

On Day 1 of the sale, December 3rd, there tends to be a mad dash to get the free trips.  Since I am just one man with a cell phone, I am requesting that you email me at guide@fightmasterflyfishing.com and just indicate that you’re interested in the offer.  I will call you back that morning to get information.  The first ten emails I receive will qualify for the buy-one-get-one-free offer.  If I get twelve emails at the same time, I’ll honor the offer to all twelve people.

How early can I contact you?  Don’t try sending me an email at midnight on December 3rd.  That’s cheating.  The sale officially begins at 8:00 a.m. EST on December 3rd. All emails received at or after 8:00 a.m. will qualify.

How do I redeem my gift certificates?  You will now be able to book online using your gift certificate!  Go through the online booking system as always and at the payment screen, enter the coupon code on the gift certificate.  Of course, you can always contact me via phone or email and I will make the reservation for you.  Just mention that you have a gift certificate.

 How long will I have to use my gift certificates?  All gift certificates will have an expiration date of 12/31/19 and I ask that you please be mindful and respectful of this.

Why is there an expiration date?  In addition to this annual offer, I donate multiple trips every year to charity fundraisers.  I am happy to do both, but when free trips from years past blend with free trips of the current year, my calendar gets so full of free trips that I don’t have enough available days to produce revenue.

Are there any other restrictions?There are no seasonal or weekend restrictions. If the date is available, you can reserve it with your gift certificate.  All of the same cancellation policies apply and there are unique policies for gift certificates.  You are encouraged to view all Policies and Restrictions found under Booking and Rates on the web site.

Flies: Soft Hackle Wired Caddis

Caddis have always seemed to be one of the most overlooked and under-imitated aquatic insects in the fly fishing world.  Maybe it’s because they haven’t been written about nearly as much as their sexier mayfly cousins over the years.  I mean, mayflies are given names like Pale Morning Dun, Quill Gordon, and Gray Fox… just to name a few.  Caddis are given names like Green Caddis, Brown Caddis, Black Caddis…

Caddis Larva

Regardless of the lack of respect given to caddis over the years, they have always been and continue to be abundant in nearly every body of freshwater and a staple in the diet of trout everywhere.  I have numerous caddis patterns that I fish seasonally in the Smokies, but one that finds its way into the line-up more than any other is the Soft Hackle Wired Caddis.

There have been a number of wire body caddis patterns over the years and this is simply my variation on similar recipes.  I sometimes tie it without a bead, but most often with a black tungsten bead at the head. It fishes well on a dead drift under a strike indicator but, especially when caddis are emerging, can be very effective fished with a drift and swing method.  Learn more about this method and other similar techniques in this article on Active Nymphing.

Soft Hackle Wired Caddis

Hook: #18 – 12 TMC 2457 (or equivalent)
Bead: Black tungsten to match hook size
Body: Small chartreuse wire*
Back: Peacock herl woven between wire wraps
Thorax: Black or brown Wapsi Life Cycle dubbing*
Hackle: Black or brown hen*

*Other colors can be substituted to match specific caddis species

How Stuff Works: Packs and Vests

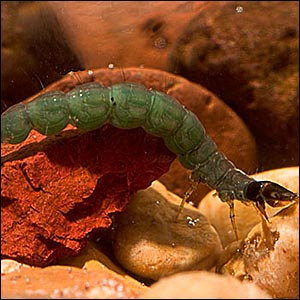
As with most things in fly fishing, fishing packs and vests have come a long way over the years.  The great thing about that is you now have a seemingly endless array of ways to carry and organize your on-stream tools and accessories.  The bad thing is those seemingly endless choices can be a bit overwhelming.

There is certainly no right or wrong pack or vest.  The best option for you will boil down to how much stuff you plan to carry, where you plan to carry it (backcountry or more roadside), and how you want to organize it. As with fly rods, the more diverse your fishing adventures are, the more likely you’ll need more than one option. For instance, what might work well for backcountry trout fishing in the mountains may not work very well wading saltwater flats.  But for most folks, you should be able to find one system that works for all of your fishing needs.

Again, what works best for me may not suit you at all, so I’m not going to try to tell you the best product.  However, I have had the opportunity over the last 30 years to use most every style of vest/pack and will share below what I believe are pros and cons of each.

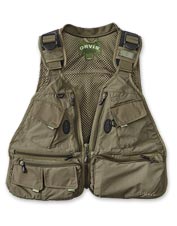
Vests: For decades, this has been the standard for carrying fly boxes, tools, etc. on the stream and while there have been some changes over the years, the basic concept is still the same and this is still the choice for many anglers.  One of the greatest benefits of a vest is that with individual pockets for nearly everything, it’s really easy to keep things separated and organized.  And the design of the vest is such that you can keep most of those items quickly and easily accessible.  Most vests will also have larger compartments on the back for items that you may not need to access as frequently, like a rain jacket or lunch. D-rings on the back of a vest also make a great place to attach a net where its out of the way but easily accessible with the addition of a magnetic or clip attachment.

While there have been numerous improvements over the years, the biggest complaint with vests still seems to be that they are heavy, with most of the weight being carried on your neck and shoulders.  Another downside is they do not wear well with a backpack.  If you like to do a lot of backcountry fishing, you may want to carry more safety and comfort provisions that necessitate a backpack in addition to your fishing gear.  It can be difficult to comfortably and practically wear a backpack when the straps are going over full, bulky pockets on a vest.

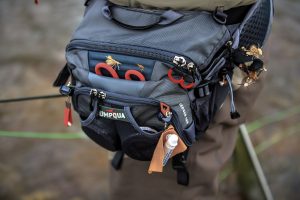
Hip Packs: These are often worn around the waist on the rear when not fishing, and rotated to the hip when accessing items in the pack. Probably their greatest advantage is that they stay out of your way when fishing and offer total freedom of movement when casting, etc.  There are also accessories you can add (or may be built in to some packs) for carrying a net.

The biggest downside to a hip pack is that it doesn’t keep items as organized and it can be more difficult to access those items.  Additionally, the hip pack, by itself, usually does not have the capacity to carry larger items like a rain jacket or lunch.  However, a hip pack does wear comfortably with an additional backpack. Many will use the hip pack alone when fishing closer to the car and add a backpack when fishing in the backcountry. Finally, these are not the best option for someone who does a lot of deep wading.  Although, there are a lot of waterproof options now.

Chest Packs: These, as the name implies, are designed to be worn on the chest and come in a number of sizes.  They organize things in much the same way a hip pack does but keep things far more accessible on your chest and high out of the water.  Many will have a D-ring on the rear of the neck strap for carrying a net. I would include a chest fly box (like I use) in the same category as a chest pack, except that there is no need for separate fly boxes.

Chest Fly Box

Some don’t like having a cumbersome item on their chest and some of the larger chest packs can be quite cumbersome.  Smaller chest packs are very comfortable but don’t carry as much stuff.  In either case, you won’t have enough capacity to carry large items but like a hip pack, you can easily wear a backpack with your chest pack to carry more things when travelling far from the car.  Some companies even make “fishing backpacks” designed in such a way that a compatible chest pack can clip to the front of it.

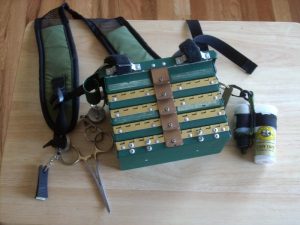
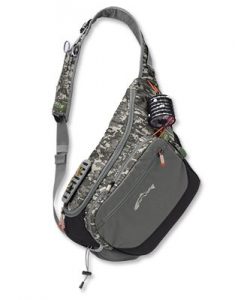
Sling Packs: These are the latest trend in fishing packs and are designed to be more accessible than a hip pack and more out of the way than a chest pack.  They are worn diagonally across your body so that they can be easily “slung” around to your front when you need to get to it.  It can then be “slung” around and secured out of the way on your back when you’re fishing.  They come in small and large sizes depending on how much you need to carry.

These packs are well designed and very comfortable but even the big ones don’t have enough capacity to carry everything you might want to take on a trip deep into the backcountry. On such a trip, I typically carry a rain jacket, lunch, first-aid kit and plenty of water.  I also regularly carry my wading boots in on long hikes. You need a backpack to carry those items and a sling bag just can’t be worn and utilized with a backpack.  The other downside to a sling bag is there just doesn’t seem to be a good place to carry a net (if needed) without it getting in the way.

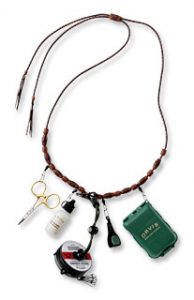
Lanyard: A fishing lanyard is basically a necklace for carrying your essentials around your neck.  Most will comfortably carry and organize nippers, forceps, tippet, floatant and small fly box.  By itself, this is for the absolute minimalist.  For others, it may be a way to keep essential, frequently used items immediately accessible while carrying other less frequently used items in a hip pack or backpack.

The downside is fairly obvious with a lanyard.  It has almost zero capacity.  There is no place for rain jacket, lunch, water, camera, leaders, multiple fly boxes, etc.  In my opinion, the only reasonable use for a lanyard would be in a boat or in conjunction with another pack as mentioned above.

Flies: Tellico Nymph

My friend Walter Babb said that most people’s favorite fly is the fly they happened to have on the first day the fishing was really good.  The implication of his statement is that more often than not, it’s the archer, not the arrow.  Most of the time, if your fly is presented well and the fish are feeding, it probably doesn’t matter what fly you have on.  And if the fish aren’t feeding?  It probably doesn’t matter what fly you have on!

But since you happened to have that fly on the first day the fishing was good, you have confidence in it.  Now it’s the first fly you put on and you leave it on longer.  I have countless fly patterns that I abandoned because they didn’t catch fish the first time I tried them, but often that first time was after I tried everything else.  Nothing was working that day!

With all of that said, I have, by far, caught more big brown trout in the Smokies on a Tellico Nymph than any other fly.  But, you guessed it… the first big brown trout I caught in the Smokies was on a Tellico Nymph.  I have confidence in it.  And since most of the big browns I’ve taken over the years were either spotted first or caught during “favorable brown trout conditions,” I’d put a Tellico on in anticipation.  So, it’s a bit deceiving.  Who is to say I wouldn’t have caught those fish on a Prince Nymph had I chosen to tie one on?

Nevertheless, the Tellico Nymph is a good fly and it’s been around a long time.  Its exact origins are unclear, though it was thought to have, obviously, been initially created and fished on the Tellico River in East Tennessee.  It has definitely been around since the 1940’s, but some estimate that it may date back to the turn of the 20thcentury.  In any case, it has to be the most well known fly from this region and it has accounted for fish all over the world.

In addition to its origin, there seems to be some confusion as to what the fly was originally supposed to imitate.  Many contend that it represents a caddis larva.  Others are just as certain it is supposed to be a mayfly nymph.  To me, there is absolutely no doubt that it was intended to represent a golden stonefly nymph.  The coloration and size are consistent with that of a golden stone, and the Tellico River has long been known for its abundance of these nymphs.

As with any popular fly that has been around for this long, there have been a number of variations on the pattern over the years.  My personal favorite was devised by East Tennessee fly tyer, Rick Blackburn. I tie most in size #10.

Blackburn’s Tellico

Hook: 3XL nymph hook #12 – 6
Thread: Dark brown 6/0
Weight: .015 to .035 lead wire (depending on hook size)
Tail: Mink fibers (I often use moose as a substitute)
Rib: Gold wire and 2-3 strands of peacock herl
Wing Case: Section of turkey tail – lacquered
Body: Wapsi Stonefly Gold Life Cycle dubbing
Hackle: Brown Chinese neck hackle, palmered through thorax

Spotting Fish

A 14″ rainbow feeding in flat, shallow water

In some fly fishing scenarios, spotting fish is absolutely critical for success.  Fishing the saltwater flats for bonefish, redfish, tarpon, etc. or the freshwater mud flats for carp will provide little more than casting practice if you can’t see the fish.  In other scenarios, such as fishing a mountain trout stream, you can tell where fish should be by reading the water, and you can catch a lot of fish just by fishing likely spots.  But even when fishing trout streams, the ability to spot fish in the water can sometimes allow you to locate and target larger fish.  In the fall, this is particularly relevant in the Smokies as large brown trout begin moving into flatter, shallower water preparing to spawn.

Spotting fish can be difficult to learn and there is no substitute for years of experience and practice, but there are a few things that can help you get started.  The best place to start is with a pair of polarized sunglasses and this article will help a little when choosing a pair.  The next thing to understand is how trout see, because as you seek out vantage points from which to spot fish, you want to avoid spooking the fish in the process.  Here is an article on trout behavior that goes into a little more detail. Now we’re ready to go spot some fish.

Start by looking for fish in slower water.  The more broken the surface is, the more difficult it will be to see through it. If possible, try to find a higher vantage point from which to look.  This will greatly reduce the amount of light refraction from the water’s surface.  Just remember that the higher up you get, the easier it will be for fish to pick up your movement.  Avoid standing erect on a large boulder, as your silhouette will be far more pronounced.  A high bank with a wooded backdrop is ideal, but you’ll still want to keep your movements slow and minimal.  If you are on a large rock above a pool, get on your belly and peek over the edge. Remember the old westerns where the Indians were looking off the rocky bluffs about to attack the wagon train? That’s the idea.

Now that you’re in position, take your time.  It’s extremely rare that you’re going to step up to a pool and immediately see a 27” brown trout.  You have to methodically scan the pool.  Start by reading the water and looking for fish where they should be.  Look for obvious feeding areas in and around current lanes and foam lines.  Look for areas with obvious cover under and around big rocks and/or fallen trees.  They blend in REALLY well, so look long and hard and train your eye to look through the water rather than at it.

It’s hard.  You’ll spot plenty of fish that turn out to be rocks or pieces of wood.  I once spent 15 minutes casting to a plastic grocery bag hung on an underwater limb. It had the exact shape and movement of a trout!  I was in the water and my buddy was above me, watching from a bridge.  We were both certain it was a fish!

There are four trout in this photo. Can you see them?

Movement and shape really are the best giveaways and that’s why it’s so important to take your time and give long looks to those likely spots.  You may not see anything at first, then you see a little movement and suddenly the fish is visible.  And once you spot one, you often begin to notice others around him.  Watching the actual stream bottom, especially on sunnier days, can be helpful too.  The movement that you often detect is the shadow of the fish.

Another thing to look for is a flash near the stream bottom.  The eyes of a trout are positioned in such a way that they look slightly upward.  When feeding on nymphs on the bottom, the trout has to angle his body to see below and will often “twist” his body when he eats the nymph.  When this occurs, his white belly reflects light and produces a flash.  This is always helpful when looking for fish, but especially in faster water.

All of this is easier the more familiar you are with the stream bottom.  If you have a favorite pool, maybe one where you spooked a big fish before, keep going back there and looking.  You will inevitably begin memorizing the stream bottom and will more quickly and easily be able to differentiate between rocks and fish. Again, it’s not easy and it takes time but like most things, the more you practice, the better you’ll get.

So, you’re starting to spot some fish… now what?  Don’t just jump in and start casting the second you see a nice one.  Keep watching.  What is the fish doing?  If you see a big fish just hugging the bottom, he’s not feeding and you’re wasting your time casting to him.  But good news… you found a big fish.  You might come back closer to dawn or dusk when he is more likely to be feeding.

This 22″ brown was spotted and observed for nearly 15 minutes before approach

If you spot a fish up in the water column, he’s likely feeding.  Keep watching him.  Is he looking up?  Does he consistently feed to his right?  Is he staying in one place or is he systematically rotating to different locations within the pool?  Pay attention to all of these things and then you can plan your attack.  Sometimes with big fish, you’re only going to get one shot and you want to make it count.

How much time you spend looking depends on you.  I know guys that do little more than target big brown trout, and they spend far more time watching water than they do fishing.  For me, it depends on where I’m fishing and the conditions.  If I’m fishing pocket water on a high country brook trout stream, I’m not going to spend much time, if any, looking for big fish. I’m going to cover a lot of water and hit the likely spots.  If I’m fishing a big pool on a brown trout river, I’m going to spend at least a few minutes looking before I jump in.  If I’m fishing that same big pool in late fall, I’m going to look a lot more thoroughly!

How Stuff Works – Floatants

One of the worst things you can do to a dry fly is catch a fish on it!  They slime it and submerge it and swim it around… Just in general, keeping a dry fly floating better and longer seems to be an ongoing quest for many fly tyers and fishers.

There are a number of factors that can go into how well and how long a dry fly continues to float high. Certainly the materials from which the fly is tied will play a big role, as will the skill of the angler.  The more you allow your fly to drag across currents, rather than drift on them, the more waterlogged your fly will become. Where you are fishing will make a difference, too.  It’s easier to keep a fly floating high in big, open rivers where false casting is an option than it is in a small, tight mountain stream.  In any case, there are an endless number of products on the market that are designed to help with this task and we lump them all into the category of “floatants.”

As with many products in the fly fishing world, if you ask ten different anglers which one is the best, it’s entirely possible that you will get ten different answers. Sometimes those answers will come in the form of a specific brand of floatant, and others will come in the form of a specific style.  When it comes to brand, I believe that is a matter of personal preference and you’ll just have to try a few different ones to see if one in particular earns your loyalty.  But when it comes to different styles of floatant, the specific task at hand may determine which will be best.  In fact, you may want to have more than one style of floatant to perform different tasks. Listed below are a few different common styles of floatant and a description of how and when they might best be applied.

Liquid Floatants
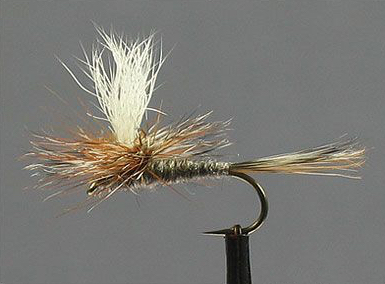
While many anglers use them in different ways, liquid floatants are probably most useful before you ever get to the stream.  Whether dry flies that you tie yourself or buy from a shop, you can use a liquid style floatant to “pre-treat” new flies in much the same way as you might “Scotchgard” your sofa.  Exact application may vary and you should read the recommendations for the specific brand you purchase, but typically, flies will be soaked in the liquid for five minutes or so and then set out to dry overnight.  In theory, after application of the product, water will better bead and roll of the fly material rather than absorb into it.

Gel Floatants
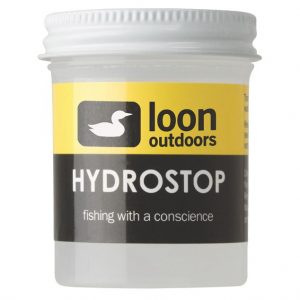
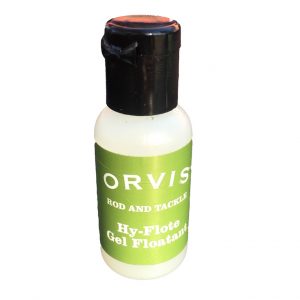
Gel floatants are probably the most common and popular style of floatant.  They come in a small, very portable bottle and, like the liquid floatants, are designed to be a pre-treatment to an already dry fly.  The big difference is gel floatants are designed to be used streamside, immediately before fishing the fly.

It is important that gels are not “over applied.”  A small amount should be rubbed into the fly and any excess should be removed.  Gels are also frequently mis-applied – after a fly has already become waterlogged.  If a fly is already saturated, applying a gel floatant will essentially trap moisture into the fly and make it worse.


Spray Floatants
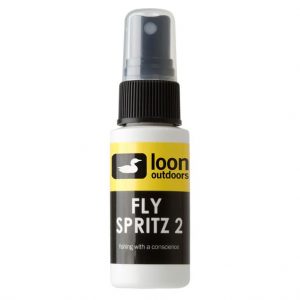
Also normally applied while the fly is still dry, spray floatants are basically just a variation on a gel floatant.  Spray floatants come in a bottle with a pump top and are applied much like you would spray something like an eyeglass cleaner.  They are not as messy as the gel but are sometimes more challenging to completey coat the fly.


Paste Floatants
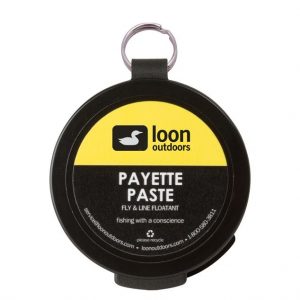
These are basically just a thicker version of a gel floatant.  They can really create a mess on smaller dry flies and are probably best suited for larger dries like hoppers and stoneflies.  A lot of people prefer a paste floatant to apply to yarn strike indicators or even on a leader to keep it floating better.


Powder Floatants
These are used less as a pre-treatment and more as a means to revive a saturated fly.  As mentioned above, when a dry fly becomes oversaturated and begins to sink, applying a gel or spray can often make it worse by trapping moisture in.  Powder floatants are used to absorb and remove that moisture from a fly.

Typically they will come in a bottle with a wide, flip-top lid.  The fly, still attached to the tippet, is inserted into the bottle and the lid is closed.  The bottle is then shaken a few times and the moisture is removed from the fly.

At this point, there is a lot of debate on whether to re-apply a gel or spray type floatant and you’ll just have to find what works best for you.  I usually don’t re-apply another floatant unless I’m using a synthetic (like foam) dry fly.

Brush Floatants
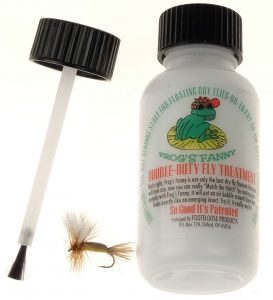
Brush floatants are essentially another version of a powder floatant.  Rather than shaking the fly inside the bottle, a small brush is used to apply the powder to the fly.  Again, it’s personal preference but with brush floatants, be prepared for a little frustration on windy days!


There are countless styles and floatants on the market today and all have their place.  And unlike the homemade lighter fluid and paraffin concoctions of days gone by, they are typically odorless and environmentally friendly.  You just need to find a system that suits your needs.

Personally, I carry a gel floatant for pre-treating dry flies and a “shake style” powder for reviving them and get by just fine.  But I offer the disclaimer that I often offer in these newsletter articles… This is just one man’s opinion!

How Stuff Works: Forceps

In the world of fly fishing, there is an endless array of gadgets designed to serve every purpose from threading a fly, to removing a fly from a tree, to tying knots… If you have any task to perform in fly fishing that you find the least bit frustrating or unpleasant, chances are someone has invented a gadget to make it easier.  But I’ve never been much of a gadget guy and I try to keep the number of items I carry on the stream to a minimum.

It’s funny how different folks have different priorities when it comes to what they carry with them.  For instance, I never go into the backcountry without a daypack that includes a first-aid kit and the basic necessities (fire source, water purification, etc.) to spend the night if I have to.  While 99.9% of backcountry fishing trips go off without a hitch, there are a number of things that could go wrong, and I like to be prepared for the unexpected.  I was taught long ago that there is a name for people who go into the woods unprepared: “Statistics.”  Yet, I regularly encounter fishermen deep in the backcountry with no such provisions, but they will have fifteen different knot tying tools hanging from their vest!

I’ve taken a really long way around the barn to say that there are only two fishing “tools” that I routinely carry with me when I’m fishing: nippers and forceps.  I’ve talked about nippers in another article.  They are responsible for most of the work I’m doing with my line.  Forceps handle pretty much everything else.

If you get in certain circles, mainly the medical community, someone might correct you and say, “Those aren’t forceps.  They’re hemostats.”  Another might refer to them as clamps.  Maybe there are subtle differences in the three – I don’t know.  But in fly fishing, the three terms are interchangeable and refer to a tool that looks kind of like a pair of scissors but with a nose more like a pair of pliers.  While they come in slightly different shapes and sizes, most are fairly long and narrow and have a locking feature.

Forceps have a number of different uses but I mostly use them to perform three common tasks.  If I need to crimp the barb on a hook, whether required by law or simply preferred, I use my forceps.  If I need to squeeze a split shot on a leader, I use my forceps.  And if I happen to hook a fish a little deeper in the mouth and the fly is difficult to reach without harming the fish, I use my forceps.

The locking feature is most often used for hook extraction.  I clamp the forceps on the hook and carefully remove it from the mouth of the fish.  I also use the locking feature to clamp the forceps to my pack or shirt when they’re not in use.  For these reasons, I greatly prefer a pair of locking forceps to pliers.

Common “Medical Forceps”

I also prefer to have forceps with flat jaws.  Many forceps that might be offered to you by your friend who works in the ER will have grooved jaws.  Those grooved jaws are great for many of the intended tasks in medical applications, but they can be a hindrance when trying to crimp the barb on a hook.  Trout hooks are often so little that they work themselves into those grooves making it difficult to meet the barb with enough metal to flatten it.

The other downside to forceps that are made for the medical community is quality.  I know, it seems strange that a fly fisherman’s forceps would be superior quality to a doctor’s.  But medical forceps are often designed to be “single use,” so the metal used to construct them is inferior.  They bend and rust easily.  Forceps built for fly fishing are usually made of high quality stainless steel and built to last.  And assuming you don’t lose them, they should last forever.

Beyond that, the only real differences in fly fishing forceps are shape, color, and features.  Some are designed with a variety of add-ons, such as scissor blades, which would be great for anglers who might use yarn for strike indicators.  Color is sort of personal preference but there are also practical considerations.

Trout Skin Forceps

When fishing for spookier trout like those in the Smokies, I prefer not to have the bright silver or gold forceps because I think they “flash” too much when the sun hits them, potentially spooking trout.  But flat black ones are sometimes difficult to locate when you inevitably drop them in the water.  I’m a fan of the the “trout skin” colored forceps.  Not only are the cool looking, but they’re dull enough not to reflect much light, yet light enough to see in the water.

As always, a lot of it boils down to how you’re going to carry them, what they will be used for and your own personal preference for appearance. In any case, pick up a pair if you don’t have some already.  You’ll use them a lot.