How Stuff Works – Floatants

One of the worst things you can do to a dry fly is catch a fish on it!  They slime it and submerge it and swim it around… Just in general, keeping a dry fly floating better and longer seems to be an ongoing quest for many fly tyers and fishers.

There are a number of factors that can go into how well and how long a dry fly continues to float high. Certainly the materials from which the fly is tied will play a big role, as will the skill of the angler.  The more you allow your fly to drag across currents, rather than drift on them, the more waterlogged your fly will become. Where you are fishing will make a difference, too.  It’s easier to keep a fly floating high in big, open rivers where false casting is an option than it is in a small, tight mountain stream.  In any case, there are an endless number of products on the market that are designed to help with this task and we lump them all into the category of “floatants.”

As with many products in the fly fishing world, if you ask ten different anglers which one is the best, it’s entirely possible that you will get ten different answers. Sometimes those answers will come in the form of a specific brand of floatant, and others will come in the form of a specific style.  When it comes to brand, I believe that is a matter of personal preference and you’ll just have to try a few different ones to see if one in particular earns your loyalty.  But when it comes to different styles of floatant, the specific task at hand may determine which will be best.  In fact, you may want to have more than one style of floatant to perform different tasks. Listed below are a few different common styles of floatant and a description of how and when they might best be applied.

Liquid Floatants
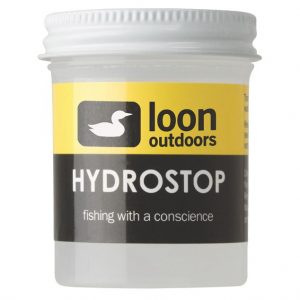
While many anglers use them in different ways, liquid floatants are probably most useful before you ever get to the stream.  Whether dry flies that you tie yourself or buy from a shop, you can use a liquid style floatant to “pre-treat” new flies in much the same way as you might “Scotchgard” your sofa.  Exact application may vary and you should read the recommendations for the specific brand you purchase, but typically, flies will be soaked in the liquid for five minutes or so and then set out to dry overnight.  In theory, after application of the product, water will better bead and roll of the fly material rather than absorb into it.

Gel Floatants
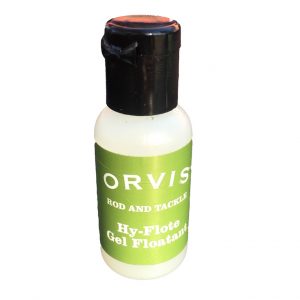
Gel floatants are probably the most common and popular style of floatant.  They come in a small, very portable bottle and, like the liquid floatants, are designed to be a pre-treatment to an already dry fly.  The big difference is gel floatants are designed to be used streamside, immediately before fishing the fly.

It is important that gels are not “over applied.”  A small amount should be rubbed into the fly and any excess should be removed.  Gels are also frequently mis-applied – after a fly has already become waterlogged.  If a fly is already saturated, applying a gel floatant will essentially trap moisture into the fly and make it worse.


Spray Floatants
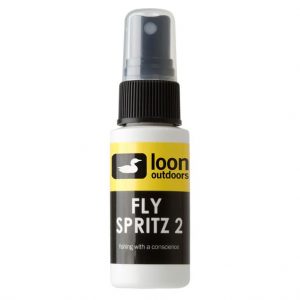
Also normally applied while the fly is still dry, spray floatants are basically just a variation on a gel floatant.  Spray floatants come in a bottle with a pump top and are applied much like you would spray something like an eyeglass cleaner.  They are not as messy as the gel but are sometimes more challenging to completey coat the fly.


Paste Floatants
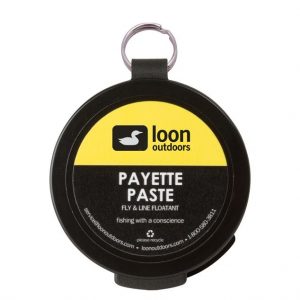
These are basically just a thicker version of a gel floatant.  They can really create a mess on smaller dry flies and are probably best suited for larger dries like hoppers and stoneflies.  A lot of people prefer a paste floatant to apply to yarn strike indicators or even on a leader to keep it floating better.


Powder Floatants
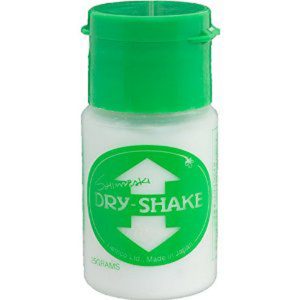
These are used less as a pre-treatment and more as a means to revive a saturated fly.  As mentioned above, when a dry fly becomes oversaturated and begins to sink, applying a gel or spray can often make it worse by trapping moisture in.  Powder floatants are used to absorb and remove that moisture from a fly.

Typically they will come in a bottle with a wide, flip-top lid.  The fly, still attached to the tippet, is inserted into the bottle and the lid is closed.  The bottle is then shaken a few times and the moisture is removed from the fly.

At this point, there is a lot of debate on whether to re-apply a gel or spray type floatant and you’ll just have to find what works best for you.  I usually don’t re-apply another floatant unless I’m using a synthetic (like foam) dry fly.

Brush Floatants
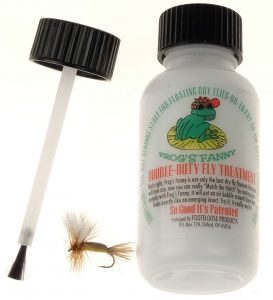
Brush floatants are essentially another version of a powder floatant.  Rather than shaking the fly inside the bottle, a small brush is used to apply the powder to the fly.  Again, it’s personal preference but with brush floatants, be prepared for a little frustration on windy days!


There are countless styles and floatants on the market today and all have their place.  And unlike the homemade lighter fluid and paraffin concoctions of days gone by, they are typically odorless and environmentally friendly.  You just need to find a system that suits your needs.

Personally, I carry a gel floatant for pre-treating dry flies and a “shake style” powder for reviving them and get by just fine.  But I offer the disclaimer that I often offer in these newsletter articles… This is just one man’s opinion!
Flies: Parachute Adams

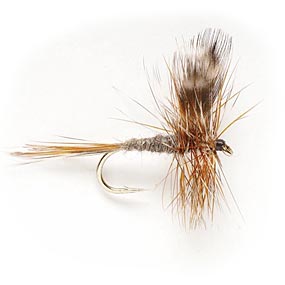
I was shocked when I realized that I had never included an article about the Parachute Adams in this newsletter.  Not only is it one of the best dry flies in the Smoky Mountains, it is arguably the best dry fly for trout in the world.  It doesn’t imitate anything in particular but just has a buggy look and serves as a great “generic” mayfly imitation.  In a pinch, it could also pass for a number of caddis and midges.

Traditional “Catskill style) Adams dry fly

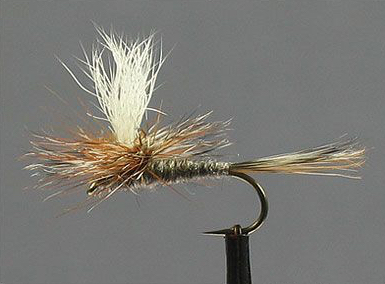
It is derived from the original Adams dry fly.  A parachute pattern is merely a method of tying a dry fly.  While traditional mayfly patterns had two upright and divided wings, with a hackle wound around the hook vertically; a parachute pattern has a single post with the hackle wound horizontally around that post.  The post is typically white or some other bright color like pink or orange, allowing the angler to better see the fly on the water.  Additionally, with a hackle wound horizontally around the post, the fly rides flatter on the water with a more realistic profile.

The original fly has been around for nearly 100 years.  In 1922, Leonard Halladay, a Michigan fly tyer conceived the Adams as a general mayfly imitation. It was first fished by an Ohio attorney and friend of Halladay, Charles F. Adams on the Boardman River near Traverse City, Michigan. Charles Adams reported his success with the fly to Halladay who decided to name the fly after his friend.  While it is unclear exactly when the Adams got the “parachute treatment,” parachute style flies began gaining popularity in the U.S. in 1971 when Swisher and Richards published the book, Selective Trout, and advocated the advantage of dry flies that rode flush on the water.  One would assume that the parachute version of the Adams was born somewhere in that timeframe.

Since then, it has seen numerous  variations in the body color, post material, post color and more.  While many of these variations have been highly successful, it’s still tough to beat the traditional pattern.  The recipe for that traditional version is included below.

Parachute Adams

Hook: TMC 100 (or equivalent) sizes #10 – #26
Thread: 8/0 black
Tail: Even mix of brown and grizzly hackle fibers
Body: Natural muskrat fur (or and modern dry fly dubbing in Adams Grey)
Post: White calf hair (synthetics such as floating poly yarn also work well)
Hackle: One grizzly and one brown rooster hackle, sized to match hook

How Stuff Works: Fly Boxes

I’m a bit of an oddball. This is not exactly breaking news for most folks who know me.  But to paraphrase John Gierach, “If, from time to time, people don’t walk away from you shaking their head… You’re doing something wrong.”  I could certainly dedicate an entire article, or even a book, to my oddball qualities, but for this article, I am referring to one specific oddball quality.  I fish and guide with a set-up that combines a pack and fly boxes all in one contraption. You’ve seen it.  It’s my chest fly box, custom built by the Richardson Chest Fly Box Company in Pennsylvania.  It’s awesome and I love it.
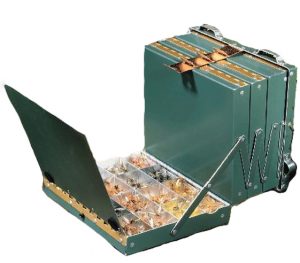
Chest Fly Box

So, that makes it a little more challenging for me to give advice on individual fly boxes.  But I have over the years used about every kind of box and pack known to man.  And along the way I have learned a few things that may be helpful to you when purchasing or organizing your flies.  At the least, it might get you thinking about it.  And who knows?  Maybe one day you’ll come to your senses and buy a Richardson!

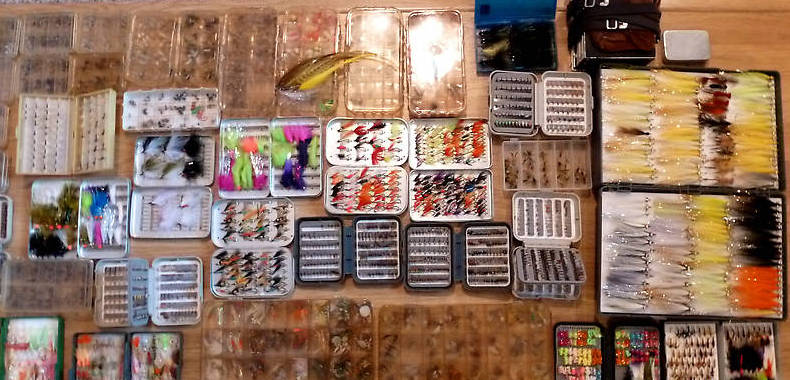
While chest fly boxes like mine are more common in the Northeast, they are hardly common.  Most folks go a different route.  They have a variety of different fly boxes that they stuff in a vest, hip pack, chest pack, sling bag, or some other carryall.  No matter how you decide to carry them, fly boxes are essential organizational tools in our sport and it helps to know a few things about them.

Medium Box with Foam

They come in a number of different sizes, from large, briefcase size boxes for boats to ultra slim boxes not much bigger than a smartphone.  When choosing a fly box size, you have to consider how many flies you need to carry, how you’re going to carry them, how big the flies are, and how you want to organize them.  For instance, a big, briefcase size box may hold every fly you have but it won’t be very portable when wading creeks.  Or a small, ultra slim box might be convenient to slip in a pocket, but if you plan to store bass bugs in it, you’ll only be able to carry a couple and you won’t be able to close the lid.

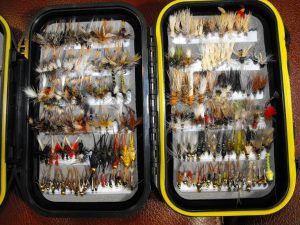
In addition, you’ll have to consider how you want to organize your flies within your box. There are countless options for securing your flies from slot foam, flat foam, and nubby foam to compartments, clips, and magnets.  Some boxes might even have a combination of both, with a type of foam on one side of the box and compartments on the other.  Certainly personal preference plays a big role in you box interior of choice, but there are practical matters to consider as well.

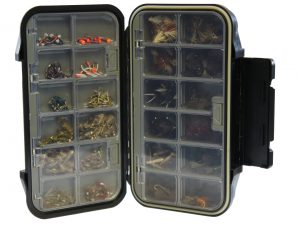
Compartment Box

Compartments tend to lend themselves well to beefier patterns, or large quantities of the same fly. For instance, if you fish a lot of Pheasant Tails and carry a lot of them with you, it’s far easier to dump them all into one compartment rather than trying to line up three dozen Pheasant Tails across multiple rows of foam.  I find foam more useful when I am trying to organize a lot of different patterns but small quantities of each.  It’s easier to see what I have.

Ultra Thin Magnetic Compartments

The type of fly may also determine the best way to store it.  Thin foam or magnetic boxes can be great for midges and nymphs but can crush the hackles on many dry flies.  On the other hand, trying to carry midges in deep compartments can not only be a waste of space, it can be difficult to grasp them with your fingers when removing them from the box.

Finally, when you’re on the stream, you don’t want to spend your time hunting for flies or digging through your pack for fly boxes.  Try to have a designated area of your pack or vest for boxes rather than burying them under a rain jacket somewhere.  And if you carry five fly boxes on the stream, try to make them five different, or at least different looking, fly boxes.  This will save you all kinds of time when trying to locate a specific box of flies.

Flies: Stimulator

When it comes to fishing dry flies in the Smokies, particularly on the smaller streams, I am typically looking for two primary things in a pattern: It needs to be visible and it needs to be buoyant.  Beyond that I can begin focusing on a few more details like color and size.

In general, trout in the Smokies don’t see heavy hatches of individual insects.  Rather, they mostly see small quantities of a lot of different insects.  So, if you can present the fly naturally and without spooking fish, most any all-purpose, “prospecting” fly pattern will do the trick.  As mentioned above, if you can get a little more precise with size and color, your pattern will be that much more effective.

Matching size will require more observation of bugs on the water or simply having general knowledge of what should be hatching.  The same two things can help with matching color but also having broad knowledge of how seasons impact color can put you ahead of the curve. With some exceptions, aquatic insects tend to blend in with their surroundings.  So, in winter months when trees are bare, most of what hatches is dark. As foliage comes in, most of what hatches is brighter.

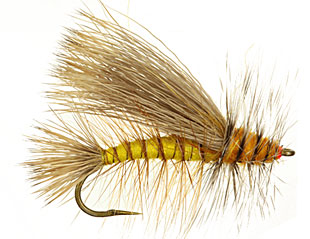
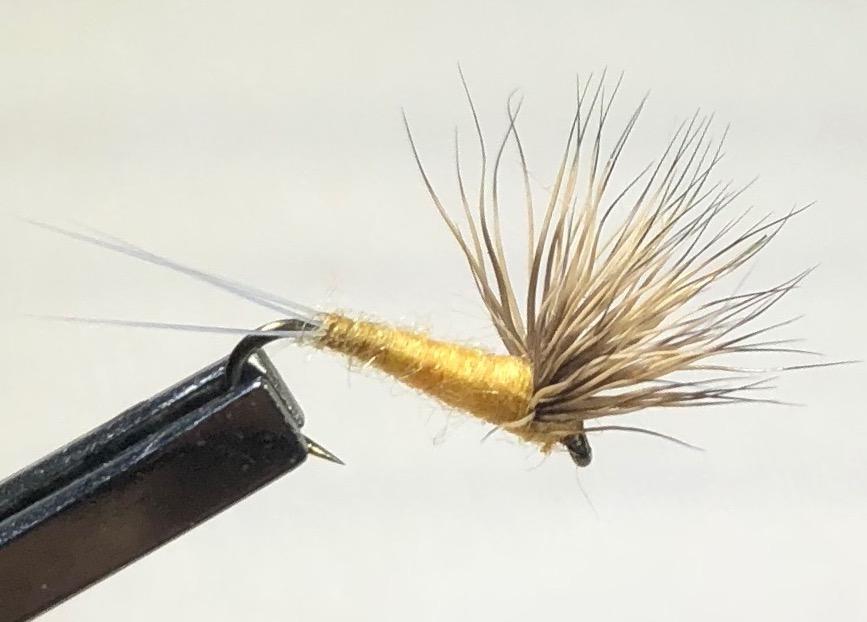
The Stimulator has long been a favorite fly pattern of Smoky Mountain anglers for all of the reasons mentioned above.  Its buoyancy and light colored wing not only make it easy to see, but make it a perfect “indicator fly” when fishing a dropper.  And if you mix and match sizes and colors, you could nearly fish a Stimulator 12 months out of the year!

The Stimulator was long thought to be the invention of well-known West Coast angler and fly shop owner, Randall Kaufmann.  While Kaufmann is responsible for the modifications that made the fly most of us know today, the fly’s true originator is thought to be Paul Slattery, who tied a stonefly pattern called the Fluttering Stonefly to fish on the Musconetcong River in central New Jersey.  This was in the early 1980’s and he soon renamed the fly after a New York City punk-rock band called The Stimulators.
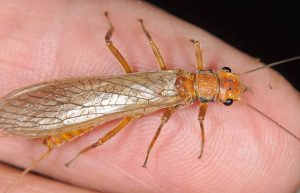
Golden Stonefly

In any case, the fly seems to have been created to imitate an adult stonefly, but it is also a good suggestion of a caddis and sometimes even a hopper.  I most often fish it in yellow and in sizes #16 – 8.  I think the smaller size makes a great imitation for the prolific Little Yellow Sally Stoneflies, and the larger sizes are good representations of the larger golden stones that hatch on summer evenings in the mountains.  In the fall, I often fish a #10 Stimulator in orange to imitate the large ginger caddis.

Whether it is imitating anything or not, it catches fish and it floats well in heavier pocket water found throughout the mountains.  It is one of the most popular dry flies ever invented for trout and can be found in most every fly shop in the country.

Yellow Stimulator
Hook: Daiichi 1270 #16 – #10
Thread: 8/0 orange
Tail: Stacked elk hair
Abdomen: Yellow floss
Abdomen Hackle: Brown rooster neck – palmered
Wing: Stacked elk hair
Thorax: Bright orange dubbing
Thorax Hackle: Grizzly rooster neck – palmered

Learn more about Southern Appalachian fly patterns and hatches in my Hatch Guide.

Flies: Sulphur Comparadun

In the Smokies, we are mainly fishing faster, choppier water and often choose bushier, more heavily hackled dry fly patterns that float well.  In that kind of water, trout don’t get much time to study the fly and their view tends to be distorted by those choppy currents, so the bushier flies tend to do the trick.  Even when fishing pools in the Smokies, you usually have a defined feeding channel that will have at least a little chop to it.  In those situations, a parachute style fly pattern is usally adequate to provide a slightly more realistic profile.
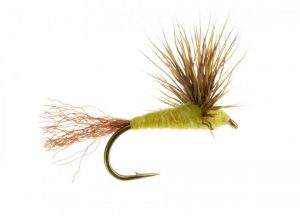
But in flatter water like you commonly see on tailwaters like the Clinch, particularly weeks into a heavy hatch, an even more realistic profile is necessary.  Trout routinely refuse parachute style flies and probably wouldn’t even consider a vertically hackled Catskill style dry fly.

This problem isn’t new to fly fishers.  In the 1930’s, Fran Betters developed the Haystack to fool trout in slow moving spring creeks.  It consisted of a deer hair wing and tail and no hackle, allowing for a lower riding fly with a much more realistic profile.  Al Caucci and Ed Natasi introduced the Comparadun, a variation of the Haystack, in their 1972 book, Comparahatch.  The pattern is essentially the same but they were able to use more modern microfibbets to create a longer, slimmer, more durable split tail that aided in floatation.

In the mid 1980’s, Craig Matthews and John Juracek took the Comparadun a step further and replaced the split microfibbet tails with a piece of antron or zelon.  It essentially turned the fly into an emerger, with the antron or zelon “tail” suggesting the trailing shuck of an emerging mayfly.  Of course, in any of the patterns described above, the body, wing, and tail/shuck colors can be altered to imitate different insects.
I routinely fish the split tail and the trailing shuck versions, usually during a sulphur or BWO hatch.  And again, I am usually fishing them on the Clinch or possibly in a slow pool in the mountains.  They just don’t float well enough to fish them in faster riffles and pocket water. But on a slow glide on the Clinch, they can be deadly!

Sulphur Comparadun

Hook: TMC 100 (or equivalent) #16-18
Thread: 8/0 pale yellow
Tail: Light dun microfibbets ( or replace microfibbets with small tuft of brown antron for trailing shuck version)
Body: Pale yellow dry fly dubbing
Wing: Coasatal deer hair

Flies: March Browns

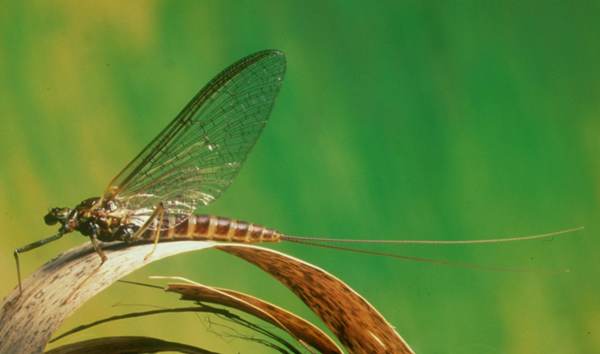
So, I’m writing about March Browns not because they are necessarily of great significance to the Smoky Mountain fly fisherman, but mainly because they’re just really cool bugs! Like many aquatic insects in the Smokies, this mayfly does not usually hatch abundantly enough to really get the trout keyed in on them, but it is worth keeping a few in your fly box. In other words, you probably don’t need fifteen different March Brown patterns in subtly different colors. Having a few of a basic pattern should do the trick.
March Brown Dry Fly

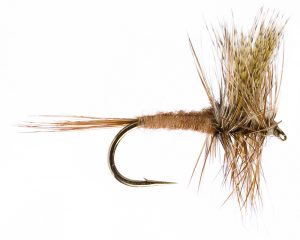
March Browns are big, usually a #12 or #10 hook size, and they tend to be the first mayfly of the year with any color. Most of your early spring mayflies are some version of grey, but March Browns usually have a light, reddish brown body with handsomely mottled wings of brown, tan and even yellow hues. Contrary to what their name might imply, these mayflies don’t hatch in March. Rather, they tend to show up, at least in the Smokies, around the third week of April and hang around for the first half of May.

March Brown Nymph

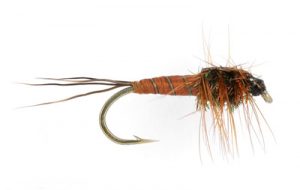
The nymphs are probably the most important stage for Smoky Mountain fishermen. While they have flat clingy bodies with muscular legs, making them very strong crawlers, when they lose their footing, they are terrible swimmers and easy pickins for a waiting trout. The nymphs tend to inhabit moderate to fast riffles and vary in color from tan to reddish brown to dark brown. A Hare’s Ear Nymph or Pheasant Tail Nymph are good generic imitations. I’ve also included one of my favorite patterns designed to specifically imitate a March Brown nymph.

Nymphing these patterns should be fairly effective all day but particularly early in the morning. Expect to see the adults hatching from late morning to early afternoon with a spinner fall near dusk.

Learn more about Smoky Mountain hatches and flies in my hatch guide.

March Brown Dry
Hook: #12 – #10 TMC 100 or equivalent
Thread: Brown 8/0
Tail: Brown hackle fibers
Body: Reddish tan dubbing (many companies sell a color called March Brown)
Wing: Wood Duck
Hackle: Brown and Grizzly

March Brown Nymph
Hook: #12 TMC 3761 or equivalent
Thread: Brown 8/0
Tail: Moose fibers
Abdomen: Rusty red floss
Rib: Stripped peacock stem
Wincase: Lacquered turkey
Thorax: Peacock herl
Legs: Brown hackle

Matching the Hatch

Probably 20 years ago, I was fishing the Clinch River with a buddy during the sulfur hatch. I won’t get into what has happened to that hatch, but back then, it was epic. Sulfurs would come off by the thousands for 4-6 hours a day for about 3 months. We would drive down from Kentucky to fish it and on most trips, we would both steadily catch fish, many topping 20”.
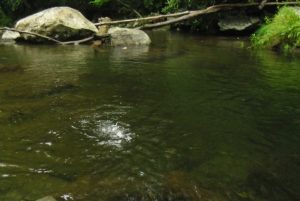
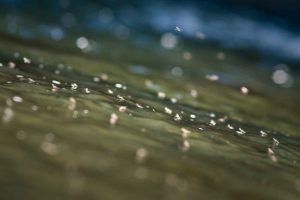
On this particular trip, the bugs were coming off as good as they ever had, the water was boiling with rises, but we were both getting blanked! We were both going through every type of sulfur dry, emerger, and nymph in the box, all with the same result. Frustration got the best of both of us and we headed to the bank for a smoke, a bad habit we both enjoyed back then. While staring at the river and scratching our heads, it hit us both at the same time as we simultaneously exclaimed, “They’re eating caddis!”

Caddisflies tend to emerge quickly and almost explode off the water. When a trout feeds on one, it will frequently chase it to the top to eat it before it gets away. Sometimes the momentum will cause the fish to come completely out of the water, but at the least, results in a very distinct, splashy rise – not like the delicate sipping rise to a mayfly. Once we stepped away from the river and watched, we both noticed it.

We went back to the water and began looking more closely. Sure enough, there were caddis hatching, too. There was probably one caddis hatching for every 100 sulfurs, but for whatever reason, the trout were keyed in on the caddis. It’s what is referred to as a “masking hatch.” We both switched to the appropriate caddis pattern and were immediately into fish!

That’s not the only time something like that has happened, and each occurrence has trained me to always pay attention and sometimes try to look past the obvious. Here are a few things I’ve learned along the way that may help you solve a hatch riddle sometime.

First, we have to address the basics. If you see fish rising and have a pretty good idea what they’re eating but you’re fly is being ignored, check to see that your fly is the same size as the naturals. Also be certain that your tippet is not too large and that you’re getting a good drift. Presentation is most often the culprit when your fly is being ignored. Next, make certain that the color is a close match to the natural. If you’re fishing a bushy pattern, you might try a more subtle pattern like a Comparadun. If that’s not working, try an emerger fished just under the surface or in the film.

Fish Rise

Still not catching them? Take a break and watch the water. You may be able to tell something from the rise rings as I described above. If you don’t learn anything from that, try to find a fish that is rising steadily and watch him. He’s probably feeding in rhythm, like every 10 seconds. Watch his spot and try to time his rises. When you have that down pretty close, try to see what he eats. You should be able to tell if it’s the same kind of bug you’re seeing in the air, or at the very least, whether he’s eating something on or just below the surface. It’s almost like detective work. You sometimes have to go through the process of eliminating suspects before you can zero in on your man!

If fish are actively rising but you don’t see any bugs in the air, check the water. Try to position yourself at the bottom of a feeding lane (downstream of where the fish are feeding) and watch the surface of the water (and just beneath) for drifting bugs. Holding a fine mesh net in the current is a great way to collect what’s coming down the channel, but if you don’t have one, your eyeballs will do just fine. If you see some insects, capture one and try to match it with a fly pattern.
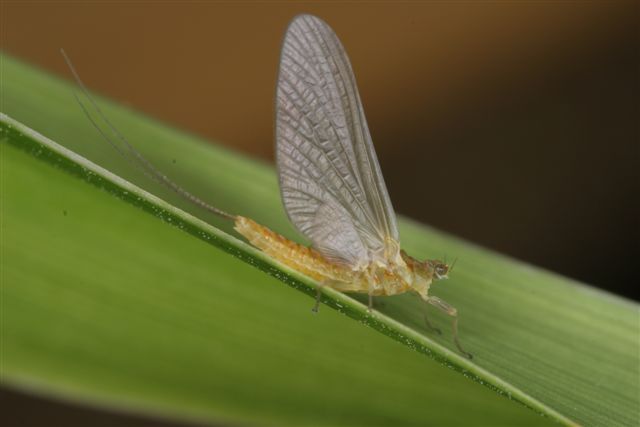
Hatches are puzzles and that’s one of the things that makes them fun. Sometimes you solve it right away, sometimes it takes awhile. Just remember that while the fly pattern is a big part of the equation, it’s not the only one. As mentioned above, presentation is huge. In addition to your technique, a smaller tippet and/or a longer overall leader may be the solution. Also consider your approach.

While I typically like to cast upstream to fish so that I can stay behind them, they will sometimes shy away from your fly in slow runs if they see your line or leader. I will sometimes try to get above fish in slow runs and cast down to them so they are sure to see the fly first. You have to land your cast short of them with slack in the line, and feed slack to enable the fly to naturally drift to them. This is a challenging presentation and it is critical that you carefully position yourself out of the trout’s line of vision.
Again, it’s a puzzle and there’s not one universal solution to every challenge.

Pay attention to your technique and everything what you’re doing (or not doing). Most important, pay attention to the fish. They’ll usually tell you what to do!

Learn more about Smoky Mountain hatches and flies in my hatch guide.

Flies: Sulphurs

If you take East Tennessee as a whole, it’s pretty safe to say one of the most prolific hatches is the sulphur mayfly hatch. Southern tailwaters are generally not known for having significant hatches of mayflies, caddisflies, or stoneflies. When we think of most of these dam-controlled rivers, we typically think of crustaceans like scuds and sow bugs, and midges…. lots and lots of midges. However, one mayfly that hatches on all East Tennessee tailwaters, often in very big numbers, is the sulphur. And that means that your best opportunity to catch a really big fish on a dry fly around these parts is during the sulphur hatch.
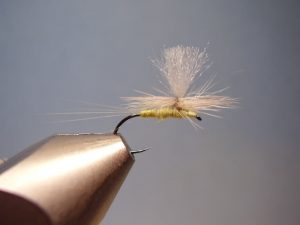
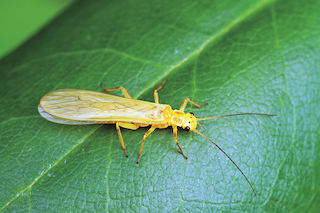
On the South Holston, they hatch in huge numbers for nearly nine months of the year. They hatch on the Holston, Hiwassee, Watauga and Caney Fork, too. But when I think of the sulphur hatch, I think of the Clinch River, probably because it was the first really BIG hatch I ever fished as a fly fisherman.  And while it may not be quite as epic as it was 20-30 years ago, it is most definitely still a hatch worth making time for.

Parachute Sulphur

The hatch usually gets started in late April on the Clinch and often lasts well into July. May is the best time to fish it. In April, the bugs are usually just starting to trickle off fairly inconsistently.  By mid June, trout have been seeing these things come off by the thousands for 4-6 hours a day, for 6+ weeks. To say that they become selective is an understatement. But in May, bugs are coming off steadily and the trout haven’t yet learned to count the hackles on your fly before choosing to eat it. They don’t seem to care if it’s on the surface, in the film, or 2” below the surface. In July, that stuff matters! In May, pretty much any pale yellow, size #16 dry fly will do the trick if it’s presented on a dead drift.

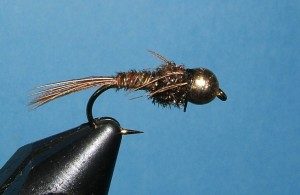
Parachutes and Comparaduns tend to be the best choices for dry flies. And there are a host of more sophisticated emergers and cripples to fool the wary, late-hatch fish. Pheasant Tails in brown and olive are usually the best option for nymphs.

Beadhead Pheasant Tail

While exact time and duration varies, the sulphur hatch on the Clinch typically starts in late morning and lasts for 4-6 hours a day, taking you right up to happy hour. Drifting Pheasant Tails will pass the time in the morning while you’re waiting for the main event to start.

Sulphurs are a big deal in the mountains, too. While they won’t come off in the obscene numbers found on the tailwaters, they are still one of the better hatches of the year. In the mountains, the hatch usually lasts 3-4 weeks and tends to be more of an evening event. Many nights, the sulphur hatch will correspond with the Little Yellow Sallies’ return to the water to lay eggs, making for a fast and furious end to the day for those willing to fish through supper.

Learn more about Smoky Mountain hatches and flies in my hatch guide.

Flies: The Great 8 (Must have Trout Flies)

With thousands of patterns available, choosing the perfect fly can prove to be a daunting task for any angler, particularly the beginner. However, unless you’re in a situation where trout are selectively feeding on a specific insect that is abundantly hatching, an assortment of well presented attractor patterns will be all you need to catch fish. Every fisherman has a list of favorite flies and over time you will find particular ones with which you are very confident. And that’s really the bottom line. If you have confidence in a fly, you will fish it better and ultimately have more success.

Below is a compilation of flies that seem to work everywhere and would likely be found on most fly angler’s list of favorites – a perfect place start your fly selection! Whether you call a fly shop in Tennessee, Montana, or New Zealand and ask for recommended flies for the area, somewhere on that list you will likely find most if not all of these patterns. These flies are also available as a packaged selection in the Fightmaster Fly Fishing online store.

Dry Flies

1) Parachute Adams: This is an absolute favorite trout fly. It doesn’t look exactly like anything but looks a lot like a lot of things! Carry them in sizes #12-#18 with the smaller versions being ideal for slow water and more finicky trout and the larger being best suited for choppier water where visibility is more important. The traditional grey body is preferred, but a yellow body also does well in the Smokies.

2) Elk Caddis: Another great dry fly, carry this one in sizes #12-#18 and with body colors of olive, tan, and yellow. The down wing on this pattern gives it a little different profile than the Adams and the combination of elk hair and hackle make this fly float like a cork.

3) Griffith’s Gnat: This is a great general purpose small fly. Fished most often in sizes #16-#20, it is a great imitation for adult midges, small mayflies or caddis, and even ants. Many of the most finicky, rising trout that have been caught have been on a Griffith’s Gnat.

Nymphs

4) Pheasant Tail: An incredibly universal pattern that looks like almost every nymph you’ll find under a submerged rock. While you’ll most often fish the bead head version, also carry the traditional version for a more realistic pattern that can more easily be fished in different levels of the water column. Carry both varieties in sizes #12-#18.

5) Hare’s Ear: For the same reasons as the Pheasant Tail, carry bead head and traditional versions of this fly, and in the same sizes. The big difference in the two nymphs is the Hare’s Ear provides an option for a lighter colored nymph and it is a little “buggier” than the Pheasant Tail, providing more movement. Most tend to favor the traditional tan body color but an olive body is also very effective and versatile.

6) Prince Nymph: This fly gives you that all important peacock herl factor which trout seem to dig. The white colored goose biots on the back also seems to grab the attention of fish. I’m not sure if anyone knows exactly what it’s supposed to imitate but the bottom line is it works! A Zug Bug is a close cousin to the Prince and would likely make many anglers’ favorite fly list. The two are similar and you can’t go wrong with either. Carry them in sizes #8-#16.

7) Zebra Midge: This fly will cover most of your small nymph needs. It is a simple pattern but extremely effective. Best fished in tailwaters and slow pools in mountain streams, carry it in sizes #18-#22. Most tend to prefer the tungsten bead head versions with black, red, or olive bodies.

Streamers

8) Wooly Bugger: While there are numerous great streamers out there, only one made this list as a must have, probably because of its incredible versatility. The Wooly Bugger, carried in a variety of colors, can facilitate almost any streamer need. Carry them in black, olive, tan, and white in sizes #4-#10 and you have an effective imitation for small baitfish, leeches, and crayfish. In a pinch, you can even dead drift a Wooly Bugger as a pretty effective imitation for a stonefly nymph or hellgramite. Whether you choose bead or no bead, flash or no flash, you have a fly capable of catching most any kind of fish in any kind of water.

Learn more about Smoky Mountain hatches and flies in my hatch guide.

Flies: Little Yellow Sallies

Yellow Sally Adult

April is one of the busiest months of the year for hatches and provides a smorgasbord of bugs for our finned friends. It’s also when we begin to see the change in color schemes on adult aquatic insects.

Aquatic insect adults are not only great sources of food for fish but also for birds. As a matter of fact, when you begin to see large numbers of swallows gather above the water and swooping down to the surface, it’s a sign for you to get ready because the hatch is beginning. Once the bugs have safely made it off the water, nature helps take care of them with appropriate camouflage to blend in with streamside trees and vegetation.

In the winter and early spring, most of your aquatic insect adults are black, grey, or some other dark color to better blend in with the dark, bare branches around the water. As we get later into spring and things begin to bloom, you begin to see more light- colored insects, such as tan and yellow. By the time summer rolls around, almost all of the adult insects are brighter yellows and greens to blend in with the abundant vegetation. And in the fall, you see more bugs with reds and oranges. There are of course plenty of exceptions to this but it’s a good guideline to follow with fly selection if you don’t know exactly what’s hatching.

So, April is a transitional month for color. Early in the month, we’re seeing the tail end of some of the darker bugs like Quill Gordons and Blue Quills, and by the end of the month we’re starting to see yellow bugs like Sulphurs and Little Yellow Sallies.

Egg Laying Imitation

Most of the hatches in the early part of the month are sparse and can be covered with generic flies like a Parachute Adams. The first hatch of significance in April is the Little Yellow Sally stonefly. It is one of the most prolific hatches in the Southern Appalachian Mountains, beginning usually around the third week of April and lasting well into July.

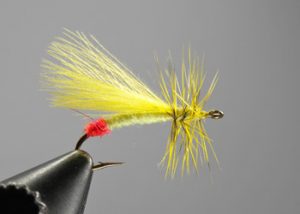
Unlike mayflies and caddisflies, stoneflies do not hatch in the water. Rather, the nymph will crawl out of the water onto a rock before hatching. Pay attention when you are on the water, and you’ll probably notice empty stonefly cases on exposed stream rocks. This means that the adult stonefly is not nearly as important to the fly fisherman because the adults are not nearly as available to the trout. We focus more on imitating stonefly nymphs, and for dry flies, focus more on the adult when it returns to the stream to lay eggs. You’ll notice that many of the adult Little Yellow Sally imitations are tied with a red butt for that very reason – to imitate the egg layer.

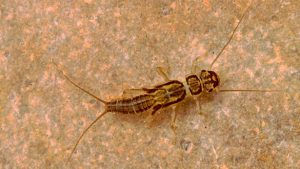
Little Yellow Sally Nymph

Stoneflies are often large bugs but that isn’t the case with the Little Yellow Sally, as suggested by the name. These are commonly found in size #16 and are typically a very bright yellow, and sometimes chartreuse. They tend to hatch sporadically through the day and return to the water in the evening to lay eggs. Typically, the later in the hatch it is, the later in the day they will return to the water. So, in April, you may see them dive bombing the water to lay eggs in the early evening, while in late June, that’s probably not going to happen until almost dark.

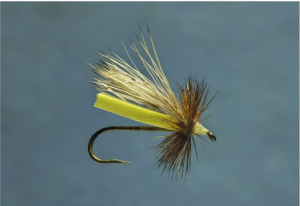
Neversink Caddis

There are a number of good imitations for the adult Yellow Sally. A yellow Neversink Caddis is one of my favorite “searching patterns.” For the nymph, you’ll want something tan to yellow in color. A small Tellico nymph or even a Hare’s Ear nymph should do the trick. And again, if you’re fishing when they’re laying eggs, something with a red butt can be very effective. Just plan to stay out late!

Learn more about Smoky Mountain hatches and flies in my hatch guide.