Tips for Warm Weather Wading

June is here and that means things begin to make another seasonal change here in the mountains.  I always look forward to warmer weather because I get to shed the waders and enjoy the feel of cool mountain stream water on my legs and feet. I also enjoy the freedom of movement I have without waders.  But the absence of waders also exposes you to a few more risks.

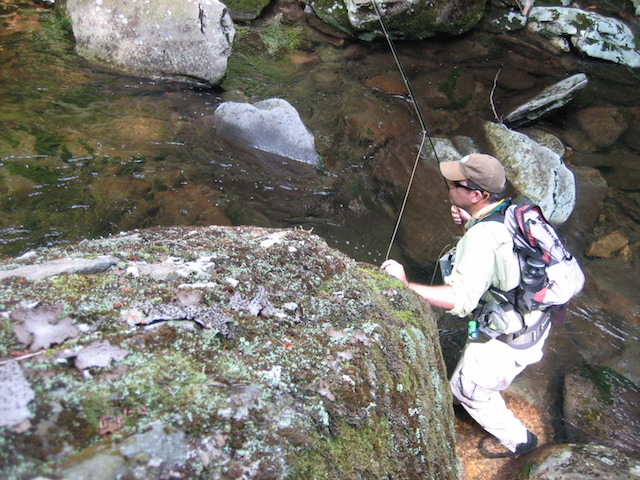
Mountain fishing involves moving.  You move through the water, you move over boulders and you move through the woods where you encounter sharp sticks, prickly bushes and undergrowth, poison ivy, and a variety of critters.  For these reasons, I always encourage people not to wear shorts when wet wading.  A pair of long, synthetic “quick-dry” pants will provide you the same level of comfort while still giving your legs much needed protection.

Wading boots are also a must.  I frequently see fishermen attempting to wet wade in Chacos or some other type of river sandals, and I cringe every time I do.  A good pair of wading boots will not only provide you with the much-needed traction of felt soles (or Vibram), but will also offer ankle support and toe protection.  You will definitely want both when navigating the rocky bottoms found in all mountain streams.

If you already have waders and boots, note that the boots are oversized to fit over the 3mm neoprene foot of the wader. Consider purchasing a pair of neoprene socks for wet wading.  These will not only make your boots fit, they will provide a layer of padding and insulation.

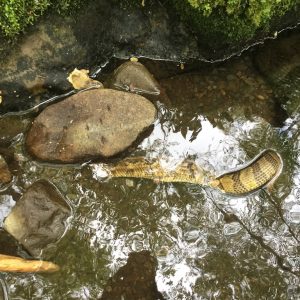
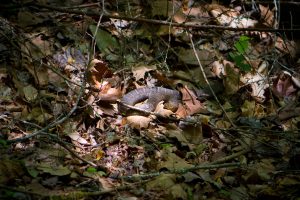
Great Northern Water Snake

Critters are another thing to be aware of when fishing in the summer months.  Snakes are the biggest concern for most people but they aren’t much of an issue. While we do have two poisonous snakes in the Smokies, Copperheads and Timber Rattlesnakes, most of the snakes encountered by fishermen are harmless water snakes.  I spend nearly 200 days a year in the park and probably see one or two poisonous snakes a year.  The Great Northern Water Snake is a fairly large water snake that is often mistaken for a Cottonmouth, a species we do not have in the Smokies.

Senseless

On a guide trip this spring, I came across a dead rattlesnake at the edge of the stream.  Someone had obviously bashed its head in with a rock.  There is absolutely no reason for this, and in the national park (and I believe the state of Tennesse), it is illegal.  If you encounter a snake, poisonous or otherwise, just leave it alone and move on.  They don’t want anything to do with you either.

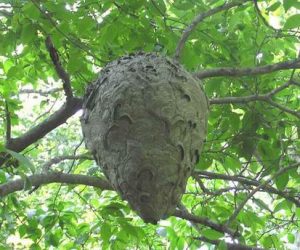
What I try to keep an eye out for more than anything else, especially during the summer months, are hornet nests.  They love to build these things on low branches above streams.  If you see one, steer clear and move on to the next hole.  And when you do, make sure it is still well out of range of your back cast.  Hooking a hornet nest can ruin your day in a hurry.

Hornet Nest

If you do accidentally get too close and get stung, DO NOT start swatting!  This triggers a pheromone that signals all other hornets in the area and one or two stings can turn into dozens.  Just get far away from the nest as quickly as possible.

Yellow Jackets are also common in the Smokies and typically build their nests in the ground.  As with snakes, your best solution here is just to pay attention and watch where you are stepping.  Of course, if you are allergic to either of these, come prepared with an EpiPen or other treatment.  If you’re not allergic, most stings can be easily treated by immediately and thoroughly rinsing the area.  Applying an anti-itch medication will also provide relief.

Mosquitoes, noseeums, and other biting insects are not a huge problem when you’re on the stream but can be as soon as you step away from the stream in the woods or on the trail.  On the stream, you’ll mostly just be harassed by gnats that don’t bite, but love to hover around your face and get in your eyes.

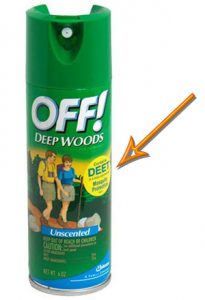
The best prevention for all of these, of course, is good old-fashion bug spray.  Bug sprays with higher concentrations of Deet seem to be most effective, but be careful when using them.  Deet has the ability to melt plastic, and getting a healthy dose of Deet heavy bug spray on your fingers can wreck a fly line.  Just avoid spraying it on your palms and finger tips.  If you’re one who likes to spray your hands and rub it on your face, just spray the back of your hands and rub it in that way.


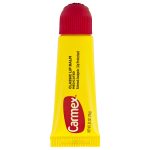
Of course, anytime you’re maneuvering through the woods, there’s a chance of picking up a tick.  Deet based bug sprays will help with that, too.  I still try to check myself periodically, particularly at the end of the day.  If you do find one on you, there’s an easy way to remove it.  Squeeze a dab of medicated lip balm (the gel type that comes in the squeeze tube) onto your finger and smear it on the tick.  It will immediately release itself from your skin. Cool, huh?!?  I always keep a tube of Carmex in my first aid kit for this reason.

Flies: Yallarhammer

No fly holds near the lore among East Tennessee fly anglers as the Yallarhammer. It has long been known that the native brook trout that reside in Southern Appalachian mountain streams have a weakness for brightly colored flies, particularly if that bright color happens to be yellow. But before endless varieties of fly tying materials were so easily available from local fly shops, mail order catalogs, and the Internet, early fly tyers had to use feathers from local birds that they could shoot themselves.

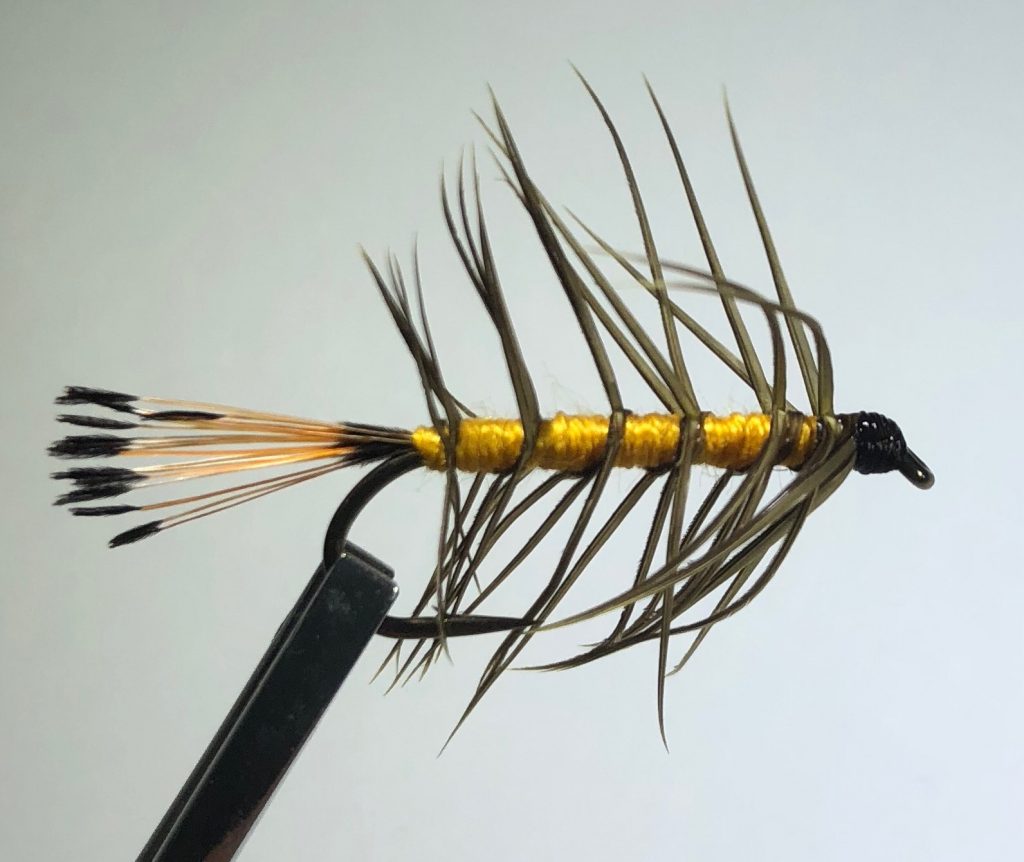
A woodpecker known as a yellow hammer because of its bright yellow feathers and hammering beak was quite abundant in the area and provided a perfect source for fly tying materials. Over the years, numerous variations of the Yallarhammer (taken from the local pronunciation) trout fly emerged but the photo above is thought to closely (and legally) resemble the original. It was fished as a ‘wet’ fly, most often drifted and swung through pockets, riffles, and plunges.

The Yallarhammer also has strong ties to the state of Alabama. Their state bird, the Yallarhammer is most often associated with a confederate regiment based in Alabama that wore Yallarhammer feathers in their hats. Tennessee Volunteer fans may even be familiar with a Crimson Tide cheer that uses the term: “Rammer, Jammer, Yallarhammer…”

As a trout fly, the Yallarhammer was so popular that locals nearly shot the poor bird to extinction. It is currently a protected bird and the possession of its feathers will likely land you a citation before landing you a trout! But the Yallarhammer fly still lives on as modern fly tyers now substitute dyed dove and quail feathers for the original flicker feathers.

Pattern:

Hook: #10 TMC 5262 (or equivalent)
Thread: Brown 6/0
Tail: Golden Pheasant
Body: Yellow Floss
Feather: Primary dove wing feather, dyed yellow

Paper or Plastic – Contrasting Bamboo & Graphite Rods

Between two evils, choose neither; between two goods, choose both.

– Tryon Edwards

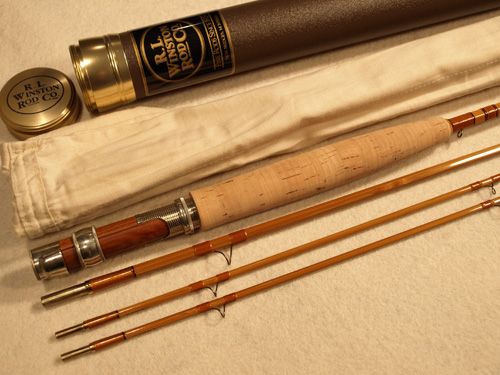
There are few smells in this world that can tell such a story as the aroma that is consumed when opening the tube of a bamboo rod. With every flirtatious breath of varnish and cane, images too elusive for mere words or photos dance through twitching nostrils and settle softly in the mind. It’s a perfume that instantly conjures simultaneous images of classic trout water, sparsely hackled dry flies, fedoras, pipe smoke, fine Kentucky bourbon, and perfect memories of past fishing trips that are not entirely my own. Somehow, there is a connection to fish, streams, mountains, and fishermen who met long before me. Each time the final rotation is made around those metal threads and the cap is removed, it’s as if the Genie has been released from the bottle, and the very spirit of fly fishing has been summoned.

I’m hardly a purist but I do take pride in the fact that my first trout came on a dry fly with a cane rod. This did not happen by design, however, and was certainly not the result of any quest for nostalgic perfection or anti-technology-damn-your-plastic-rod doctrine. It was my granddad’s rod, a worthless old Montague production rod from the 1930’s that’s sentimental value is now priceless, but back then, its only value was that it was better than the rod I had. The rod it replaced, my first rod, was a K-Mart special that came neatly packaged with a reel, a spool of backing, and a 7-weight, level fly line. A burgundy blank finished out with a black plastic reel seat, black foam handle, and gold tipped, black wraps on the guides; it measured 8-feet in length, probably 3-pounds in weight, and had the casting action of a stiff garden hose.

Somehow, its companion reel was even less impressive. While better suited in capacity for a 4 or 5-weight line, it tightly enveloped the packaged 7-weight line and about 10 yards of 20-pound backing. And as advertised on the package, the reel did have an “adjustable” drag. If you flipped the switch on the back of the reel up, it clicked and provided minimal resistance when pulling out line. If you flipped the switch down, the reel silently exclaimed, “Oh shit!” and the spool rotated at 8700 rpm’s with the slightest tug of line. The result, of course, was a rat’s nest of fly line inside the reel with little knotted loops of plastic peeking out of each port in the spool.

At the time, I wasn’t aware of the physical differences, much less the cultural differences of bamboo and graphite, so neither played a role in my decision to “upgrade” that first rod. The fishermen in my family, including my granddad, were almost exclusively bait and spin guys, so in addition to having no real instruction as a budding fly fisherman, I had no preconceived moral perceptions regarding the material used to construct my rod. Instead, I somehow had it stuck in my head that a rod with a cork handle was better than one with a foam handle, making my granddad’s old Montague the obvious choice over the K-Mart rod. In no way was I a bamboo fundamentalist and truth be known, I went to bed nearly every night staring at the Orvis catalog and dreaming of a brand new, shiny graphite fly rod. I was a helpless lump of clay in the hands of the fly fishing marketing machine, and I wouldn’t rest until I could secure the funds for the genuine graphite Orvis Superfine fly rod of my dreams.

With an arsenal now obscenely exceeding 25 rods, a time when I hoped, dreamed, scrimped, and saved for one – just one – nice graphite rod seems like a lifetime ago. Even longer go, when I was a kid, it was shoes. If I could just get my feet in a new pair of those Zips, my speed and vertical leap would undoubtedly increase to unprecedented levels. And with an Orvis 7’ 9” 5-weight Far and Fine rod, all of my casting woes would immediately disappear and I would instantly begin catching all of the fish that had been eluding me.

To my disappointment, when I eventually got that rod, my casting and fish catching prowess remained pretty much the same. However, even as a novice, the new, high-end graphite rod’s superiority to my previous rods was undeniable. It was lighter, crisper, and more responsive. It was modern, and cool, and just plain sexy! And it would start a trend lasting more than a decade of graphite addiction. Every year something a little lighter, a little faster, and a little sexier would hit the market and I would be first in line to own one.

Bamboo rod purists would likely equate this to selling my soul to the devil. Aside from the moral and ethical legitimacy of strike indicators, there is rarely a fly fishing topic that incites more passionate debates than trying to determine the superior material for fly rods: good old-fashioned split cane versus the new space-age graphite materials. The proponents on either side possess unshakeable convictions and will argue with a ferocity not seen at even the most heated of presidential debates. And much like presidential candidates might debate the advantages of change versus experience, the pro graphite contingent will argue that their candidate is stronger and lighter and far more capable of zinging much longer lengths of line in the air, while the bamboo party will claim that graphite has no life – no soul – and has no real connection to the line or fish. They see graphite rods as lifeless, plastic sticks designed for heaving rather than casting a fly line. They think people who fish with graphite rods are communists.

I eventually broke the addiction and my preferences even started to change when I finally had the opportunity to fish with a good cane rod. My experience had only been with the cheaper production rods of the 30’s and it turns out that there were not only much better quality rods being made back then, but the cane rods being made today are nothing short of fantastic! Passing judgment on all bamboo rods based on my granddad’s Montague was the equivalent of judging all graphite rods by my first K-Mart special. But I still can’t passionately take a stand on one material being superior to another.

I’m not sure if there is a right answer. A big part of it probably has a lot to do with where you fish. For instance, suggesting that a cane rod is the better choice for tarpon fishing in the Florida Keys is a pretty tough sell. If we’re being honest, the real determining factor is more likely personal style. As a teen, I went to school with kids that jumped on every trend from leg warmers to parachute pants. Other kids went the preppy route, while others went with the thrashed denim, rocker look. All of these options served the primary purpose of clothing the kid, but as an individual style allowed the kid to tell the world who he was – or at least who he thought he was. Are we not, in some regard, doing the same thing with our choices of fly rods and gear?

In most situations, a fly rod, whether bamboo or graphite, is quite capable of executing effective casts and catching a lot of fish when in the right hands – it’s the chef, not the skillet. What it should boil down to is which rod brings you the most pleasure. I once heard legendary fly fisherman, Joe Humphreys, tell a story about a debate he had with another legend of the stream, Ed Shenk. Ed liked to fish with very short fly rods. Joe asked him why he fished with such short rods when they put him at such an obvious disadvantage. Ed told him it was because they are fun.

There was an awkward period as a teenager when I was preppy and an even more awkward phase when I wore parachute pants. Now, neither fit my style. As a fly fisherman, there have been periods of graphite obsession, and periods of bamboo obsession. Now, both fit my style. I am at peace with the realization that I don’t have to pick one side or the other because, doggone it, I like them both. Out of the far too many fly rods I own, five of them are bamboo, and for day in, day out fishing, I tend to prefer the versatility I get from good graphite rods and find them to be the most useful, practical choice. But I still fish very frequently with my bamboo rods because they’re not impractical, and well, they’re just plain fun… And there’s just something about that smell.

The Perfect Fly

“While the snow whorled, the old men would work at the desk with the glow of bemused gods, forsaking reason and good sense in their search for the great concoction, the random mating of fur and feather and colored thread that would break new ground in piscatorial seduction, speak in the language of pure appeal, fascination, enticement, allure, the perfect corruption, hooked bribe, deadly enchantment, a come-on no fish could deny, something beyond mere interest, something exotic and irresistible. No combination was too distasteful or out of bounds, no creation too shocking.”

– Harry Middleton, Rivers of Memory

Tying flies just seems to be a natural progression for any avid fly angler, though it becomes more of an obsession for some than others. Some possess a romantic ideal of catching a fish on a fly that they’ve crafted with their own hands while others simply fish so much and burn through so many flies that they see fly tying as a means of stopping the bleeding, a practical means of saving money. Many more enter the world of fly tying with delusions of grandeur, possessing an unbridled optimism and certainty that they will be able to catch more or better fish by filling a void with a creation not yet imagined by the world’s tying minds and not yet available through their local shop’s selection. That 29” brown trout under the bridge is just a bead-head-bright-green-bodied-pink-tailed-red-rubber-legged nymph away from being caught! I began with similar delusions and like most tyers, still have them. Somewhere deep in the creative recesses of my mind, I surely hold the key to the ultimate creation: The dry fly that won’t sink, the nymph that won’t hang the bottom, the streamer with just the right “waggle”…. All tied in such a unique, unprecedented way that trout will come from neighboring pools just to get a taste…. The perfect fly.

However, the budding fly tyer is quickly faced with the reality that there is an art to this fly tying thing and that an unspeakable number of very imperfect flies will be born at the vise before the perfect fly can ever emerge from the dubbing dust, especially when you begin the task as I did, with a shortage of funds and a surplus of stubbornness. Determined to teach myself rather than spend time and money taking a class, my first of many mistakes, my response to the overwhelming myriad of materials and tools confronting me was to purchase a starter kit. Fly tying kits aren’t a bad way to get started at all; especially when you have one personally assembled for you by someone at a fly shop who can get a feel for what flies you’re interested in tying. But I opted for the pre-selected, company kit that was assembled probably more as a means of ditching materials that wouldn’t sell than as something to ease my transition into the art of fly tying.

The kit regretfully came from one of the large catalog companies, cost $150, and was advertised as having everything I’d needed to start tying flies: vise, tools, hooks, materials, and a book to show me how to do it. To no real surprise, the materials were extremely low grade, with the provided colors apparently selected for patterns no longer in production. Or someone thought red and yellow were the two universal colors for everything from hackle and marabou to chenille and dubbing. The pocket sized book turned out to be equally disappointing with about twenty pages that included such detailed instructions as: Put hook in vise. Attach thread to hook. Tie feather to hook. Dub body. There were no technique pictures, no definitions, and really only about five illustrated patterns. So I tied a few mutant Wooly Buggers with massive, 10” yellow tails that included even the thick stem, red bodies that were plump at the hook bend and skinny near the head, red palmered hackles that ended about halfway up the body, and a thread head the size of a marble.

I also tried my luck with dry flies but due to limited materials, the fact that I really didn’t know what the materials were, and that I had no discernible skills, they didn’t quite turn out like the ones in the fly shop. They did look exactly like mayflies – assuming we’re talking about mayflies that have been smashed on your car windshield and spread a few times with the wiper blade. They consisted of 2” tails that pointed down because I tied them too far back on the hook. The body was a thick, lumpy mass of mangled fur because I didn’t know how to spread and twist dubbing on a thread. The hackle was big and soft since I was using broad saddle hackle from the kit. You mean there are different types of hackle? And to finish it off, the hook eye would be inaccessible, covered over in thread wraps since I never left enough room to wind a head. That actually may have been a cosmic favor – the universe suggesting that I might want to reconsider attaching this monstrosity to the end of my tippet.

I eventually put all the pieces together and twenty years later, I can say that my flies do catch fish, they look kind of pretty, and I’m finally to the point where I’m saving a little money. In fact, as a commercial tyer, I now even get to say I’m making money, but if I’m being honest, most of my profits go right back into materials to tie more flies – the circle of life. There are people that solely make a living tying flies but I’m not one of them. Other than offset some other expenses, all commercial fly tying has really done for me is significantly change my perspective on the value of a fly. It didn’t take long before I went from, “They want $2.00 for one fly?!” to “They only get $2.00 for a fly?!”

Making the jump from recreational fly tying to commercial fly tying also has a way of stifling any creative ambitions you once may have possessed as you become confined to a one person assembly line of feathers and fur, repetitively producing dozens of the exact same fly. I get hit from two sides as I try to keep many of the bins full at the local fly shop while still keeping my own boxes full for guide trips, constantly replenishing staple patterns routinely sacrificed to high tree limbs by eager fly fishing virgins. Still, that creative yearning never goes away and routinely creeps up and distracts me while I’m four dozen deep in a fly tying shift of redundancy. An hour later, I’ve aborted the task at hand and have tied six Parachute Adams with pink rubber legs, chartreuse hackle, and a spinner blade for a tail.

Okay, that may be a bit of an exaggeration, but I have, for whatever reason, had some really bad ideas for fly patterns. They were all born of what, at the time, seemed to be sound theory but in retrospect are pretty difficult to justify. Despite these failures in fly tying evolution, over the years I have created some flies that turned out to be very productive, but I don’t know how original any of them really are. The patterns I create most often tend to be variations of already established patterns, posing the question of what actually constitutes an original fly pattern.

Fly tying is much like cooking in that regard. Very rarely is a brand new recipe created anymore. Rather, traditional recipes are often tweaked to create a slightly different flavor or texture. If I cook ground beef and put it on a bun, it’s a hamburger. If I add cheese it’s a cheeseburger. If I add sautéed onions, it’s a cheeseburger with sautéed onions. But if I make the same thing on different bread it becomes a Patty Melt. If I use chartreuse grizzly hackle on a Parachute Adams and add pink rubber legs, is it simply a Chartreuse, Rubber-Legged Parachute Adams, or is that enough variation to be considered an original pattern warranting a clever new name?

What is it that even motivates so many fly tyers to attempt so many new patterns when the old standards seem to work just fine? Is it an attempt at something better or merely an attempt at something different? Is it for the fish’s benefit or our own? Maybe it’s because with a new fly pattern comes new hope. Success with a particular fly, whether it is an old standard or a new concoction of your own design, really just seems to boil down to personal confidence. When you have confidence in the fly with which you’re fishing, you naturally fish it harder and fish it better. It’s funny how that works. I know that the Muddler Minnow is a fantastic fly and that it works. It’s probably one of the top five freshwater streamers ever created but while I’ve been in the company of numerous fishermen who catch several fish and big fish on it, I couldn’t catch a fish on that fly if I cast it in a trout tank at the local boat show. It has just never worked for me and I suppose that’s because, for whatever reason, I just don’t fish it with confidence.

What I’ll really never understand are the flies that go in and out of “style” – not necessarily with fishermen, but with fish. Some flies have been staples for me since the day I started trout fishing while others seem to fall in and out of vogue. I used to tie and fish a fly called a Mallard Minnow that, back in the day, would catch any kind of fish in any kind of water. I thought about it once and realized that on that fly, I’d caught rainbow trout, brown trout, brook trout, smallmouth bass, largemouth bass, rock bass, striped bass, bluegill, gar, carp, catfish, walleye, and salmon. It probably would have also accounted for saltwater fish if given the chance but at some point, it just quit working. It was a fly in which I once had total confidence and unmatched success and I haven’t had a fish so much as look at it since the late nineties.

Why is that? Are flies to fish what clothes are to us? Do they have fly shows every spring to feature the latest trends? Maybe that large brown trout behind the stump is rolling his eyes at my Mallard Minnow, telling his rainbow trout friend, “That is so 1995.” Are there also trout with retro tastes that are looking for fly patterns from the fifties and sixties? If so, I suppose that’s why a good old standard Wooly Bugger would top my list as the perfect fly. Like a basic pair of blue jeans, it seems to always be in style. But if it just had a propeller at the head….
Rob’s Hellbender Nymph

Since we’re talking about big browns this month, I thought it only fitting to feature one of my favorite flies for big brown trout. While I have caught a number of big browns on small flies over the years, most of the big guys in the mountains have come on larger stonefly nymphs. This is a little bit misleading as most of the large browns I’ve caught in the Smokies I spotted before I fished for them. And when I spot a big brown trout, I almost always tie some sort of stonefly nymph imitation to my line. Who is to say I wouldn’t have caught those same fish on a #20 Zebra Midge had I chosen that fly?
I’ve always said that fly selection is 45% scientific, 45% experience, and 10% dumb luck. The scientific aspect comes in when you choose a fly to specifically imitate something that the fish are known to be feeding on. For example, if you see sulfur mayflies hatching, you see fish feeding on them, and you choose a sulfur mayfly imitation, you’ve more or less made a scientific decision. If you go to the stream and tie on a Royal Wulff for no other reason than you’ve always done pretty well on a Royal Wulff, you’ve made your decision based on experience. And of course, if you choose to fish the purple and green fly for no other reason than it looks neat, you’re pretty much depending on dumb luck!

All three methods have been successful over the years but the first two are usually more reliable because you have something at least somewhat logical and reliable to base the decision on. Even when your logic may be incorrect, such as choosing a sulfur to imitate a perceived sulfur hatch when the fish are actually eating caddis, you tend to have more success because you have confidence in your fly. When you have confidence in your fly pattern, you tend to fish it longer and better.

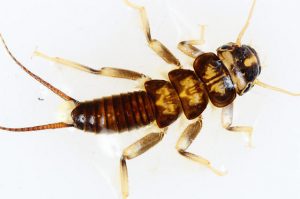
My tendency to select a stonefly nymph when I fish to a big brown trout comes from scientific reasoning and experience. I’ve studied the aquatic entomology of the Smokies and know that there are a lot of stonefly nymphs in the streams. I also reason that a larger morsel of food, like a stonefly nymph, would be more enticing to a larger fish. And I’m also relying on experience – I’ve caught a lot of big brown trout on stonefly nymphs over the years.

Golden Stonefly Nymph

Some of my favorite “go-to” stonefly patterns over the years have been old standards like a Tellico Nymph, a Bitch Creek Nymph, and a Girdle Bug. I always liked the coloring of the Tellico because I thought it best represented a golden stone, which seems to be the most prolific big stonefly in most Smoky Mountain streams. I liked the flat, two-tone profile of the Bitch Creek Nymph. It seems to produce a nice rocking motion on the drift. And while the Bitch Creek Nymph does incorporate rubber legs in the design, the additional rubber legs on a Girdle Bug always seemed to give it a much more lifelike appearance.

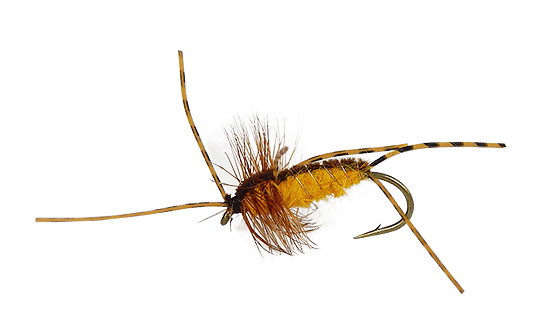
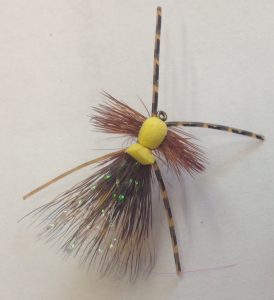
So what did I do? I took what I thought were the best features from each of my favorite stonefly nymph patterns and blended them into one fly. The result is Rob’s Hellbender Nymph. It has the flat, elongated, two-tone profile of a Bitch Creek, the multiple rubber legs of a Girdle Bug, and a color similar to the Tellico.

I weight these flies with lead wire that is flattened to provide that rocking motion in the water. I not only tie them in different sizes, usually #10 – #4, but I tie them in different weights. To get down fast in deep, fast runs, I like a lot of weight, but I prefer a lightly weighted one when casting to a brown trout in the shallows.

For whatever reason, offering flies in different weights tends to be too confusing to customers at a fly shop so commercially tied patterns like this one are typically made available in one uniform weight. So the ones you find in a shop like Little River Outfitters are going to be lightly weighted so the fly can be fished in slower, shallower water. To get them down quickly in deeper, faster runs, just add the appropriate amount of split shot.

While I may choose something like a large streamer when searching for big browns, this fly has become my “go-to” for a large brown that I have spotted first. Of course, every situation is different and there will be countless circumstances that suggest otherwise. But next time you’re in the Smokies with a big brown in your sights, see what he thinks about this bug!

Learn more about Smoky Mountain hatches and flies in my hatch guide.

Flies: Rob’s Hellbender Dry

As about anyone who knows me can tell you, I’m terrible at self-promotion. The worst. So it should come as no surprise that I’ve never featured one of my own patterns in the newsletter. Usually I opt for more standard or classic patterns. But this is a good fly and it’s good this time of the year, so here you go!
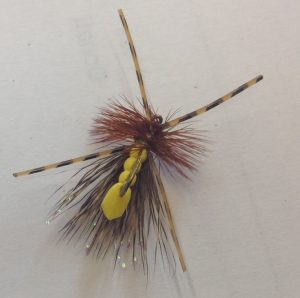
I started tying this one probably 4 or 5 years ago, and if you’ve fished with me in the summertime or fall, you’ve probably fished with it at some point. Heck, you might have even caught a fish on it. It started as most fly patterns do for me, as a modification to an existing pattern. If you’re not a fly tyer or maybe if you’re new to it, you may not realize that fly tying is a lot like cooking. You can make up a recipe totally out of your head. You can follow an existing recipe step by step. Or you can take an existing recipe and modify it to better suit your taste. I’ve done all of the above over the years.

Just before this pattern was born, I was having success with a fly called a Neversink Caddis, a great little foam pattern named for the Neversink River in New York. But I got to thinking about a yellow foam body fly with a little flash. So I tied a Neversink Caddis with a little Krystal Flash under the wing. Then I thought about how great it would be to have a yellow foam body fly with a little flash and some rubber legs. So I tied a Neversink Caddis with a little Krystal Flash under the wing and rubber legs on the side. Then I started thinking about how well it might work if it was still buoyant, but rode a little flatter on the surface. You get the idea.

There comes a point where you change so many things about a chili recipe that it’s no longer chili. And after the fourth or fifth modification on this fly, it was no longer a Neversink Caddis. It was it’s own fly and it was catching fish. A lot of them. I was fairly quiet about it but had more than a few guide clients that started asking for the fly at Little River Outfitters, and it wasn’t long before Daniel asked me to tie some for the shop.

Bottom View

I’ve done some commercial tying in the past and it’s a grind – a whole lot of work for not much money. I remember when I first started fly fishing, I’d go to a fly shop and say, “Seriously? They charge $2 for one of these?!?” After I began tying commercially, tying hundreds of dozens of flies, I remember saying, “Seriously? They only charge $2 for one of these?!?” Needless to say, I wasn’t jumping at the chance to get back into the commercial tying game.

So I went a different route and submitted it and another nymph pattern to a large fly distributor. If accepted, you send samples with tying instructions, they mass-produce them, and you collect a royalty for each dozen sold. Pretty neat. It doesn’t add up to much but I collect a check at the end of each year that’s enough to take my wife to a nice dinner. I have other original patterns that I keep intending to submit but never seem to get around to it. Maybe this winter.

So that’s how the fly came to be. It’s a good fly pretty much anytime between late April and early November, but I like it best in the late summer and early fall when the water is low. In low or flat water, high-riding, bushy flies get refused a lot, and I have trouble keeping more sparsely dressed flies afloat. But Rob’s Hellbender floats great, sits lower and flatter on the surface and seems to produce strikes when its high-riding counterparts fail.

It falls under the attractor category, as it doesn’t really imitate anything in particular. I’m sure it mostly gets taken as a stonefly or hopper. Either way, they eat it and you need some. If you want to tie it, the recipe is below.  Or better yet, buy a bunch at Little River Outfitters so I can take my wife out to dinner.

Rob’s Hellbender Dry
Hook: 2xl dry fly hook #14 – 10
Thread: 8/0 yellow
Underbody and rib: Thread
Body and Head: Yellow 2mm foam (tan, chartreuse, & orange work well, too)
Underwing: Pearl Krystal Flash
Wing: Deer hair
Hackle: Brown rooster
Legs: Tan barred Sili-Legs

Learn more about Smoky Mountain hatches and flies in my hatch guide.


Flies: Red Fox Squirrel Nymph

Even with all the newfangled fly patterns and fly tying materials available today, I usually find myself sticking more with the old staples, or at least pretty similar variations. And I stick with them for one main reason: They work! Created by fly tying guru, Dave Whitlock in the 1960’s, this fly definitely falls under the “old staple” category.
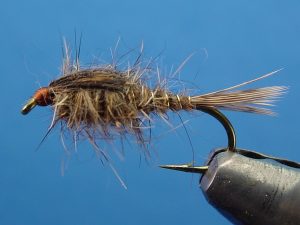
As disappointing as this may be to some, the fly was not named for Redd Foxx of Sanford and Son – you big dummy! Rather, it got its name for the simple reason that it is tied mostly from the fur and hair of a red fox squirrel. It is considered an impressionistic fly, meaning that it is designed more to look alive or “buggy” more than imitating a specific food source. We also lump these sorts of flies in the categories of “attractors” or “generals.” Or Orvis likes to call them “prospecting flies.”

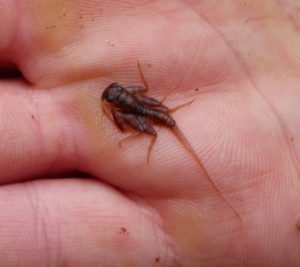
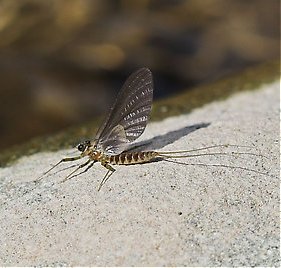
So really, it’s a pretty good fly to fish anytime in the Smokies, but I think it is at it’s best in the early spring. I attribute that to the abundance of Quill Gordon nymphs in the water at that time, as this impressionistic fly imitates that nymph as well as any other I’ve fished. I’ve had a lot of success with the traditional, light red version of this fly, but tie them in a few other colors as well. Different colors might better imitate other food sources in the water, but may also better imitate the color of Quill Gordon nymphs found in a specific river, or even a specific stretch of river.

Quill Gordon Nymph

It’s hard to say just how selective these trout can get and how important it is to match the color of the nymph, but I’ve personally found Quill Gordon nymphs in Little River that range from a light reddish color, to tan, to grey, to dark reddish brown, to olive. You can see that the Quill Gordon nymph in the picture has more of a dark reddish brown color. Though it’s probably more of a confidence thing, it seems that some years a certain color just works better than another.  I like to fish double nymph rigs with two different colored nymphs until I zero in on their preference.

In any case, these Quill Gordon nymphs are pretty robust, and the beefy body on the Red Fox Squirrel Nymph seems to suggest that better than, say, the slender profile of a Pheasant Tail Nymph. And the picked-out fur body and soft hackle provide a lot of subtle, life-like movement.

Hare’s Ear Nymph

A close cousin to the RFSN, is the Gold Ribbed Hare’s Ear Nymph. This is another one of those staple flies that is really simple to tie and can be found in most any fly shop.   I will sometimes fish these in a tan or olive color as an alternative to the RFSN or even in tandem in a two nymph rig.

In all cases, I’m usually fishing these flies in fairly large sizes – typically in the #14 – #10 range. As the season progresses, I’m more likely to fish them in smaller sizes and lighter colors. They can be purchased or tied in beadhead or non beadhead versions. The non beadhead will typically have lead wire wrapped around the hook under the materials. I personally like the look and profile of the beadless version better. But that’s just one man’s opinion. Try them both and tell me what you think!

Learn more about Smoky Mountain hatches and flies in my hatch guide.

Below is Dave Whitlock’s original recipe for the nymph.  I fish the beadhead version most, and I tend to substitute commercial dubbing for the mixes he describes below.

DAVE WHITLOCK’S RED FOX SQUIRREL-HAIR NYMPH

HOOK: Tiemco 5262
THREAD: Black or orange 70 Wapsi Ultra Thread
HOOK WEIGHTING: lead wire, diameter of hook wire, 8 to 12 wraps
ABDOMEN: Belly fur from red fox squirrel skin mixed 50/50 with sienna or fox tan Antron dubbing OR Dave Whitlock SLF Dubbing – #1 (blended to my specs). Abdomen should be 1/2 to 2/3 of the overall body length
THORAX: Back fur from red fox squirrel skin mixed 50/50 with charcoal Antron dubbing OR Dave Whitlock SLF Dubbing – #2
RIB: Oval gold tinsel or orange-pearlescent Flashabou
TAIL: Small tuft of back fur from red fox squirrel skin
LEGS: (On sizes 10 and larger) Metz dark ginger back-hackle or back-hackle of Partridge, one turn

Flies: Quill Gordon Hatch

March is the month when trout fishing in the Smokies officially kicks off. Days are getting a little longer, temperatures are getting a little warmer and water temperatures are on the rise. It’s also the month when we begin to see our first good hatches of the year.
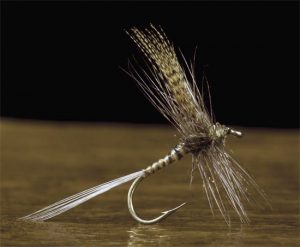
Aquatic insects from Early Black Stones to Blue Wing Olives to a variety of midges will hatch all winter, but trout rarely pay much attention to them as water temperatures are typically too cold for active feeding (read Understanding Water Temeratures for more info). But in March, that begins to change. And if you pay attention to water temperature, you just might catch one of the best hatches of the year.

Quill Gordons are fairly large mayflies, between a #14-10 hook size, that begin to hatch when the water temperature reaches 50-degrees for a significant part of the day, for a few days in a row. In unusually warm years, they’ve hatched as early as mid February. In particularly cool years, they may not hatch until April. But most years on the lower elevation streams in the Smokies, this occurs about the third week of March.
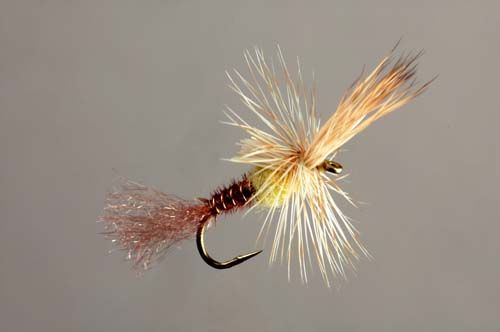
In any case, it’s a tricky hatch to catch and really just a tricky month to fish if you don’t live here where you can pick your days. Weather can change in the blink of an eye in March and one major cold front or one big, river blowing rain can make all the difference in your success. I’ve had some of my absolute best days in March and I’ve had some of my worst.

So, why even fool with it? Why not just wait until April when things are more stable? Because some of those “best days” were really, really good! The Quill Gordon hatch is not just worthwhile because of the number of bugs or the size of the bugs. It tends to happen at the exact same time wild mountain trout begin actively feeding. Many of these trout, including the large browns, have had very little to eat in the last 2-3 months and they tend to be a little less cautious. And when a size #12 Quill Gordon comes drifting down the lane, well, it’s pretty hard to resist!

Brown trout exceeding 20” don’t get caught very often in the Smokies, period. Even fewer are caught on dry flies. I’ve been fortunate to catch a fair number of large browns on dry flies in the Smokies, and probably 99% of them have come during the Quill Gordon hatch. Though it’s certainly a gamble, THAT is why it’s worth coming in March!

The good thing about the hatch is once it starts, it usually doesn’t stop. So, if the hatch gets started on say, 3/21, they’ll keep hatching every day even if you get a significant cold front on 3/25. While such a cold front may not impact the hatch, it still might impact the way the trout feed, and they may be more reluctant to come to the surface. What many people forget, is that for all the bug activity on the surface during a hatch, there is just as much, if not more, activity under the surface with nymphs preparing to hatch. Drifting a greyish olive nymph below the surface can also be very productive during this hatch, especially in colder water

Most years the hatch lasts 2-3 weeks and it is usually at its best during the warmest part of the day. In March, that’s typically about 11am to 4pm so rearranging your lunch plans is not a bad idea.

The best place to be during the hatch is in a larger pool near the head and middle of the run. Unlike most other instances fishing the Smokies, this is a time when you may need a little more distance on your cast and your mending skills will be put to the test. The fish may be more aggressive but they still won’t tolerate a bad drift!

Learn more about Smoky Mountain hatches and flies in my hatch guide.

Flies: Quigley Cripple

Okay, so it’s not exactly the most politically correct name for a fly pattern. Maybe the Quigley Emergently Challenged Mayfly would be a better choice? Nevertheless, as teased in the newsletter text, it has been a “hatch buster” for me since probably the early 90’s. The fly has been around a little longer than that, devised by Bob Quigley in the late 1970’s.

What do I mean by hatch buster? Some hatches of aquatic insects can get so heavy and last for such long periods of time that trout become ultra selective on the flies they eat. They just have so many of the naturals available that your fly, no matter how precise an imitation, can kind of get lost in the mix. We have few hatches of that magnitude in this area but when we do, it’s usually going to be a sulphur mayfly. They can come off fairly heavily in the mountains in May, particularly late in the day. We also see significant hatches of them on area tailwaters, particularly the Clinch and South Holston. On the Clinch, it’s usually from late April through early July and on the South Holston, they come off nearly nine months out of the year!

The Quigley Cripple looks a bit of a mess, but that’s kind of what it’s supposed to look like. During the emergence process, there’s a period of time when the adult mayfly is attempting to break free of its nymphal shuck. It usually occurs right in the surface film and it usually only takes a couple of seconds. However, this is a highly vulnerable couple of seconds. You can’t run with your pants down! Sometimes they’ll get stuck in this stage even longer, particularly on damp or even overcast days.

In either case, trout will often key in on the insects that are in this stage as they are such easy targets. In many cases during a heavy hatch, you’ll find trout that feed exclusively on bugs in this stage, ignoring adults and nymphs. Needless to say, if you don’t have a fly that imitates this, you could be missing out on a lot of trout!

There are a number of patterns that are intended to represent this stage of a mayfly’s life, but I have had more success with the Quigley than any other. The brown tail and “abdomen” of the fly suggest the case of the nymph while the yellow “thorax” suggests the adult half out of the case. The deer hair and hackle represent the wings and legs of the struggling adult.

It sits pretty low in the surface film. As a matter of fact, I often apply floatant to only the thorax and wing so that the fly will rest sort of half above and half below the surface film. Because it sits so low, it can be a little difficult to see. My favorite way to fish it is as a dropper, about 18” behind a more visible parachute or comparadun dry fly pattern. Having the higher riding dry fly as reference allows me to better see the cripple. Even when I can’t see it, if I see a trout rise within 18” of my dry fly, I assume he’s hitting the cripple and set the hook. Great fly, give it a try!

Learn more about Smoky Mountain hatches and flies in my hatch guide.

Quigley Cripple

Hook: TMC 100 (or equivalent) #16-18
Thread: 8/0 pale yellow
Tail: Rusty brown antron
Abdomen: Rusty brown antron
Rib: Fine copper wire
Thorax: Sulphur dry fly dubbing
Wing: Coastal deer hair
Hackle: Light to medium dun

Skills: Fishing High Water

The Smoky Mountains are known for receiving large amounts of rain in a season and when it comes in bunches, the result can be swollen, rough, intimidating, and dangerous streams and rivers. Good and bad things occur when the water rises in mountain streams. On the down side, the streams become much more dangerous and sometimes impossible to wade. The faster current also makes it more difficult to control your drift. On the up side, a lot of food gets churned up in the stream, and that factor, combined with a level of comfort and security in stained water, often results in more reckless feeding by some of the bigger trout on the block. There are brown trout exceeding 20” in many mountain streams that don’t get caught often, but when they do, it’s usually when the water is up and off color.

The stream is going to look completely different under these conditions and it will help if you have intimate familiarity with the stream under normal flows. Regardless of how well you know the water, always use extreme caution under these conditions and don’t try any heroic stream crossings. One wrong step can quickly get you in big trouble! In fact, it’s not a bad idea to wear a life vest when fishing under these conditions. Better safe than sorry!

Forget about finesse. You’re not going to coax rainbows to #16 dry flies with delicate casts. Bring a long rod for a heavier line – maybe a 9’ 6 weight – and plan on chucking large, heavy nymphs with a rosary of split shot and no strike indicator. Casting is going to simply involve one flip behind you, wait for the tug on the rod tip, and chuck it forward with an open loop. Long casts are not necessary and will be less effective.

Instead, wade the edges and look for slower seams on the edge of fast currents and eddies behind rocks. Position yourself as close to the feeding zone as you safely can and use the length of the rod to reach and hold your flies in position. Keep the rod tip up and try to keep as much of the fly line off the water as possible, allowing for a much slower, more controlled drift. Follow the flies with the rod tip as they drift through the feeding lane and keep an eye on the fly line between the rod tip and water. You may feel a strike since you’re working with such a short line but most likely you’ll determine the strike when you see the fly line pull down or hesitate. If anything suspicious like this occurs, set the hook! With practice you’ll soon be able to differentiate between fish and rocks.

Don’t expect to catch large quantities of fish under these circumstances. It will be tough fishing to say the least. But if you stick with it, the rewards can be enormous!