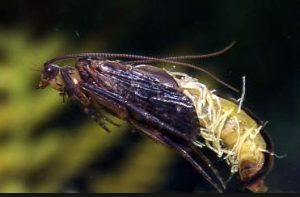
Caddis have always seemed to be one of the most overlooked and under-imitated aquatic insects in the fly fishing world. Maybe it’s because they haven’t been written about nearly as much as their sexier mayfly cousins over the years. I mean, mayflies are given names like Pale Morning Dun, Quill Gordon, and Gray Fox… just to name a few. Caddis are given names like Green Caddis, Brown Caddis, Black Caddis…
Caddis Larva
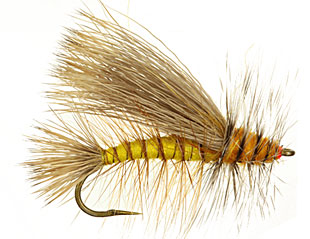
Regardless of the lack of respect given to caddis over the years, they have always been and continue to be abundant in nearly every body of freshwater and a staple in the diet of trout everywhere. I have numerous caddis patterns that I fish seasonally in the Smokies, but one that finds its way into the line-up more than any other is the Soft Hackle Wired Caddis.
There have been a number of wire body caddis patterns over the years and this is simply my variation on similar recipes. I sometimes tie it without a bead, but most often with a black tungsten bead at the head. It fishes well on a dead drift under a strike indicator but, especially when caddis are emerging, can be very effective fished with a drift and swing method. Learn more about this method and other similar techniques in this article on Active Nymphing.
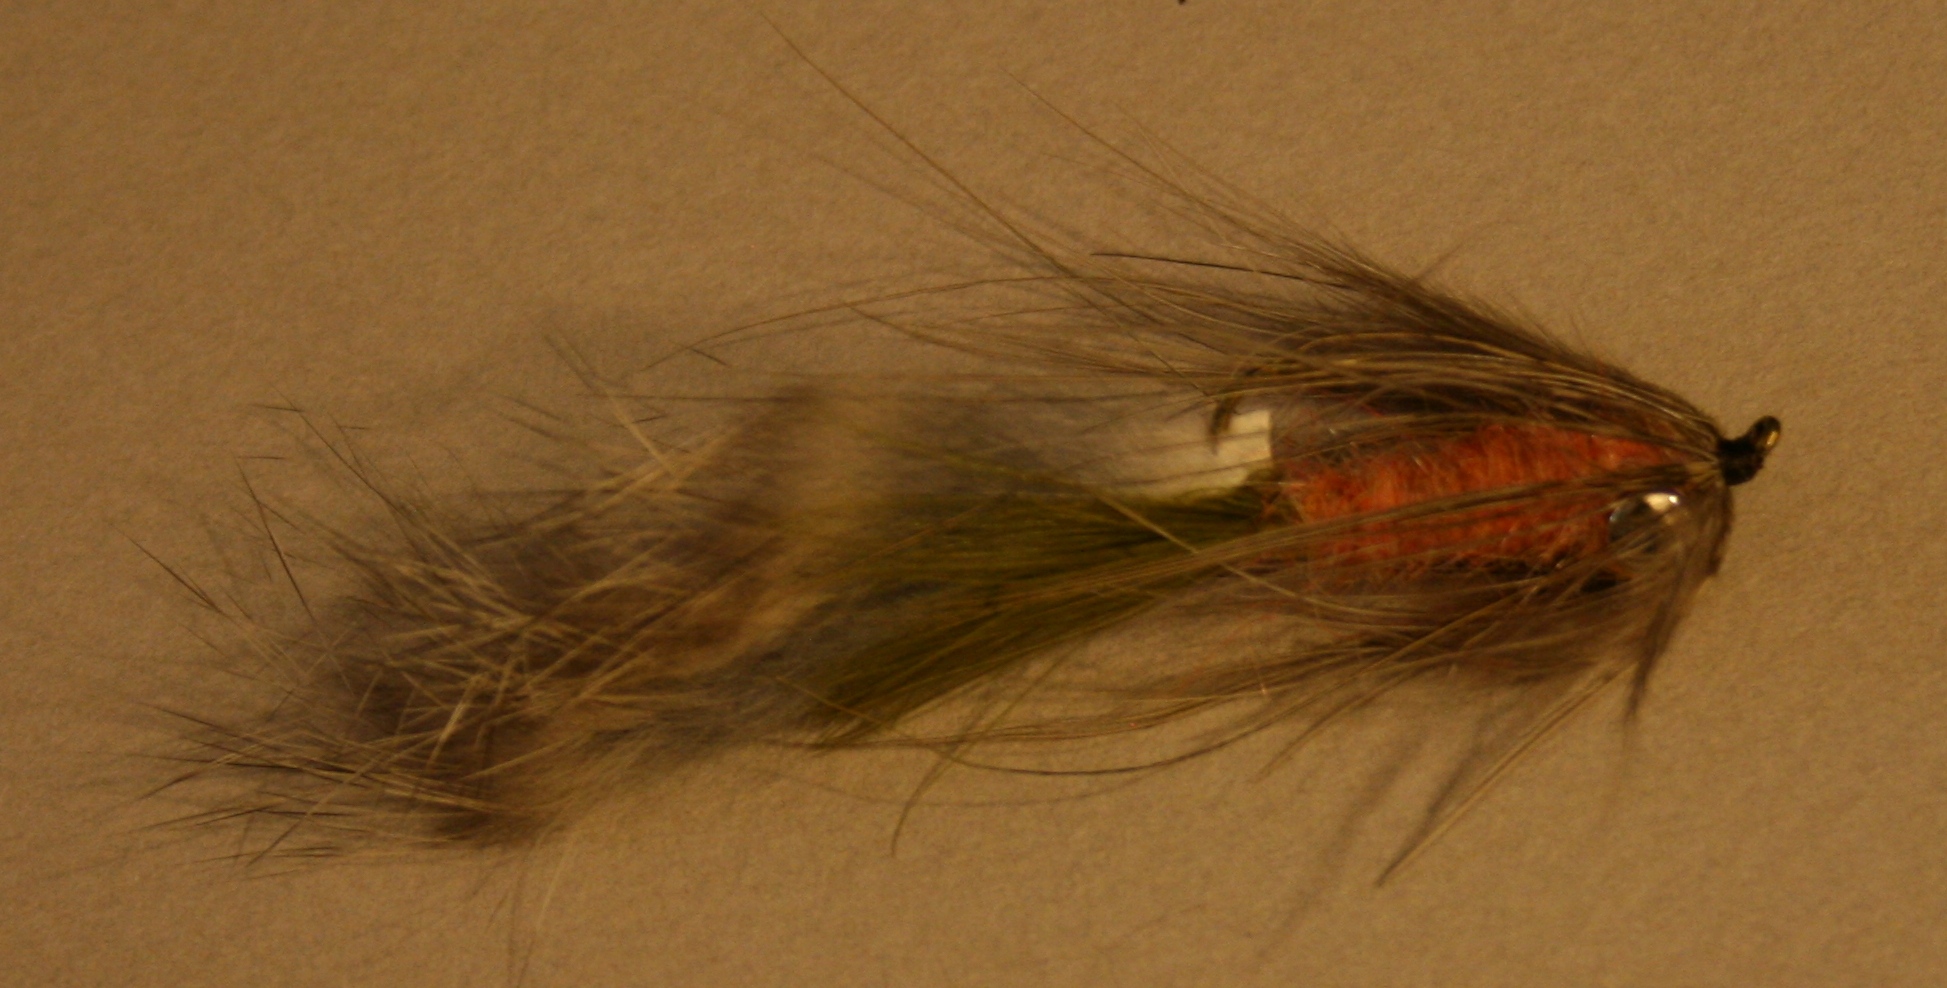
Soft Hackle Wired Caddis
Hook: #18 – 12 TMC 2457 (or equivalent) Bead: Black tungsten to match hook size Body: Small chartreuse wire* Back: Peacock herl woven between wire wraps Thorax: Black or brown Wapsi Life Cycle dubbing* Hackle: Black or brown hen*
*Other colors can be substituted to match specific caddis species
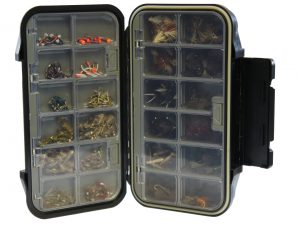
As with most things in fly fishing, fishing packs and vests have come a long way over the years. The great thing about that is you now have a seemingly endless array of ways to carry and organize your on-stream tools and accessories. The bad thing is those seemingly endless choices can be a bit overwhelming.
There is certainly no right or wrong pack or vest. The best option for you will boil down to how much stuff you plan to carry, where you plan to carry it (backcountry or more roadside), and how you want to organize it. As with fly rods, the more diverse your fishing adventures are, the more likely you’ll need more than one option. For instance, what might work well for backcountry trout fishing in the mountains may not work very well wading saltwater flats. But for most folks, you should be able to find one system that works for all of your fishing needs.
Again, what works best for me may not suit you at all, so I’m not going to try to tell you the best product. However, I have had the opportunity over the last 30 years to use most every style of vest/pack and will share below what I believe are pros and cons of each.
Vests: For decades, this has been the standard for carrying fly boxes, tools, etc. on the stream and while there have been some changes over the years, the basic concept is still the same and this is still the choice for many anglers. One of the greatest benefits of a vest is that with individual pockets for nearly everything, it’s really easy to keep things separated and organized. And the design of the vest is such that you can keep most of those items quickly and easily accessible. Most vests will also have larger compartments on the back for items that you may not need to access as frequently, like a rain jacket or lunch. D-rings on the back of a vest also make a great place to attach a net where its out of the way but easily accessible with the addition of a magnetic or clip attachment.
While there have been numerous improvements over the years, the biggest complaint with vests still seems to be that they are heavy, with most of the weight being carried on your neck and shoulders. Another downside is they do not wear well with a backpack. If you like to do a lot of backcountry fishing, you may want to carry more safety and comfort provisions that necessitate a backpack in addition to your fishing gear. It can be difficult to comfortably and practically wear a backpack when the straps are going over full, bulky pockets on a vest.
Hip Packs: These are often worn around the waist on the rear when not fishing, and rotated to the hip when accessing items in the pack. Probably their greatest advantage is that they stay out of your way when fishing and offer total freedom of movement when casting, etc. There are also accessories you can add (or may be built in to some packs) for carrying a net.
The biggest downside to a hip pack is that it doesn’t keep items as organized and it can be more difficult to access those items. Additionally, the hip pack, by itself, usually does not have the capacity to carry larger items like a rain jacket or lunch. However, a hip pack does wear comfortably with an additional backpack. Many will use the hip pack alone when fishing closer to the car and add a backpack when fishing in the backcountry. Finally, these are not the best option for someone who does a lot of deep wading. Although, there are a lot of waterproof options now.
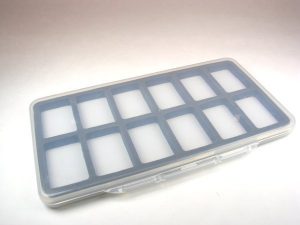
Chest Packs: These, as the name implies, are designed to be worn on the chest and come in a number of sizes. They organize things in much the same way a hip pack does but keep things far more accessible on your chest and high out of the water. Many will have a D-ring on the rear of the neck strap for carrying a net. I would include a chest fly box (like I use) in the same category as a chest pack, except that there is no need for separate fly boxes.
Chest Fly Box
Some don’t like having a cumbersome item on their chest and some of the larger chest packs can be quite cumbersome. Smaller chest packs are very comfortable but don’t carry as much stuff. In either case, you won’t have enough capacity to carry large items but like a hip pack, you can easily wear a backpack with your chest pack to carry more things when travelling far from the car. Some companies even make “fishing backpacks” designed in such a way that a compatible chest pack can clip to the front of it.
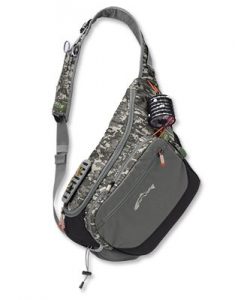
Sling Packs: These are the latest trend in fishing packs and are designed to be more accessible than a hip pack and more out of the way than a chest pack. They are worn diagonally across your body so that they can be easily “slung” around to your front when you need to get to it. It can then be “slung” around and secured out of the way on your back when you’re fishing. They come in small and large sizes depending on how much you need to carry.
These packs are well designed and very comfortable but even the big ones don’t have enough capacity to carry everything you might want to take on a trip deep into the backcountry. On such a trip, I typically carry a rain jacket, lunch, first-aid kit and plenty of water. I also regularly carry my wading boots in on long hikes. You need a backpack to carry those items and a sling bag just can’t be worn and utilized with a backpack. The other downside to a sling bag is there just doesn’t seem to be a good place to carry a net (if needed) without it getting in the way.
Lanyard: A fishing lanyard is basically a necklace for carrying your essentials around your neck. Most will comfortably carry and organize nippers, forceps, tippet, floatant and small fly box. By itself, this is for the absolute minimalist. For others, it may be a way to keep essential, frequently used items immediately accessible while carrying other less frequently used items in a hip pack or backpack.
The downside is fairly obvious with a lanyard. It has almost zero capacity. There is no place for rain jacket, lunch, water, camera, leaders, multiple fly boxes, etc. In my opinion, the only reasonable use for a lanyard would be in a boat or in conjunction with another pack as mentioned above.
My friend Walter Babb said that most people’s favorite fly is the fly they happened to have on the first day the fishing was really good. The implication of his statement is that more often than not, it’s the archer, not the arrow. Most of the time, if your fly is presented well and the fish are feeding, it probably doesn’t matter what fly you have on. And if the fish aren’t feeding? It probably doesn’t matter what fly you have on!
But since you happened to have that fly on the first day the fishing was good, you have confidence in it. Now it’s the first fly you put on and you leave it on longer. I have countless fly patterns that I abandoned because they didn’t catch fish the first time I tried them, but often that first time was after I tried everything else. Nothing was working that day!
With all of that said, I have, by far, caught more big brown trout in the Smokies on a Tellico Nymph than any other fly. But, you guessed it… the first big brown trout I caught in the Smokies was on a Tellico Nymph. I have confidence in it. And since most of the big browns I’ve taken over the years were either spotted first or caught during “favorable brown trout conditions,” I’d put a Tellico on in anticipation. So, it’s a bit deceiving. Who is to say I wouldn’t have caught those fish on a Prince Nymph had I chosen to tie one on?
Nevertheless, the Tellico Nymph is a good fly and it’s been around a long time. Its exact origins are unclear, though it was thought to have, obviously, been initially created and fished on the Tellico River in East Tennessee. It has definitely been around since the 1940’s, but some estimate that it may date back to the turn of the 20thcentury. In any case, it has to be the most well known fly from this region and it has accounted for fish all over the world.
In addition to its origin, there seems to be some confusion as to what the fly was originally supposed to imitate. Many contend that it represents a caddis larva. Others are just as certain it is supposed to be a mayfly nymph. To me, there is absolutely no doubt that it was intended to represent a golden stonefly nymph. The coloration and size are consistent with that of a golden stone, and the Tellico River has long been known for its abundance of these nymphs.
As with any popular fly that has been around for this long, there have been a number of variations on the pattern over the years. My personal favorite was devised by East Tennessee fly tyer, Rick Blackburn. I tie most in size #10.
Blackburn’s Tellico
Hook: 3XL nymph hook #12 – 6 Thread: Dark brown 6/0 Weight: .015 to .035 lead wire (depending on hook size) Tail: Mink fibers (I often use moose as a substitute) Rib: Gold wire and 2-3 strands of peacock herl Wing Case: Section of turkey tail – lacquered Body: Wapsi Stonefly Gold Life Cycle dubbing Hackle: Brown Chinese neck hackle, palmered through thorax
One of the worst things you can do to a dry fly is catch a fish on it! They slime it and submerge it and swim it around… Just in general, keeping a dry fly floating better and longer seems to be an ongoing quest for many fly tyers and fishers.
There are a number of factors that can go into how well and how long a dry fly continues to float high. Certainly the materials from which the fly is tied will play a big role, as will the skill of the angler. The more you allow your fly to drag across currents, rather than drift on them, the more waterlogged your fly will become. Where you are fishing will make a difference, too. It’s easier to keep a fly floating high in big, open rivers where false casting is an option than it is in a small, tight mountain stream. In any case, there are an endless number of products on the market that are designed to help with this task and we lump them all into the category of “floatants.”
As with many products in the fly fishing world, if you ask ten different anglers which one is the best, it’s entirely possible that you will get ten different answers. Sometimes those answers will come in the form of a specific brand of floatant, and others will come in the form of a specific style. When it comes to brand, I believe that is a matter of personal preference and you’ll just have to try a few different ones to see if one in particular earns your loyalty. But when it comes to different styles of floatant, the specific task at hand may determine which will be best. In fact, you may want to have more than one style of floatant to perform different tasks. Listed below are a few different common styles of floatant and a description of how and when they might best be applied.
Liquid Floatants While many anglers use them in different ways, liquid floatants are probably most useful before you ever get to the stream. Whether dry flies that you tie yourself or buy from a shop, you can use a liquid style floatant to “pre-treat” new flies in much the same way as you might “Scotchgard” your sofa. Exact application may vary and you should read the recommendations for the specific brand you purchase, but typically, flies will be soaked in the liquid for five minutes or so and then set out to dry overnight. In theory, after application of the product, water will better bead and roll of the fly material rather than absorb into it.
Gel Floatants Gel floatants are probably the most common and popular style of floatant. They come in a small, very portable bottle and, like the liquid floatants, are designed to be a pre-treatment to an already dry fly. The big difference is gel floatants are designed to be used streamside, immediately before fishing the fly.
It is important that gels are not “over applied.” A small amount should be rubbed into the fly and any excess should be removed. Gels are also frequently mis-applied – after a fly has already become waterlogged. If a fly is already saturated, applying a gel floatant will essentially trap moisture into the fly and make it worse.
Spray Floatants Also normally applied while the fly is still dry, spray floatants are basically just a variation on a gel floatant. Spray floatants come in a bottle with a pump top and are applied much like you would spray something like an eyeglass cleaner. They are not as messy as the gel but are sometimes more challenging to completey coat the fly.
Paste Floatants These are basically just a thicker version of a gel floatant. They can really create a mess on smaller dry flies and are probably best suited for larger dries like hoppers and stoneflies. A lot of people prefer a paste floatant to apply to yarn strike indicators or even on a leader to keep it floating better.
Powder Floatants These are used less as a pre-treatment and more as a means to revive a saturated fly. As mentioned above, when a dry fly becomes oversaturated and begins to sink, applying a gel or spray can often make it worse by trapping moisture in. Powder floatants are used to absorb and remove that moisture from a fly.
Typically they will come in a bottle with a wide, flip-top lid. The fly, still attached to the tippet, is inserted into the bottle and the lid is closed. The bottle is then shaken a few times and the moisture is removed from the fly.
At this point, there is a lot of debate on whether to re-apply a gel or spray type floatant and you’ll just have to find what works best for you. I usually don’t re-apply another floatant unless I’m using a synthetic (like foam) dry fly.
Brush Floatants Brush floatants are essentially another version of a powder floatant. Rather than shaking the fly inside the bottle, a small brush is used to apply the powder to the fly. Again, it’s personal preference but with brush floatants, be prepared for a little frustration on windy days!
There are countless styles and floatants on the market today and all have their place. And unlike the homemade lighter fluid and paraffin concoctions of days gone by, they are typically odorless and environmentally friendly. You just need to find a system that suits your needs.
Personally, I carry a gel floatant for pre-treating dry flies and a “shake style” powder for reviving them and get by just fine. But I offer the disclaimer that I often offer in these newsletter articles… This is just one man’s opinion!
I was shocked when I realized that I had never included an article about the Parachute Adams in this newsletter. Not only is it one of the best dry flies in the Smoky Mountains, it is arguably the best dry fly for trout in the world. It doesn’t imitate anything in particular but just has a buggy look and serves as a great “generic” mayfly imitation. In a pinch, it could also pass for a number of caddis and midges.
Traditional “Catskill style) Adams dry fly
It is derived from the original Adams dry fly. A parachute pattern is merely a method of tying a dry fly. While traditional mayfly patterns had two upright and divided wings, with a hackle wound around the hook vertically; a parachute pattern has a single post with the hackle wound horizontally around that post. The post is typically white or some other bright color like pink or orange, allowing the angler to better see the fly on the water. Additionally, with a hackle wound horizontally around the post, the fly rides flatter on the water with a more realistic profile.
The original fly has been around for nearly 100 years. In 1922, Leonard Halladay, a Michigan fly tyer conceived the Adams as a general mayfly imitation. It was first fished by an Ohio attorney and friend of Halladay, Charles F. Adams on the Boardman River near Traverse City, Michigan. Charles Adams reported his success with the fly to Halladay who decided to name the fly after his friend. While it is unclear exactly when the Adams got the “parachute treatment,” parachute style flies began gaining popularity in the U.S. in 1971 when Swisher and Richards published the book, Selective Trout, and advocated the advantage of dry flies that rode flush on the water. One would assume that the parachute version of the Adams was born somewhere in that timeframe.
Since then, it has seen numerous variations in the body color, post material, post color and more. While many of these variations have been highly successful, it’s still tough to beat the traditional pattern. The recipe for that traditional version is included below.
Parachute Adams
Hook: TMC 100 (or equivalent) sizes #10 – #26
Thread: 8/0 black
Tail: Even mix of brown and grizzly hackle fibers
Body: Natural muskrat fur (or and modern dry fly dubbing in Adams Grey)
Post: White calf hair (synthetics such as floating poly yarn also work well)
Hackle: One grizzly and one brown rooster hackle, sized to match hook
The Fleeing Crayfish was originated by fly fishing legend, Gary Borger in the 1980’s. He noted that while many crayfish pattern with ultra realistic, outstretched claws and the like looked great, most fish would eat them as they were retreating or fleeing. The design of his pattern imitates the crayfish in this moment. It has unbelievable movement and motion in the water and is a killer pattern for smallmouth and large browns.
I’ve included the recipe for my most common version of this pattern, but I tie it in a number of different color combinations. You should substitute colors that best represent crayfish in the waters you fish.
It should also be mentioned that this fly’s greatest strength is also its greatest weakness. The loose piece of rabbit hide that provides so much “action” in the fly will inevitable tear off after numerous fish. Since the rest of the fly is so durable, I carry a package of rabbit strips with me so that I can replace that piece when necessary.
Borger’s Fleeing Crayfish
Hook: 3x long streamer #10 – #4
Thread: 6/0 Brown
Eyes: Barbell matched to hook size
Tail: Light green medium marabou
Body: Crayfish orange dubbing
Legs: Pheasant rump feather
Pinchers: Natural rabbit hide strip – medium
Other Materials: Super glue to secure eyes
I’m a bit of an oddball. This is not exactly breaking news for most folks who know me. But to paraphrase John Gierach, “If, from time to time, people don’t walk away from you shaking their head… You’re doing something wrong.” I could certainly dedicate an entire article, or even a book, to my oddball qualities, but for this article, I am referring to one specific oddball quality. I fish and guide with a set-up that combines a pack and fly boxes all in one contraption. You’ve seen it. It’s my chest fly box, custom built by the Richardson Chest Fly Box Company in Pennsylvania. It’s awesome and I love it.
Chest Fly Box
So, that makes it a little more challenging for me to give advice on individual fly boxes. But I have over the years used about every kind of box and pack known to man. And along the way I have learned a few things that may be helpful to you when purchasing or organizing your flies. At the least, it might get you thinking about it. And who knows? Maybe one day you’ll come to your senses and buy a Richardson!
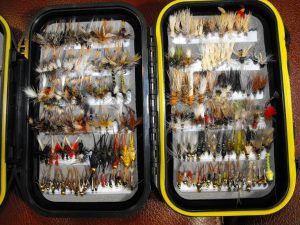
While chest fly boxes like mine are more common in the Northeast, they are hardly common. Most folks go a different route. They have a variety of different fly boxes that they stuff in a vest, hip pack, chest pack, sling bag, or some other carryall. No matter how you decide to carry them, fly boxes are essential organizational tools in our sport and it helps to know a few things about them.
Medium Box with Foam
They come in a number of different sizes, from large, briefcase size boxes for boats to ultra slim boxes not much bigger than a smartphone. When choosing a fly box size, you have to consider how many flies you need to carry, how you’re going to carry them, how big the flies are, and how you want to organize them. For instance, a big, briefcase size box may hold every fly you have but it won’t be very portable when wading creeks. Or a small, ultra slim box might be convenient to slip in a pocket, but if you plan to store bass bugs in it, you’ll only be able to carry a couple and you won’t be able to close the lid.
In addition, you’ll have to consider how you want to organize your flies within your box. There are countless options for securing your flies from slot foam, flat foam, and nubby foam to compartments, clips, and magnets. Some boxes might even have a combination of both, with a type of foam on one side of the box and compartments on the other. Certainly personal preference plays a big role in you box interior of choice, but there are practical matters to consider as well.
Compartment Box
Compartments tend to lend themselves well to beefier patterns, or large quantities of the same fly. For instance, if you fish a lot of Pheasant Tails and carry a lot of them with you, it’s far easier to dump them all into one compartment rather than trying to line up three dozen Pheasant Tails across multiple rows of foam. I find foam more useful when I am trying to organize a lot of different patterns but small quantities of each. It’s easier to see what I have.
Ultra Thin Magnetic Compartments
The type of fly may also determine the best way to store it. Thin foam or magnetic boxes can be great for midges and nymphs but can crush the hackles on many dry flies. On the other hand, trying to carry midges in deep compartments can not only be a waste of space, it can be difficult to grasp them with your fingers when removing them from the box.
Finally, when you’re on the stream, you don’t want to spend your time hunting for flies or digging through your pack for fly boxes. Try to have a designated area of your pack or vest for boxes rather than burying them under a rain jacket somewhere. And if you carry five fly boxes on the stream, try to make them five different, or at least different looking, fly boxes. This will save you all kinds of time when trying to locate a specific box of flies.
When it comes to fishing dry flies in the Smokies, particularly on the smaller streams, I am typically looking for two primary things in a pattern: It needs to be visible and it needs to be buoyant. Beyond that I can begin focusing on a few more details like color and size.
In general, trout in the Smokies don’t see heavy hatches of individual insects. Rather, they mostly see small quantities of a lot of different insects. So, if you can present the fly naturally and without spooking fish, most any all-purpose, “prospecting” fly pattern will do the trick. As mentioned above, if you can get a little more precise with size and color, your pattern will be that much more effective.
Matching size will require more observation of bugs on the water or simply having general knowledge of what should be hatching. The same two things can help with matching color but also having broad knowledge of how seasons impact color can put you ahead of the curve. With some exceptions, aquatic insects tend to blend in with their surroundings. So, in winter months when trees are bare, most of what hatches is dark. As foliage comes in, most of what hatches is brighter.
The Stimulator has long been a favorite fly pattern of Smoky Mountain anglers for all of the reasons mentioned above. Its buoyancy and light colored wing not only make it easy to see, but make it a perfect “indicator fly” when fishing a dropper. And if you mix and match sizes and colors, you could nearly fish a Stimulator 12 months out of the year!
The Stimulator was long thought to be the invention of well-known West Coast angler and fly shop owner, Randall Kaufmann. While Kaufmann is responsible for the modifications that made the fly most of us know today, the fly’s true originator is thought to be Paul Slattery, who tied a stonefly pattern called the Fluttering Stonefly to fish on the Musconetcong River in central New Jersey. This was in the early 1980’s and he soon renamed the fly after a New York City punk-rock band called The Stimulators.
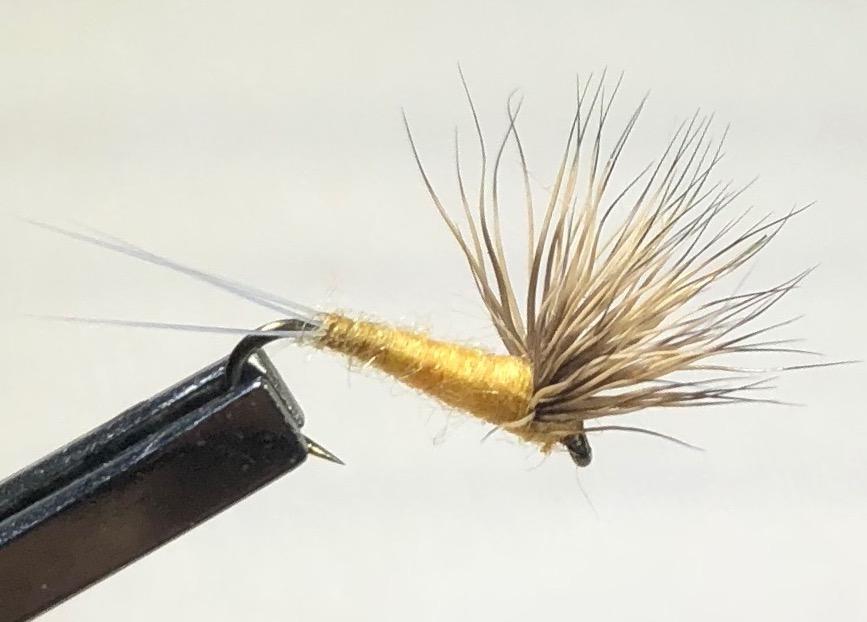
Golden Stonefly
In any case, the fly seems to have been created to imitate an adult stonefly, but it is also a good suggestion of a caddis and sometimes even a hopper. I most often fish it in yellow and in sizes #16 – 8. I think the smaller size makes a great imitation for the prolific Little Yellow Sally Stoneflies, and the larger sizes are good representations of the larger golden stones that hatch on summer evenings in the mountains. In the fall, I often fish a #10 Stimulator in orange to imitate the large ginger caddis.
Whether it is imitating anything or not, it catches fish and it floats well in heavier pocket water found throughout the mountains. It is one of the most popular dry flies ever invented for trout and can be found in most every fly shop in the country.
In the Smokies, we are mainly fishing faster, choppier water and often choose bushier, more heavily hackled dry fly patterns that float well. In that kind of water, trout don’t get much time to study the fly and their view tends to be distorted by those choppy currents, so the bushier flies tend to do the trick. Even when fishing pools in the Smokies, you usually have a defined feeding channel that will have at least a little chop to it. In those situations, a parachute style fly pattern is usally adequate to provide a slightly more realistic profile.
But in flatter water like you commonly see on tailwaters like the Clinch, particularly weeks into a heavy hatch, an even more realistic profile is necessary. Trout routinely refuse parachute style flies and probably wouldn’t even consider a vertically hackled Catskill style dry fly.
This problem isn’t new to fly fishers. In the 1930’s, Fran Betters developed the Haystack to fool trout in slow moving spring creeks. It consisted of a deer hair wing and tail and no hackle, allowing for a lower riding fly with a much more realistic profile. Al Caucci and Ed Natasi introduced the Comparadun, a variation of the Haystack, in their 1972 book, Comparahatch. The pattern is essentially the same but they were able to use more modern microfibbets to create a longer, slimmer, more durable split tail that aided in floatation.
In the mid 1980’s, Craig Matthews and John Juracek took the Comparadun a step further and replaced the split microfibbet tails with a piece of antron or zelon. It essentially turned the fly into an emerger, with the antron or zelon “tail” suggesting the trailing shuck of an emerging mayfly. Of course, in any of the patterns described above, the body, wing, and tail/shuck colors can be altered to imitate different insects.
I routinely fish the split tail and the trailing shuck versions, usually during a sulphur or BWO hatch. And again, I am usually fishing them on the Clinch or possibly in a slow pool in the mountains. They just don’t float well enough to fish them in faster riffles and pocket water. But on a slow glide on the Clinch, they can be deadly!
Sulphur Comparadun
Hook: TMC 100 (or equivalent) #16-18
Thread: 8/0 pale yellow
Tail: Light dun microfibbets ( or replace microfibbets with small tuft of brown antron for trailing shuck version)
Body: Pale yellow dry fly dubbing
Wing: Coasatal deer hair
Few fly fishermen, if any, possess the knowledge and experience of Joe Humphreys. Joe is probably best known as a teacher and an author, but over his many decades in the business, he has also created a number of original fly patterns. By far, my favorite is the Humphreys’ Caddis Pupa.
Natural Caddis Pupa
To be honest though, I’ve always been a little perplexed by the pattern. To me it bears little resemblance to a natural caddis pupa and doesn’t look like any imitation that I’ve seen or that I would create. In his book, “On the Trout Stream,” the only explanation Joe provides is “A good firsthand look at a caddis pupa prompted this tie.” Apparently Joe saw something in a caddis pupa that nobody else did, because his unique pattern has proven to be one of the most effective I’ve ever fished!
The body color can be varied to match caddis in a specific stream. I tie them often in olive and cream, but in the Smokies, most frequently find success with tan bodies. Some species of caddis hatches in the Smokies nearly anytime of year but the heaviest hatches tend to occur in spring.
It works best on any stretch of stream with more of a cobble or even sandy bottom. I frequently fish it as a dropper off a Neversink Caddis or in a tandem nymph rig below a soft hackle.
Humphreys’ Caddis Pupa
Hook: TMC 3761 or equivalent #18 – 12
Thread: Brown 8/0
Weight: Lead wire to match hook size
Butt: Peacock Herl
Body: Natural Hare’s Ear Dubbing (substitute other colors to match naturals)
Hackle: Dark Brown Saddle
Head: Peacock Herl
 Caddis have always seemed to be one of the most overlooked and under-imitated aquatic insects in the fly fishing world. Maybe it’s because they haven’t been written about nearly as much as their sexier mayfly cousins over the years. I mean, mayflies are given names like Pale Morning Dun, Quill Gordon, and Gray Fox… just to name a few. Caddis are given names like Green Caddis, Brown Caddis, Black Caddis…
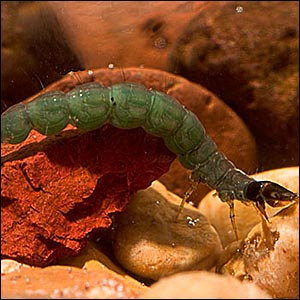
 As with most things in fly fishing, fishing packs and vests have come a long way over the years. The great thing about that is you now have a seemingly endless array of ways to carry and organize your on-stream tools and accessories. The bad thing is those seemingly endless choices can be a bit overwhelming.
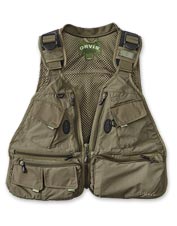 Vests: For decades, this has been the standard for carrying fly boxes, tools, etc. on the stream and while there have been some changes over the years, the basic concept is still the same and this is still the choice for many anglers. One of the greatest benefits of a vest is that with individual pockets for nearly everything, it’s really easy to keep things separated and organized. And the design of the vest is such that you can keep most of those items quickly and easily accessible. Most vests will also have larger compartments on the back for items that you may not need to access as frequently, like a rain jacket or lunch. D-rings on the back of a vest also make a great place to attach a net where its out of the way but easily accessible with the addition of a magnetic or clip attachment.
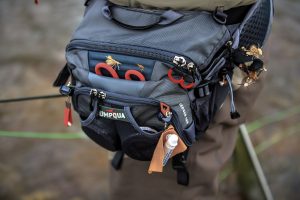 Hip Packs: These are often worn around the waist on the rear when not fishing, and rotated to the hip when accessing items in the pack. Probably their greatest advantage is that they stay out of your way when fishing and offer total freedom of movement when casting, etc. There are also accessories you can add (or may be built in to some packs) for carrying a net.
 Chest Packs: These, as the name implies, are designed to be worn on the chest and come in a number of sizes. They organize things in much the same way a hip pack does but keep things far more accessible on your chest and high out of the water. Many will have a D-ring on the rear of the neck strap for carrying a net. I would include a chest fly box (like I use) in the same category as a chest pack, except that there is no need for separate fly boxes.
 Sling Packs: These are the latest trend in fishing packs and are designed to be more accessible than a hip pack and more out of the way than a chest pack. They are worn diagonally across your body so that they can be easily “slung” around to your front when you need to get to it. It can then be “slung” around and secured out of the way on your back when you’re fishing. They come in small and large sizes depending on how much you need to carry.
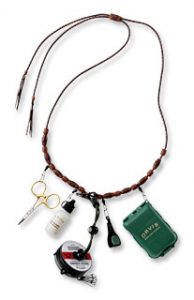 Lanyard: A fishing lanyard is basically a necklace for carrying your essentials around your neck. Most will comfortably carry and organize nippers, forceps, tippet, floatant and small fly box. By itself, this is for the absolute minimalist. For others, it may be a way to keep essential, frequently used items immediately accessible while carrying other less frequently used items in a hip pack or backpack.
 My friend Walter Babb said that most people’s favorite fly is the fly they happened to have on the first day the fishing was really good. The implication of his statement is that more often than not, it’s the archer, not the arrow. Most of the time, if your fly is presented well and the fish are feeding, it probably doesn’t matter what fly you have on. And if the fish aren’t feeding? It probably doesn’t matter what fly you have on!
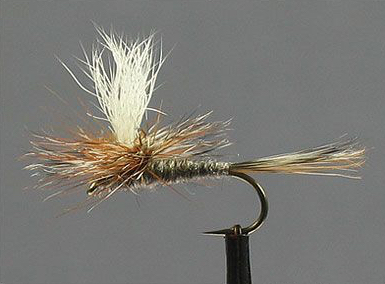
 While many anglers use them in different ways, liquid floatants are probably most useful before you ever get to the stream. Whether dry flies that you tie yourself or buy from a shop, you can use a liquid style floatant to “pre-treat” new flies in much the same way as you might “Scotchgard” your sofa. Exact application may vary and you should read the recommendations for the specific brand you purchase, but typically, flies will be soaked in the liquid for five minutes or so and then set out to dry overnight. In theory, after application of the product, water will better bead and roll of the fly material rather than absorb into it.
 Gel floatants are probably the most common and popular style of floatant. They come in a small, very portable bottle and, like the liquid floatants, are designed to be a pre-treatment to an already dry fly. The big difference is gel floatants are designed to be used streamside, immediately before fishing the fly.
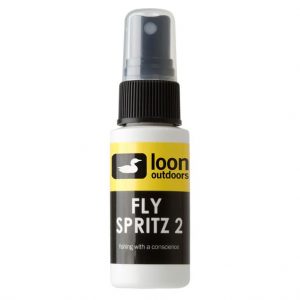 Also normally applied while the fly is still dry, spray floatants are basically just a variation on a gel floatant. Spray floatants come in a bottle with a pump top and are applied much like you would spray something like an eyeglass cleaner. They are not as messy as the gel but are sometimes more challenging to completey coat the fly.
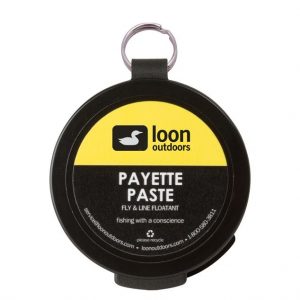 These are basically just a thicker version of a gel floatant. They can really create a mess on smaller dry flies and are probably best suited for larger dries like hoppers and stoneflies. A lot of people prefer a paste floatant to apply to yarn strike indicators or even on a leader to keep it floating better.
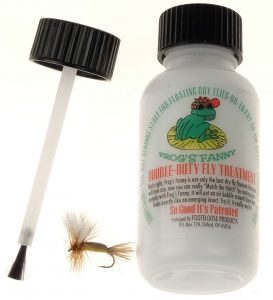 Brush floatants are essentially another version of a powder floatant. Rather than shaking the fly inside the bottle, a small brush is used to apply the powder to the fly. Again, it’s personal preference but with brush floatants, be prepared for a little frustration on windy days!
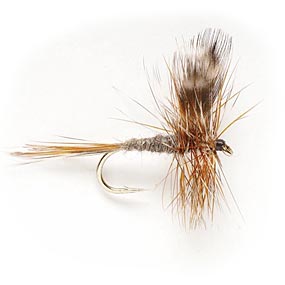
 The Fleeing Crayfish was originated by fly fishing legend, Gary Borger in the 1980’s. He noted that while many crayfish pattern with ultra realistic, outstretched claws and the like looked great, most fish would eat them as they were retreating or fleeing. The design of his pattern imitates the crayfish in this moment. It has unbelievable movement and motion in the water and is a killer pattern for smallmouth and large browns.
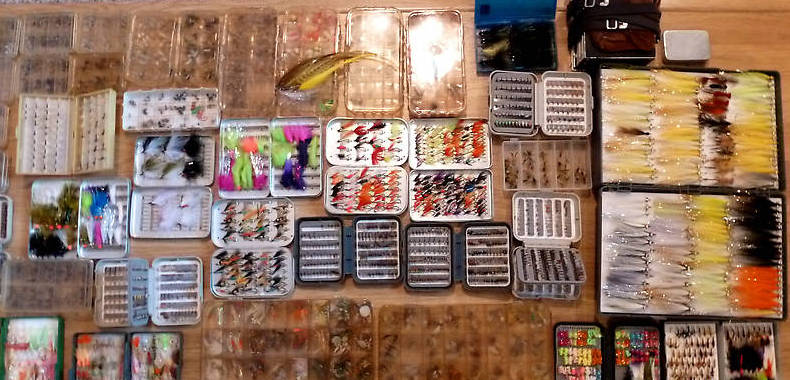 I’m a bit of an oddball. This is not exactly breaking news for most folks who know me. But to paraphrase John Gierach, “If, from time to time, people don’t walk away from you shaking their head… You’re doing something wrong.” I could certainly dedicate an entire article, or even a book, to my oddball qualities, but for this article, I am referring to one specific oddball quality. I fish and guide with a set-up that combines a pack and fly boxes all in one contraption. You’ve seen it. It’s my chest fly box, custom built by the
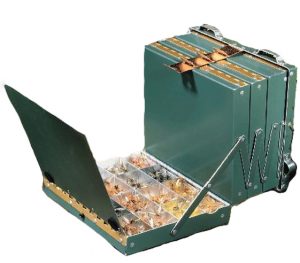
 The Stimulator was long thought to be the invention of well-known West Coast angler and fly shop owner, Randall Kaufmann. While Kaufmann is responsible for the modifications that made the fly most of us know today, the fly’s true originator is thought to be Paul Slattery, who tied a stonefly pattern called the Fluttering Stonefly to fish on the Musconetcong River in central New Jersey. This was in the early 1980’s and he soon renamed the fly after a New York City punk-rock band called The Stimulators.
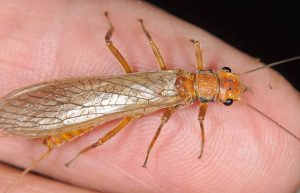
 In the Smokies, we are mainly fishing faster, choppier water and often choose bushier, more heavily hackled dry fly patterns that float well. In that kind of water, trout don’t get much time to study the fly and their view tends to be distorted by those choppy currents, so the bushier flies tend to do the trick. Even when fishing pools in the Smokies, you usually have a defined feeding channel that will have at least a little chop to it. In those situations, a parachute style fly pattern is usally adequate to provide a slightly more realistic profile.
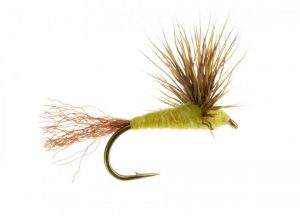 In the mid 1980’s, Craig Matthews and John Juracek took the Comparadun a step further and replaced the split microfibbet tails with a piece of antron or zelon. It essentially turned the fly into an emerger, with the antron or zelon “tail” suggesting the trailing shuck of an emerging mayfly. Of course, in any of the patterns described above, the body, wing, and tail/shuck colors can be altered to imitate different insects.
 Few fly fishermen, if any, possess the knowledge and experience of Joe Humphreys. Joe is probably best known as a teacher and an author, but over his many decades in the business, he has also created a number of original fly patterns. By far, my favorite is the Humphreys’ Caddis Pupa.