 I almost always fish with two flies when I’m trout fishing. There are just so many advantages to it. Beside the obvious advantage of potentially offering two fly choices to the trout, it provides you the opportunity to simultaneously present a fly in two different feeding columns. Below, I’m going to talk about some of those strategies as well as a few different ways to rig a dropper system. As a bonus, you get to enjoy some of my horrific artwork!
Dry Fly / Dropper
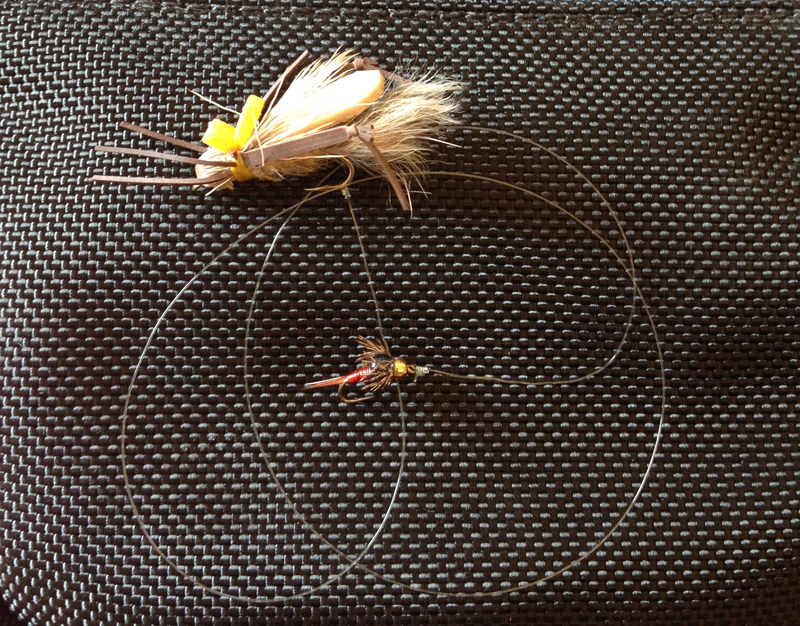
This is the two-fly method with which many fly fishermen are most familiar. It seems that even less experienced fishermen will tell you this is how their guide rigged them up when they were fishing out west during hopper season. When you rig like this, you are typically tying on a larger, or at least more visible, dry fly and attaching a smaller nymph off the back of that dry fly. You’re covering the top of the water with the dry fly and you’re covering usually the middle water column (sometimes the bottom) with the nymph. The dry fly serves as sort of an edible strike indicator for the nymph.
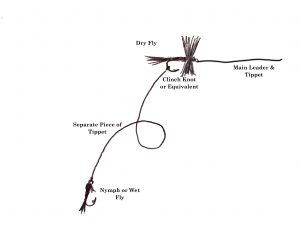 I typically rig this by tying my dry fly directly to the main leader and tippet. I’ll then take probably 18”-24” of tippet material and tie one end to the nymph, and the other to the bend of the hook on the dry fly. There are certainly a lot of variables, such as water depth or where you think the fish might be feeding, that determine how far apart you put the two flies, but the amount mentioned above is a pretty good “default setting.” I like to use a clinch knot to connect to the bend of the hook, but whatever knot you usually use to tie a fly on should work fine.
You want to make sure that the flies you select for this set-up compliment each other and are appropriate for the type of water you’re fishing. For example, a small parachute dry fly may not support the weight of a large, heavily weighted nymph. Parachute type patterns will easily support the weight of smaller, lighter nymphs, particularly in slower water. So, a #14 Parachute Adams with a #18 Zebra Midge dropper would be great for a tailwater or maybe a slower run or pool in the mountains. A #14 Parachute Adams with a #8 weighted Tellico nymph, fished in faster water is going to be trouble. Heavily hackled, bushy dry flies or foam dry flies are better choices when fishing in faster water or with heavier nymphs.
 With that in mind, know that this method may not be suitable for every situation. For instance, if you need to get a nymph deep, particularly in a faster run, you’re going to need a lot of weight and using a dry fly–dropper rig is not going to be effective. You’re better off using traditional nymphing techniques for that. But for fishing hatch scenarios where fish are actively feeding on and just below the surface, or for fishing to opportunistic feeders in shallower pocket water, it’s pretty tough to beat.
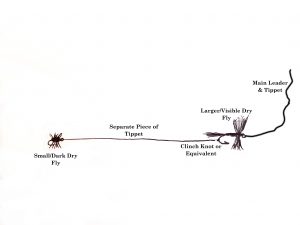
I also like to fish this same rig with two dry fly flies. On many occasions, I’ve found myself in a situation where I have trouble seeing my dry fly – usually when trying to imitate something small or dark like a midge, Trico, or BWO. In those situations, I’ll often tie on a larger, more visible dry fly with the smaller, darker dry fly tied about 18” off the back. Sometimes, having the more visible fly as reference allows me to actually see the smaller fly. But if I still can’t see the smaller one, I know to set the hook if I see a rise anywhere within 18” of the visible fly.
Two Nymphs or Wet Flies
Just like the dry fly-dropper rig above, fishing with two nymphs or wets allows you to cover two different feeding columns. Only now, you’re typically covering the middle column and the bottom. I think another advantage with a two nymph rig is they tend to balance each other out and drift better.
 There are a few different ways to rig for this and there are numerous strategies for fly selection and placement. If I have a nymph pattern that the fish are really after, I will sometimes fish two of the exact same fly. There have even been a few occasions when I’ve caught two fish at once! But usually I’m searching and I’m trying to provide the fish with options, so I’ll most often have two different fly patterns.
Keep in mind that (most of the time) your lowest fly on the rig will be fished near the bottom while the higher fly will be fished more in the middle column. I try to select and position flies with that in mind. For example, it’s far less likely to find a stonefly in the middle of the water column. They’re going to be found near the stream bottom, so logically, I want my stonefly nymph to be the bottom fly of my two fly rig. On the other hand, an emerging mayfly is more likely to be found in the middle feeding column. So, a soft hackle wet fly would probably be most effective as the top fly on my nymph rig.
You can rig like this with totally different flies or you may decide to stay in the same “family.” If you’re in the middle of or expecting, say, a caddis hatch, you may rig with a caddis emerger as your top fly and a caddis larva as your bottom fly. I’ve also had a lot of success choosing one nymph to act purely as an attractor. I may tie on a larger or brighter nymph as my top fly and a smaller or subtler nymph as my bottom one. I think that very often, the brighter or bigger nymph gets their attention, but they eat the subtler nymph below it. I tend to fish the nymphs a little closer together in these situations.
You can rig a pair of nymphs the same way we mentioned above, by tying one directly off the hook bend of the other – referred to as the in-line method. This is probably the easiest way to rig and fish two nymphs. But some don’t like this method because they don’t think it allows the top fly to drift freely.
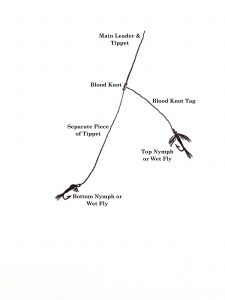
 A common way to rig two nymphs that will allow the top fly to drift more freely, is to use a blood knot to attach a section of tippet to the end of your leader. When tying the knot, take care to leave one long tag end, to which you will tie the top fly. The bottom fly will be attached to the end of the new tippet section. This definitely allows the top fly to have more movement and it puts you in more direct contact with both nymphs. Though for me, this method results in a lot more tangles so I only use it for specific scenarios.
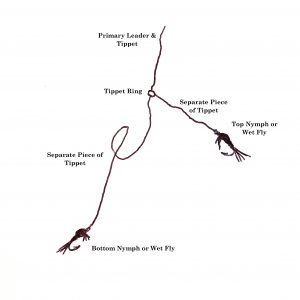
You can also rig quite similarly using a tippet ring (discussed in another article in this newsletter). With a tippet ring attached to the end of your leader, you tie one shorter piece of tippet to the ring, to which you will tie your top fly. And you tie a separate, longer piece of tippet to the ring, to which you’ll tie your bottom fly. This is a pretty simple way to do things but will also likely result in a few more tangles than the in-line method.
These are just examples of a few of the more common methods for fishing and rigging multiple flies. Play around with it and find what combos and techniques work best for you. Never be afraid to experiment!
 Probably 20 years ago, I was fishing the Clinch River with a buddy during the sulfur hatch. I won’t get into what has happened to that hatch, but back then, it was epic. Sulfurs would come off by the thousands for 4-6 hours a day for about 3 months. We would drive down from Kentucky to fish it and on most trips, we would both steadily catch fish, many topping 20”.
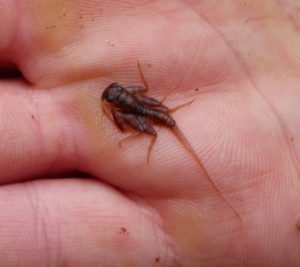
 If fish are actively rising but you don’t see any bugs in the air, check the water. Try to position yourself at the bottom of a feeding lane (downstream of where the fish are feeding) and watch the surface of the water (and just beneath) for drifting bugs. Holding a fine mesh net in the current is a great way to collect what’s coming down the channel, but if you don’t have one, your eyeballs will do just fine. If you see some insects, capture one and try to match it with a fly pattern.
 When I first started fly fishing, it was a different time. It was before everyone had access to the Internet. There were no message boards. There was no Twitter. There was no Facebook. Many fisheries didn’t receive nearly as much pressure simply because not nearly as many people knew about them. And to the fishermen who did know about them, they were closely guarded secrets shared only with a handful of trusted friends.
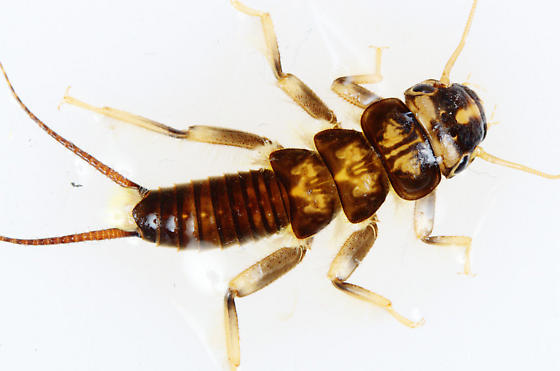 When many people think of fishing with flies, images of more familiar insects such as houseflies and mosquitoes are typically conjured. While some of these familiar terrestrial insects like ants, beetles, and hoppers are a source of food for trout, especially in the summer, it is aquatic insects that are most abundant to fish throughout the year and what most artificial flies are intended to resemble.
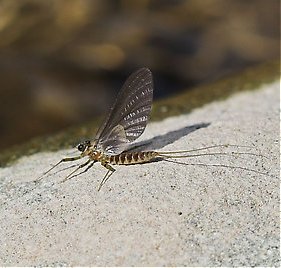
 I recently saw a post on Facebook from a gentleman who had broken two fly rods on one trip. Another person commented about “having the record” for taking the most broken rods back to his local fly shop. They proceeded to boastfully go back and forth about this as if it was some sort of badge of honor. Accidents happen and rods do break from time to time, but I had guided one of these gentlemen and it was no secret why he had broken so many.
 When we first met, I cringed as he pulled his rod from the trunk of his car. It was not in a tube and there were a variety of items piled on top of it. I’ve seen a lot of rods break over the years, but I’ve never seen a single one break while it was in the tube. If you knew him, it would come as no surprise that he forgot to bring a reel for the rod, so he ended up using one of mine.
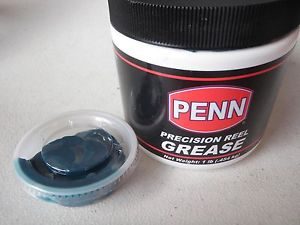
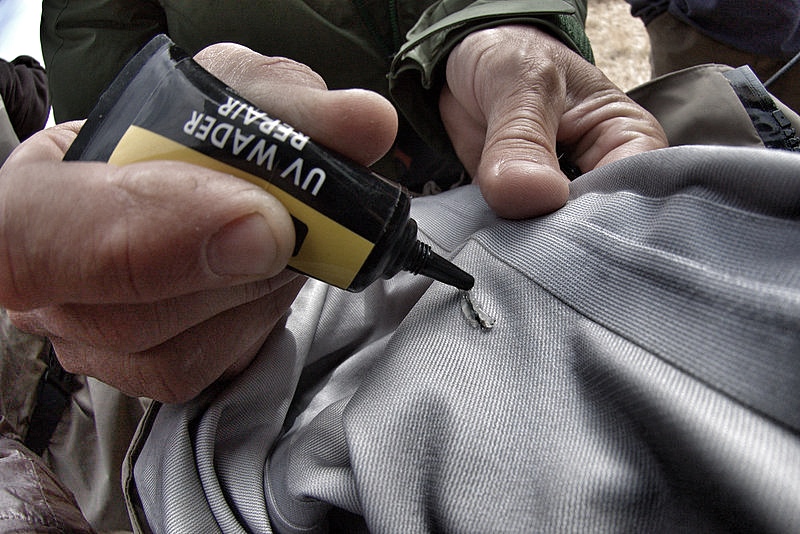
 Treating your breathable waders with a DWR is a great winter project. As a matter of fact, if you have a breathable rain jacket, grab it and treat it at the same time. DWR (Durable Water Repellant) is basically going to allow the water to “bead” and roll off the fabric rather than absorb into it. I’ve had old waders and jackets that I never treated that, even though they were still waterproof, were absorbing so much water that they felt heavy and even clammy. DWR is good stuff. There are a few brands out there and can usually be found at camping/outdoor stores. I’ve personally had good luck with ReviveX Spray-on Repellant.
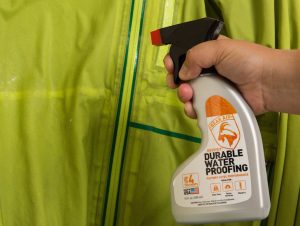 Start by washing the waders and/or jacket with a mild detergent as described above. Hang the garment(s) and spray evenly and thoroughly with DWR while the garment is still wet. I usually apply a little heavier around seams and stress areas such as the knees and crotch area on waders. On jackets, I put a little more emphasis on the shoulder area. You can then simply allow it to air dry where it’s hanging or put it in the dryer on low/medium for about an hour.
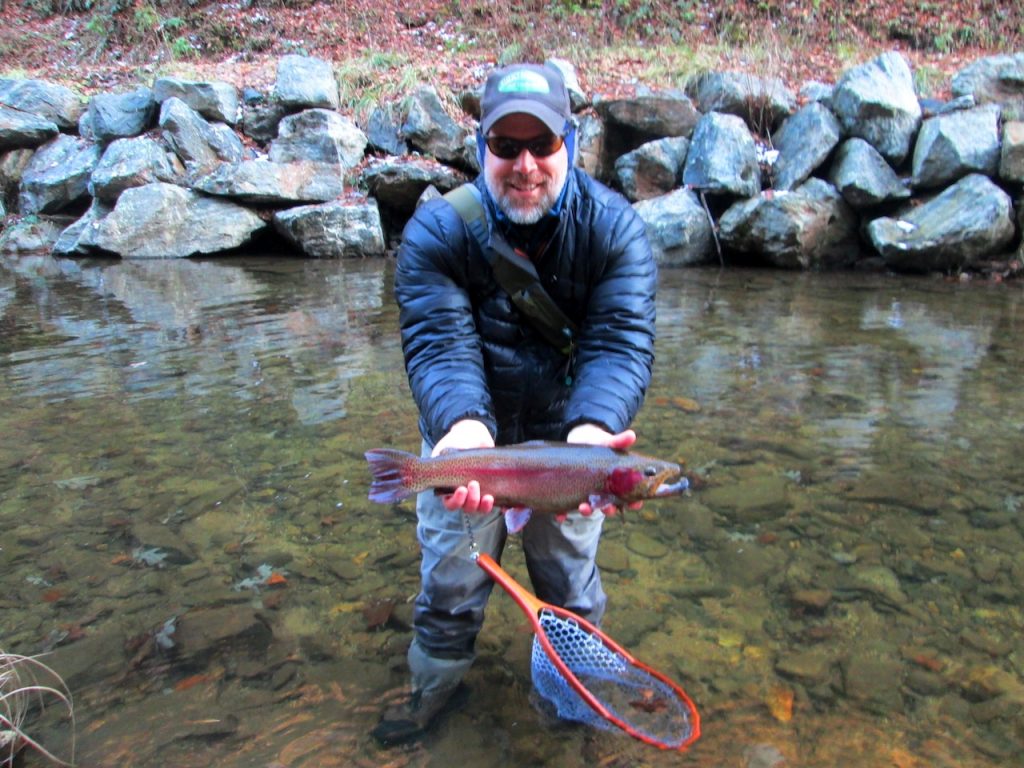 The arrival of November usually means cold weather is not too far off, but it doesn’t mean that you have to quit fishing. Certainly the fishing for wild, mountain trout can slow down significantly as water temperatures fall, but tailwater trout and really any stocked trout will continue to feed well, even in the coldest of temperatures. In recent years, winter guide trips to Delayed Harvest streams have become a favorite of many clients, mainly because of the potential for really big trout.
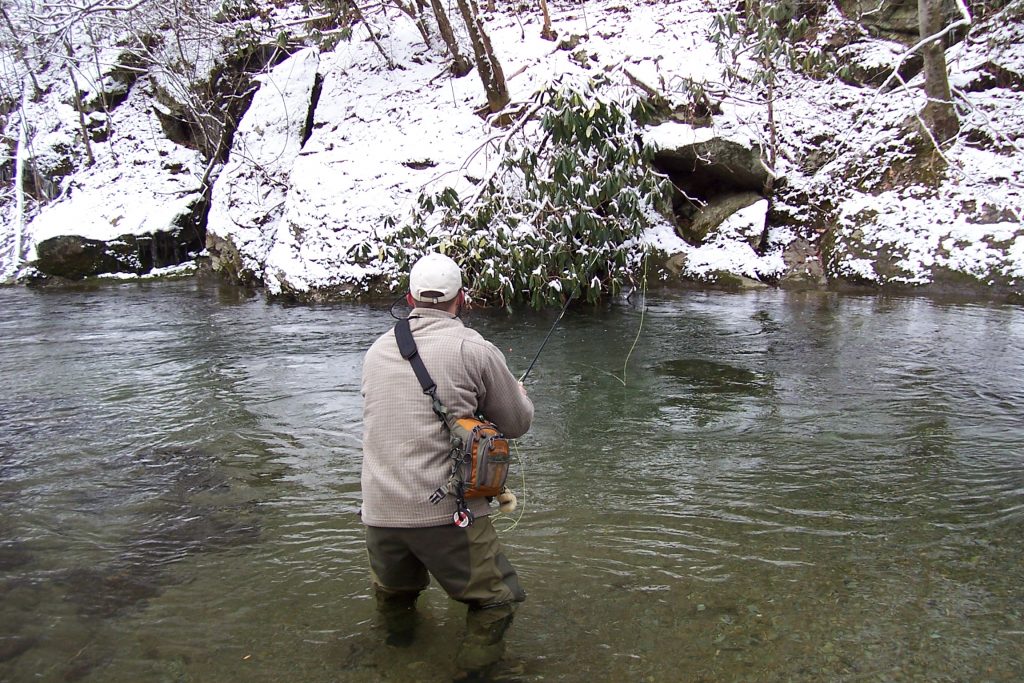 We’ve talked a lot about water temperature in many of these articles and for good reason. Things like approach, presentation, and fly selection can determine whether or not a fish will take your offering, but water temperature can determine whether or not a fish will take any offering! You can read in more detail about water temperature in A Matter of Degrees, but to keep it simple here, wild trout in the Smokies just don’t do a lot of feeding when the water temperature is in the 30’s and low 40’s.
 Once you think you’ve located feeding fish, it’s time to think about fly selection. On warmer winter days, you may actually see some insects hatching. If you do, they’re likely to be small and dark: Blue Wing Olive mayflies, small black stoneflies or caddis, dark olive or black midges… Rarely anything bigger than a #18. On rare occasions, you may see fish feeding on the surface during one of these hatches. Small Parachute Adams or Griffith’s Gnats are a pretty good bet in those instances. Mostly though, they’re going to feed more on the nymphs, so black Zebra Midges, small Pheasant Tails, and small black or olive Hare’s Ears will be pretty good bets.
 It’s the time of year when certain folks seem to be whispering more at the fly shop. They’re isolated in corners and peeking over their shoulders before saying too much. They’re talking about brown trout. Big ones. Somebody mentioned seeing a decent one around Metcalf Bottoms – about 18-inches. A younger guy innocently asked, “Since when did we start referring to 18-inch browns as ‘decent’?” The older guy replied with a grin, “October.”
 Fish that size don’t get caught often. Brown trout only live in a handful of rivers in the Smokies to begin with. They’re extremely cagey and for much of the year, they do most of their feeding at night – it’s illegal to fish the park at night. So, outside of the occasional big brown caught at dusk, or dawn, or after a good rain, we don’t get a lot of good shots at these guys. Until late fall.
 Most people aren’t willing to put in the time it takes to catch one of these fish. Unless you’re just going to depend on luck, you have to trade fishing time for looking time. You may not spot one at the first place, or second or third… And once you do spot one, you’re not done looking. You have to watch him for a while to figure out his pattern: how he’s feeding, where he’s feeding, when he’s feeding, IF he’s feeding. You then may have to spend a pain-staking amount of time sneaking into a position where you can cast to him without spooking him.