How Stuff Works: Packs and Vests

As with most things in fly fishing, fishing packs and vests have come a long way over the years.  The great thing about that is you now have a seemingly endless array of ways to carry and organize your on-stream tools and accessories.  The bad thing is those seemingly endless choices can be a bit overwhelming.

There is certainly no right or wrong pack or vest.  The best option for you will boil down to how much stuff you plan to carry, where you plan to carry it (backcountry or more roadside), and how you want to organize it. As with fly rods, the more diverse your fishing adventures are, the more likely you’ll need more than one option. For instance, what might work well for backcountry trout fishing in the mountains may not work very well wading saltwater flats.  But for most folks, you should be able to find one system that works for all of your fishing needs.

Again, what works best for me may not suit you at all, so I’m not going to try to tell you the best product.  However, I have had the opportunity over the last 30 years to use most every style of vest/pack and will share below what I believe are pros and cons of each.

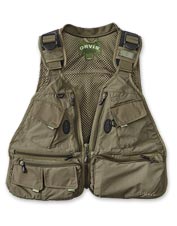
Vests: For decades, this has been the standard for carrying fly boxes, tools, etc. on the stream and while there have been some changes over the years, the basic concept is still the same and this is still the choice for many anglers.  One of the greatest benefits of a vest is that with individual pockets for nearly everything, it’s really easy to keep things separated and organized.  And the design of the vest is such that you can keep most of those items quickly and easily accessible.  Most vests will also have larger compartments on the back for items that you may not need to access as frequently, like a rain jacket or lunch. D-rings on the back of a vest also make a great place to attach a net where its out of the way but easily accessible with the addition of a magnetic or clip attachment.

While there have been numerous improvements over the years, the biggest complaint with vests still seems to be that they are heavy, with most of the weight being carried on your neck and shoulders.  Another downside is they do not wear well with a backpack.  If you like to do a lot of backcountry fishing, you may want to carry more safety and comfort provisions that necessitate a backpack in addition to your fishing gear.  It can be difficult to comfortably and practically wear a backpack when the straps are going over full, bulky pockets on a vest.

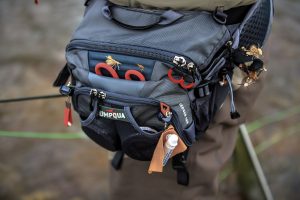
Hip Packs: These are often worn around the waist on the rear when not fishing, and rotated to the hip when accessing items in the pack. Probably their greatest advantage is that they stay out of your way when fishing and offer total freedom of movement when casting, etc.  There are also accessories you can add (or may be built in to some packs) for carrying a net.

The biggest downside to a hip pack is that it doesn’t keep items as organized and it can be more difficult to access those items.  Additionally, the hip pack, by itself, usually does not have the capacity to carry larger items like a rain jacket or lunch.  However, a hip pack does wear comfortably with an additional backpack. Many will use the hip pack alone when fishing closer to the car and add a backpack when fishing in the backcountry. Finally, these are not the best option for someone who does a lot of deep wading.  Although, there are a lot of waterproof options now.

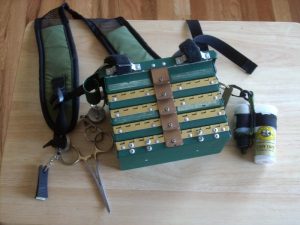
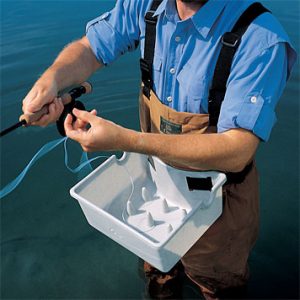
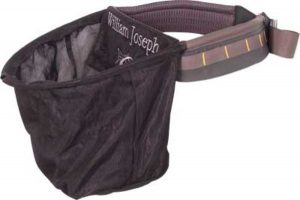
Chest Packs: These, as the name implies, are designed to be worn on the chest and come in a number of sizes.  They organize things in much the same way a hip pack does but keep things far more accessible on your chest and high out of the water.  Many will have a D-ring on the rear of the neck strap for carrying a net. I would include a chest fly box (like I use) in the same category as a chest pack, except that there is no need for separate fly boxes.

Chest Fly Box

Some don’t like having a cumbersome item on their chest and some of the larger chest packs can be quite cumbersome.  Smaller chest packs are very comfortable but don’t carry as much stuff.  In either case, you won’t have enough capacity to carry large items but like a hip pack, you can easily wear a backpack with your chest pack to carry more things when travelling far from the car.  Some companies even make “fishing backpacks” designed in such a way that a compatible chest pack can clip to the front of it.

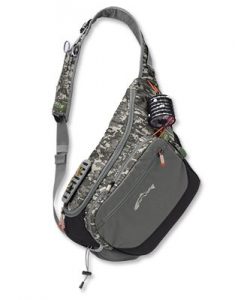
Sling Packs: These are the latest trend in fishing packs and are designed to be more accessible than a hip pack and more out of the way than a chest pack.  They are worn diagonally across your body so that they can be easily “slung” around to your front when you need to get to it.  It can then be “slung” around and secured out of the way on your back when you’re fishing.  They come in small and large sizes depending on how much you need to carry.

These packs are well designed and very comfortable but even the big ones don’t have enough capacity to carry everything you might want to take on a trip deep into the backcountry. On such a trip, I typically carry a rain jacket, lunch, first-aid kit and plenty of water.  I also regularly carry my wading boots in on long hikes. You need a backpack to carry those items and a sling bag just can’t be worn and utilized with a backpack.  The other downside to a sling bag is there just doesn’t seem to be a good place to carry a net (if needed) without it getting in the way.

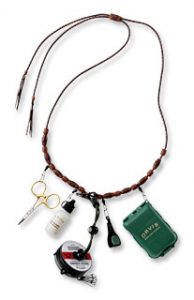
Lanyard: A fishing lanyard is basically a necklace for carrying your essentials around your neck.  Most will comfortably carry and organize nippers, forceps, tippet, floatant and small fly box.  By itself, this is for the absolute minimalist.  For others, it may be a way to keep essential, frequently used items immediately accessible while carrying other less frequently used items in a hip pack or backpack.

The downside is fairly obvious with a lanyard.  It has almost zero capacity.  There is no place for rain jacket, lunch, water, camera, leaders, multiple fly boxes, etc.  In my opinion, the only reasonable use for a lanyard would be in a boat or in conjunction with another pack as mentioned above.

How Stuff Works – Floatants

One of the worst things you can do to a dry fly is catch a fish on it!  They slime it and submerge it and swim it around… Just in general, keeping a dry fly floating better and longer seems to be an ongoing quest for many fly tyers and fishers.

There are a number of factors that can go into how well and how long a dry fly continues to float high. Certainly the materials from which the fly is tied will play a big role, as will the skill of the angler.  The more you allow your fly to drag across currents, rather than drift on them, the more waterlogged your fly will become. Where you are fishing will make a difference, too.  It’s easier to keep a fly floating high in big, open rivers where false casting is an option than it is in a small, tight mountain stream.  In any case, there are an endless number of products on the market that are designed to help with this task and we lump them all into the category of “floatants.”

As with many products in the fly fishing world, if you ask ten different anglers which one is the best, it’s entirely possible that you will get ten different answers. Sometimes those answers will come in the form of a specific brand of floatant, and others will come in the form of a specific style.  When it comes to brand, I believe that is a matter of personal preference and you’ll just have to try a few different ones to see if one in particular earns your loyalty.  But when it comes to different styles of floatant, the specific task at hand may determine which will be best.  In fact, you may want to have more than one style of floatant to perform different tasks. Listed below are a few different common styles of floatant and a description of how and when they might best be applied.

Liquid Floatants
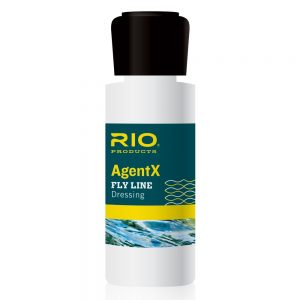
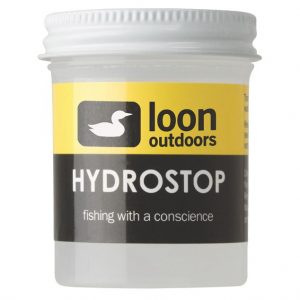
While many anglers use them in different ways, liquid floatants are probably most useful before you ever get to the stream.  Whether dry flies that you tie yourself or buy from a shop, you can use a liquid style floatant to “pre-treat” new flies in much the same way as you might “Scotchgard” your sofa.  Exact application may vary and you should read the recommendations for the specific brand you purchase, but typically, flies will be soaked in the liquid for five minutes or so and then set out to dry overnight.  In theory, after application of the product, water will better bead and roll of the fly material rather than absorb into it.

Gel Floatants
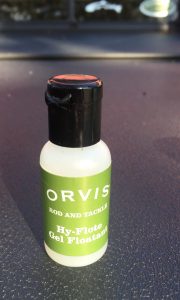
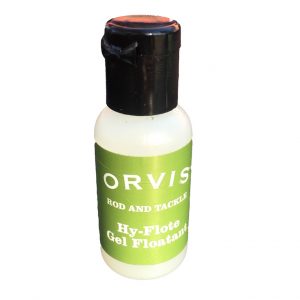
Gel floatants are probably the most common and popular style of floatant.  They come in a small, very portable bottle and, like the liquid floatants, are designed to be a pre-treatment to an already dry fly.  The big difference is gel floatants are designed to be used streamside, immediately before fishing the fly.

It is important that gels are not “over applied.”  A small amount should be rubbed into the fly and any excess should be removed.  Gels are also frequently mis-applied – after a fly has already become waterlogged.  If a fly is already saturated, applying a gel floatant will essentially trap moisture into the fly and make it worse.


Spray Floatants
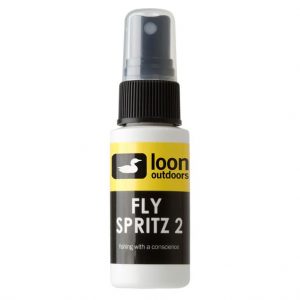
Also normally applied while the fly is still dry, spray floatants are basically just a variation on a gel floatant.  Spray floatants come in a bottle with a pump top and are applied much like you would spray something like an eyeglass cleaner.  They are not as messy as the gel but are sometimes more challenging to completey coat the fly.


Paste Floatants
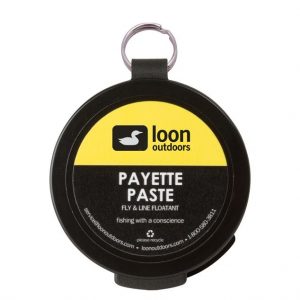
These are basically just a thicker version of a gel floatant.  They can really create a mess on smaller dry flies and are probably best suited for larger dries like hoppers and stoneflies.  A lot of people prefer a paste floatant to apply to yarn strike indicators or even on a leader to keep it floating better.


Powder Floatants
These are used less as a pre-treatment and more as a means to revive a saturated fly.  As mentioned above, when a dry fly becomes oversaturated and begins to sink, applying a gel or spray can often make it worse by trapping moisture in.  Powder floatants are used to absorb and remove that moisture from a fly.

Typically they will come in a bottle with a wide, flip-top lid.  The fly, still attached to the tippet, is inserted into the bottle and the lid is closed.  The bottle is then shaken a few times and the moisture is removed from the fly.

At this point, there is a lot of debate on whether to re-apply a gel or spray type floatant and you’ll just have to find what works best for you.  I usually don’t re-apply another floatant unless I’m using a synthetic (like foam) dry fly.

Brush Floatants
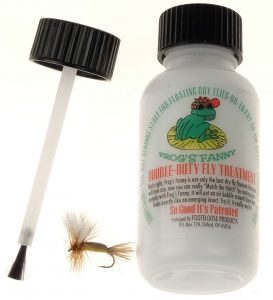
Brush floatants are essentially another version of a powder floatant.  Rather than shaking the fly inside the bottle, a small brush is used to apply the powder to the fly.  Again, it’s personal preference but with brush floatants, be prepared for a little frustration on windy days!


There are countless styles and floatants on the market today and all have their place.  And unlike the homemade lighter fluid and paraffin concoctions of days gone by, they are typically odorless and environmentally friendly.  You just need to find a system that suits your needs.

Personally, I carry a gel floatant for pre-treating dry flies and a “shake style” powder for reviving them and get by just fine.  But I offer the disclaimer that I often offer in these newsletter articles… This is just one man’s opinion!

How Stuff Works: Forceps

In the world of fly fishing, there is an endless array of gadgets designed to serve every purpose from threading a fly, to removing a fly from a tree, to tying knots… If you have any task to perform in fly fishing that you find the least bit frustrating or unpleasant, chances are someone has invented a gadget to make it easier.  But I’ve never been much of a gadget guy and I try to keep the number of items I carry on the stream to a minimum.

It’s funny how different folks have different priorities when it comes to what they carry with them.  For instance, I never go into the backcountry without a daypack that includes a first-aid kit and the basic necessities (fire source, water purification, etc.) to spend the night if I have to.  While 99.9% of backcountry fishing trips go off without a hitch, there are a number of things that could go wrong, and I like to be prepared for the unexpected.  I was taught long ago that there is a name for people who go into the woods unprepared: “Statistics.”  Yet, I regularly encounter fishermen deep in the backcountry with no such provisions, but they will have fifteen different knot tying tools hanging from their vest!

I’ve taken a really long way around the barn to say that there are only two fishing “tools” that I routinely carry with me when I’m fishing: nippers and forceps.  I’ve talked about nippers in another article.  They are responsible for most of the work I’m doing with my line.  Forceps handle pretty much everything else.

If you get in certain circles, mainly the medical community, someone might correct you and say, “Those aren’t forceps.  They’re hemostats.”  Another might refer to them as clamps.  Maybe there are subtle differences in the three – I don’t know.  But in fly fishing, the three terms are interchangeable and refer to a tool that looks kind of like a pair of scissors but with a nose more like a pair of pliers.  While they come in slightly different shapes and sizes, most are fairly long and narrow and have a locking feature.

Forceps have a number of different uses but I mostly use them to perform three common tasks.  If I need to crimp the barb on a hook, whether required by law or simply preferred, I use my forceps.  If I need to squeeze a split shot on a leader, I use my forceps.  And if I happen to hook a fish a little deeper in the mouth and the fly is difficult to reach without harming the fish, I use my forceps.

The locking feature is most often used for hook extraction.  I clamp the forceps on the hook and carefully remove it from the mouth of the fish.  I also use the locking feature to clamp the forceps to my pack or shirt when they’re not in use.  For these reasons, I greatly prefer a pair of locking forceps to pliers.

Common “Medical Forceps”

I also prefer to have forceps with flat jaws.  Many forceps that might be offered to you by your friend who works in the ER will have grooved jaws.  Those grooved jaws are great for many of the intended tasks in medical applications, but they can be a hindrance when trying to crimp the barb on a hook.  Trout hooks are often so little that they work themselves into those grooves making it difficult to meet the barb with enough metal to flatten it.

The other downside to forceps that are made for the medical community is quality.  I know, it seems strange that a fly fisherman’s forceps would be superior quality to a doctor’s.  But medical forceps are often designed to be “single use,” so the metal used to construct them is inferior.  They bend and rust easily.  Forceps built for fly fishing are usually made of high quality stainless steel and built to last.  And assuming you don’t lose them, they should last forever.

Beyond that, the only real differences in fly fishing forceps are shape, color, and features.  Some are designed with a variety of add-ons, such as scissor blades, which would be great for anglers who might use yarn for strike indicators.  Color is sort of personal preference but there are also practical considerations.

Trout Skin Forceps

When fishing for spookier trout like those in the Smokies, I prefer not to have the bright silver or gold forceps because I think they “flash” too much when the sun hits them, potentially spooking trout.  But flat black ones are sometimes difficult to locate when you inevitably drop them in the water.  I’m a fan of the the “trout skin” colored forceps.  Not only are the cool looking, but they’re dull enough not to reflect much light, yet light enough to see in the water.

As always, a lot of it boils down to how you’re going to carry them, what they will be used for and your own personal preference for appearance. In any case, pick up a pair if you don’t have some already.  You’ll use them a lot.

How Stuff Works: Fly Boxes

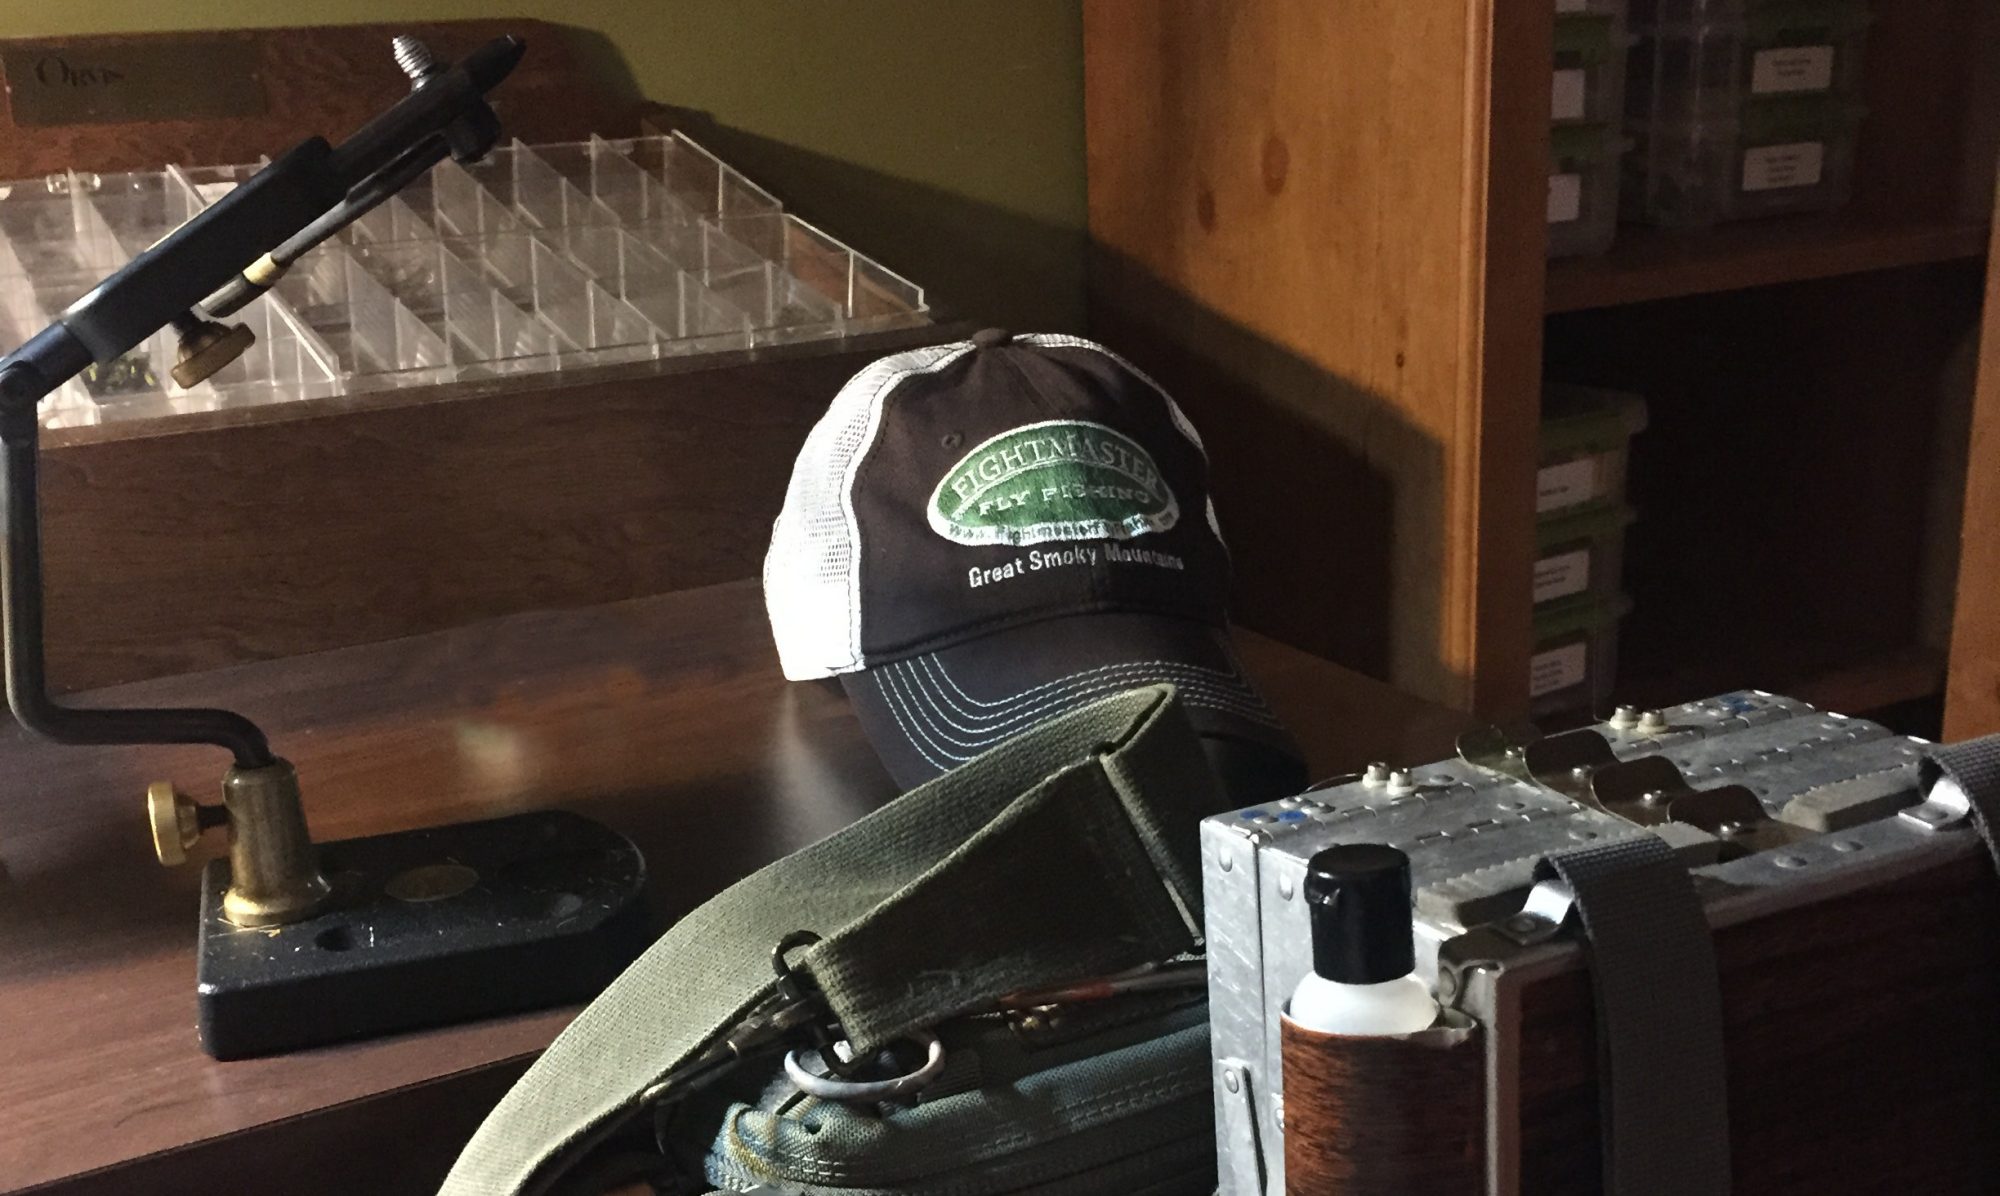
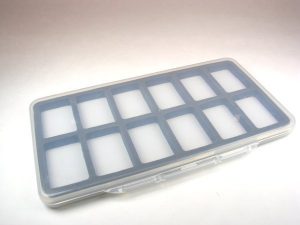
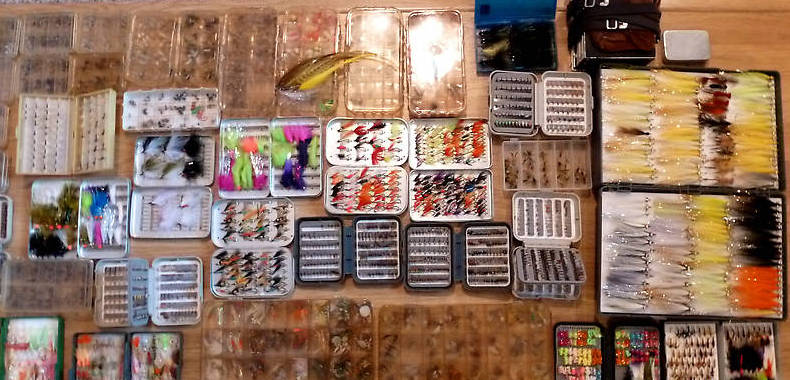
I’m a bit of an oddball. This is not exactly breaking news for most folks who know me.  But to paraphrase John Gierach, “If, from time to time, people don’t walk away from you shaking their head… You’re doing something wrong.”  I could certainly dedicate an entire article, or even a book, to my oddball qualities, but for this article, I am referring to one specific oddball quality.  I fish and guide with a set-up that combines a pack and fly boxes all in one contraption. You’ve seen it.  It’s my chest fly box, custom built by the Richardson Chest Fly Box Company in Pennsylvania.  It’s awesome and I love it.

Chest Fly Box

So, that makes it a little more challenging for me to give advice on individual fly boxes.  But I have over the years used about every kind of box and pack known to man.  And along the way I have learned a few things that may be helpful to you when purchasing or organizing your flies.  At the least, it might get you thinking about it.  And who knows?  Maybe one day you’ll come to your senses and buy a Richardson!

While chest fly boxes like mine are more common in the Northeast, they are hardly common.  Most folks go a different route.  They have a variety of different fly boxes that they stuff in a vest, hip pack, chest pack, sling bag, or some other carryall.  No matter how you decide to carry them, fly boxes are essential organizational tools in our sport and it helps to know a few things about them.

Medium Box with Foam

They come in a number of different sizes, from large, briefcase size boxes for boats to ultra slim boxes not much bigger than a smartphone.  When choosing a fly box size, you have to consider how many flies you need to carry, how you’re going to carry them, how big the flies are, and how you want to organize them.  For instance, a big, briefcase size box may hold every fly you have but it won’t be very portable when wading creeks.  Or a small, ultra slim box might be convenient to slip in a pocket, but if you plan to store bass bugs in it, you’ll only be able to carry a couple and you won’t be able to close the lid.

In addition, you’ll have to consider how you want to organize your flies within your box. There are countless options for securing your flies from slot foam, flat foam, and nubby foam to compartments, clips, and magnets.  Some boxes might even have a combination of both, with a type of foam on one side of the box and compartments on the other.  Certainly personal preference plays a big role in you box interior of choice, but there are practical matters to consider as well.

Compartment Box

Compartments tend to lend themselves well to beefier patterns, or large quantities of the same fly. For instance, if you fish a lot of Pheasant Tails and carry a lot of them with you, it’s far easier to dump them all into one compartment rather than trying to line up three dozen Pheasant Tails across multiple rows of foam.  I find foam more useful when I am trying to organize a lot of different patterns but small quantities of each.  It’s easier to see what I have.

Ultra Thin Magnetic Compartments

The type of fly may also determine the best way to store it.  Thin foam or magnetic boxes can be great for midges and nymphs but can crush the hackles on many dry flies.  On the other hand, trying to carry midges in deep compartments can not only be a waste of space, it can be difficult to grasp them with your fingers when removing them from the box.

Finally, when you’re on the stream, you don’t want to spend your time hunting for flies or digging through your pack for fly boxes.  Try to have a designated area of your pack or vest for boxes rather than burying them under a rain jacket somewhere.  And if you carry five fly boxes on the stream, try to make them five different, or at least different looking, fly boxes.  This will save you all kinds of time when trying to locate a specific box of flies.

How Stuff Works: Fly Rods

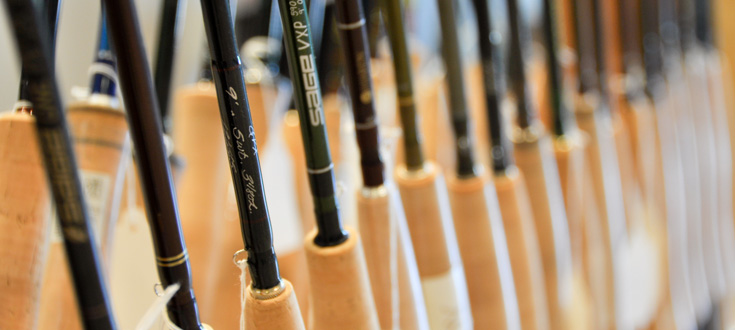
This should probably go without saying, but the fly rod is the tool used to cast the line when fly fishing.  It is also used to manipulate line on the water after the cast, to set the hook on a fish (usually), and to fight the fish after hooking it.  It is certainly one of the most important pieces of your equipment and likely the piece of equipment in which you’ll invest the most money.  So, what do you need to consider before making this investment?  The three most important characteristics of a fly rod are its length, its line weight designation, and its action.

Fly Rod Length
While there are specialty sizes on either end, most common fly rods are going to range from 7’ to 10’ in length.  Longer rods aid in keeping the line higher off the water which can be helpful when trying to achieve longer casts or when trying to cast from a lower position, like sitting in a float tube or canoe.  Longer rods are also helpful when trying to reach to keep line off of faster currents.  If you’re planning to regularly fish from a float tube or canoe, fish open areas like wide rivers or lakes, or fish a lot of pocket water on medium to large mountain streams, you may want to consider a 9’ to 10’ rod.

Shorter rods are most beneficial in small, brushy streams where a longer rod will be hard to maneuver. If you’re planning to spend most of your time on tiny tributaries and backcountry “blue lines,” you may want to consider a rod in the 7’ to 8’ range.

Line Weight
The next thing to consider is the line weight.  Each rod is given a line weight designation like a 5-weight or a 9-weight.  That just indicates what size line it is designed to cast and you typically want to match that to the fly line size.  For instance, a 5-weight line will properly load a 5-weight rod and make it cast its best in most situations.  Using an 8-weight line on a 5-weight rod would over-load it, resulting in an awkward, “clunky” cast.  Using a 3-weight line on a 5-weight rod wouldn’t load it enough, resulting in little line control and a significant compromise in accuracy and distance.

When you’re choosing the line weight of a rod, you want to consider what you will be fishing for. For trout, you are commonly using a 3 to 5-weight.  For largemouth bass, you might use a 7 to 9-weight.  The difference has little, if anything, to do with the size of the fish. A largemouth won’t snap a 3-weight rod. It’s more about the necessary fly sizes and the required presentations.

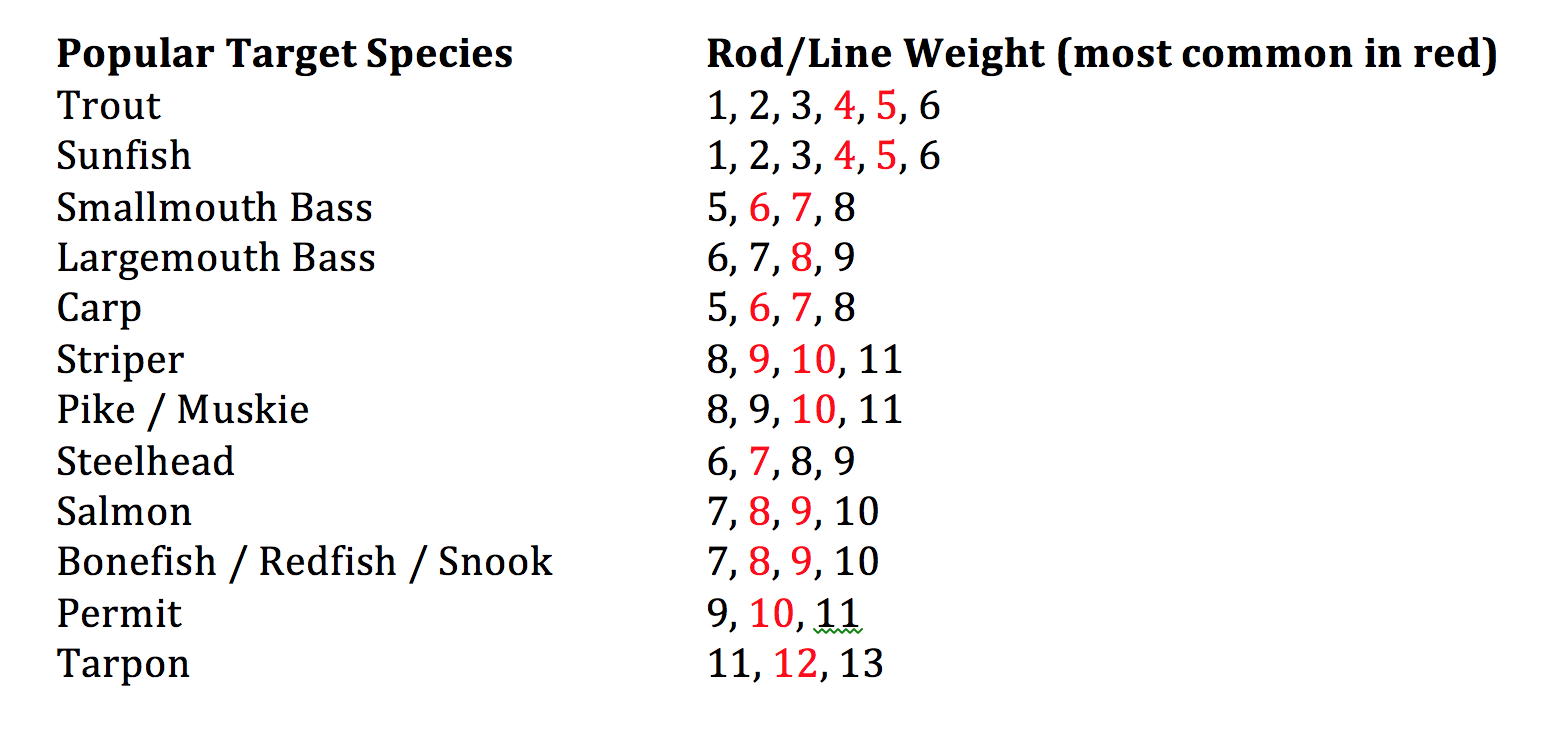
For trout, we are most often fishing with smaller flies on a dead drift.  Lighter lines allow for a more delicate presentation and create less drag.  On the other hand, when fishing for bass, we are often trying to “punch” flies into tight areas and quickly pull fish out of areas with a lot of woody structure.  And we are typically using larger, heavier, wind-resistant flies.  Often, there is simply not enough weight in a 4-weight line to effectively “turnover” a larger bass bug.  Rather than the line carrying the fly on a level plane during the cast, the fly travels below the line, often catching the rod tip or worse, the back of your head!

When you get into saltwater species and some large freshwater species like salmon, you may be choosing a particular rod and line weight because of the size of the fish more than the size of the fly.  Yes, a 13-weight helps to cast bigger flies to tarpon, but mostly you need that size rod because its larger butt section will be necessary to fight a 150 pound fish!

The other thing that can necessitate a rod with a heavier line weight is wind.  Saltwater species like bonefish, snook, redfish, etc. often aren’t particularly big and they don’t demand unusually large flies, but you encounter a lot of wind around the coast.  In the American West, you tend to encounter more wind and may consequently want a 6-weight rod for trout.  The accompanying chart lists appropriate rod/line weights for common game fish.

Compromise
So, you really need to consider what you’ll be fishing for and where you’ll be fishing to determine the best rod length and weight for your needs.  In this part of the country, most people want to fish for bass and bluegill in streams, ponds and lakes, and they want to fish for trout in the mountains and tailwaters.  But if you’re just getting into the sport, you probably don’t want to rush out and buy four different fly rod outfits.  Fortunately, there is a middle ground.

If you’re the person described in the paragraph above, your ideal rod lengths might range from 7’ to 10’ and your ideal line weights might range from 4 to 7-weight.  While it is impossible to get one rod that is perfect for everything, you can sometimes get one rod that is good enough for a lot of things.  An 8 ½’ rod would be long enough to get by on bigger water and short enough to manage on smaller streams.  A 5-weight would be light enough for trout fishing, ideal for bluegill, and adequate for bass fishing if you scale down your fly size.

Later, if you get really interested in bass fishing, maybe you add a 9’ 8-weight to your arsenal. Or if hiking into small brook trout streams becomes your thing, maybe you add a 7 ½’ 3-weight.  You can certainly get by with one rod, but the more diverse your locations and species become, the more necessary it will be to have multiple rod sizes.

Fly Rod Action
Once you’ve narrowed down the rod size, it’s time to consider the action of the rod.  Rods will typically be described as slow, medium, or fast.  A slow action rod feels softer and more “noodly” because it flexes closer to the butt of the rod.  A fast action fly rod will feel stiffer because it flexes closer to the tip of the rod. And as you might guess, a medium action rod sort of falls in between, flexing more in the middle of the rod.

Fast action rods are capable of generating more line speed and, in the right hands, more easily achieving greater casting distance.  With their stiffer butt sections, they also tend to have more “backbone” when it comes to apply pressure when fighting fish.  Most fly rods that are 7-weight or heavier will only be available in a fast action.

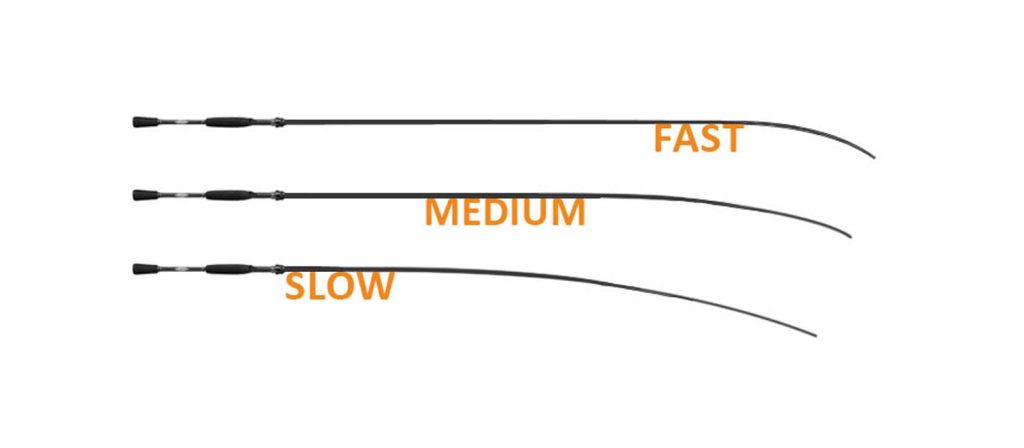
Slow action rods are more delicate in their delivery of the line and are more ideal for softer presentations.  You tend to feel the fish more on a slow action rod and because it flexes much deeper in the rod, it is capable of better protecting very light tippets. Most rods in the 1 to 3-weight range are slower action rods.  Typically, rods in the 4 to 6 weight range are available in a number of different actions.

Your own personal casting style will also be a factor in the best rod action for you.  People with a more aggressive casting stroke tend to favor a fast action rod.  People with a more relaxed casting stroke tend to favor a slow action rod. Experienced fly casters can pretty easily adjust their casting stroke to the rod.  If you’re new to fly fishing, you may not have enough experience to even know your preference.  In that case, it’s usually safest to stick to the middle and go with a medium action rod.

Fly Rod Material and Price
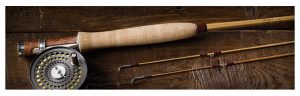
In the old days, fly rods were made from bamboo and their price depended on things like who made them and whether or not they were mass-produced.  Some of the rods made by certain independent makers are extremely valuable today.  Most of the bamboo rods that were mass-produced by larger companies have little value.  Bamboo rods that are made today are mostly made by independent makers and have price tags in excess of $1000 largely because of the amount of time and craftsmanship that goes into making them.

Today, bamboo rods definitely still have a following much like classic cars have a following.  When compared to more “modern” materials, they tend to be a little heavier and almost every bamboo rod will fall into the slow action category.  I wouldn’t recommend them to a beginner looking for a rod to get into the sport but for the more seasoned fly fishing enthusiast, they sure are cool!

Fiberglass replaced bamboo in the 50’s as the most common material for fly rods.  It was lightweight, and after the trade embargo with China (where rod makers got their bamboo), it was far more available and cheaper to produce.  Fiberglass rods have seen a recent return in popularity because of their soft, unique action (slow).  Many large rod manufacturers are currently offering select models of fiberglass rods built with more modern components.

Most rods today are made from carbon fiber (graphite) and that has been the case for probably forty years.  Carbon fiber is strong and much lighter than fiberglass or bamboo.  It can be made in a number of different actions and it can be made in multiple pieces while still maintaining that action.

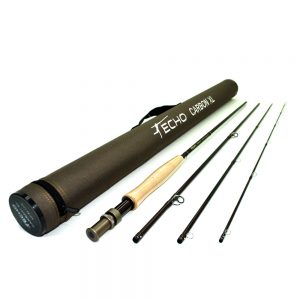
Bamboo rods, for instance, had/have metal ferrules (joints).  To make a four-piece bamboo rod results not only in a lot of added weight, but “dead spots” at each of those joints.  Carbon fiber rods have carbon fiber joints, allowing for a multi-piece rod that is still light and still maintains its action.  Most carbon fiber rods today break down to four sections, allowing for easy storage and travel.  Some break down into as many as seven pieces!

Today’s carbon fiber rods are priced all over the place.  Some are mass-produced overseas using less expensive components (guides, reel seat, etc.) and can be found for well under $100.  American made rods tend to start around $200.  When you bump up to about $400, you’re getting a higher modulus graphite that will feel lighter and crisper – you’ll notice a difference. When you get into the real high-end stuff ($500-$1200), you are getting more technology as well as higher-end components, but most beginner to intermediate fly casters won’t be able to tell the difference.

Keep in mind that many of the things that influence the price of the rod won’t have anything to do with how it casts.  For example, a mid to high end rod might have some exotic, $150 piece of wood used for the reel seat, while an entry level rod might use a $30 piece of walnut.  One might use titanium for the guides while another might use stainless steel.

In other words, if you have the disposable income and want to spend $1200 on a rod, have at it. Just don’t expect it to necessarily cast better or catch more fish!  Buy the best rod you can afford.  There are some great rods in the $100 – $300 range, many with an unconditional guarantee. That’s right.  Some of the major rod manufacturers provide an unconditional guarantee (or variation) on their rods.  Orvis, for instance, offers a 25-year guarantee on all but one series of their rods.  No matter how it breaks, they’ll fix it or replace it for 25 years!  To me, it’s worth spending a little more to get a rod with a good warranty.

The bottom line is once you narrow down what size rod you need and what your budget is, it begins to boil down to personal preference.  If you decide that an 8 ½’ 5-weight is what you need and you’re willing and able to spend up to $400 on it, go to the fly shop and cast every 8 ½’ 5-weight rod under $400 that they have.  Any fly shop worth their salt will have a place for you to cast a rod and will gladly let you cast as many as you’d like.  And when you do, one of them will just feel right.

How Stuff Works: Tippet Rings

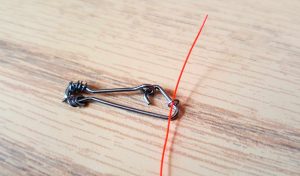
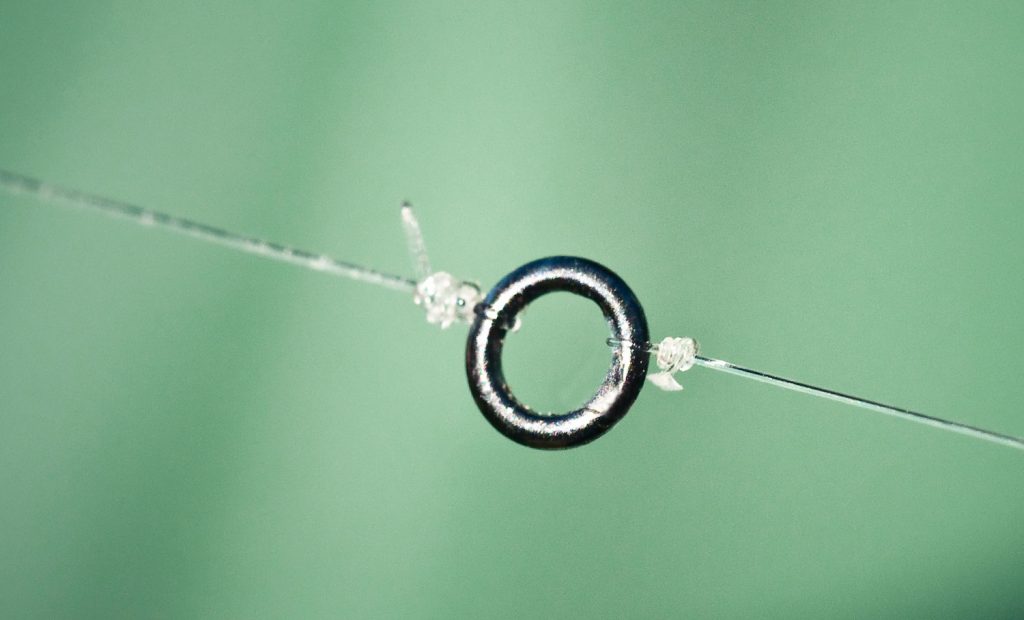
Over the last few years, tippet rings have been gaining more and more popularity and acceptance.  Most new fly fishermen love them.  Most traditionalists hate them.  What are they?

In case you’re new to the sport, lets start with a quick overview of leaders.  The leader is simply the monofilament connection between the the heavier fly line and the actual fly. Typically 7 1/2′ to 12′ in total length, leaders are tapered from a thick butt section that attaches to the fly line to a finer tippet section that attaches to the fly.  Check out this link for more detailed info on leaders and tippet.

As you change flies (or lose them in trees), your tippet gets gradually shorter until it is no longer the proper length, or worse, you’ve cut it away to the point that you’re in the thicker part of the leader.  In this situation, you would cut a length of tippet from the appropriate size spool of tippet material, tie it to the existing leader, and ultimately rebuild your leader back to its original length and size.

Though tying the knot to splice the new piece of tippet back to the leader is not very complicated with a little practice, many anglers struggle with it, or don’t want to take the time to learn it.  For these fishermen, the tippet ring is like an answered prayer!

Varying sizes of tippet rings

Tippet rings are very small metal rings, available in a few different sizes, that simplify this splice.  You tie it to the end of your leader using whatever knot you prefer for tying on a fly.  Then you tie a piece of tippet to the ring using that same knot.  You could also tie a second piece of tippet off the ring to add a second fly for a dropper rig.  So, all of your frequent connections can be made using the same knot.

Multiple tippet rings are stored on a clip and for convenience, are often threaded and attached before removing from the clip

This is one of the biggest benefits to using tippet rings.  It just simplifies the process, particularly for someone who may not fish frequently and may have trouble remembering or executing various knots.  Another benefit is that they can greatly prolong the life of your overall leader since your always replacing tippet off the ring and not cutting part of your leader away every time you change tippet.

Of course, there are also down sides – at least in my opinion.  First, I don’t think it makes as strong of a connection as when you splice using more traditional Surgeons or Blood Knots.  This may not make much difference on smaller fish, but I believe you have a much better chance of breaking off a big fish if you’re using a tippet ring.  Second, the tippet ring creates a “dead spot” in the leader which can negatively impact you in a couple of ways.

One way is with straight line nymphing.  This technique is commonly used in mountain streams and requires a certain amount of feel.  With that tippet ring creating a dead spot between leader and tippet, I believe you’re more likely to miss some of the more subtle takes of a trout.  That dead spot also can create problems with accuracy.

One of the main functions of a tapered leader is to transfer energy during a cast.  It’s what helps prevent things like hard splash downs or tippet pile-up on a cast.  When you put a tippet ring in the middle of all of that, the dead spot created can act almost like a short in an electrical current.  The energy doesn’t transfer smoothly from the taper of the leader to the tippet and can create a hinging effect – resulting in a significant loss of accuracy.

Like most things, you have to consider the kind of fishing you do and how important things like feel or accuracy are to you.  For me, they’re pretty important.  For others, they may take a backseat to convenience.  And that’s okay!  Figure out your system and roll with it!

Fly Fishing Gear Maintenance

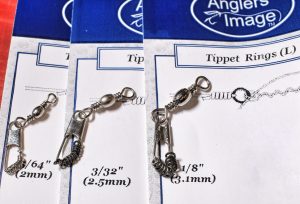
I recently saw a post on Facebook from a gentleman who had broken two fly rods on one trip. Another person commented about “having the record” for taking the most broken rods back to his local fly shop. They proceeded to boastfully go back and forth about this as if it was some sort of badge of honor. Accidents happen and rods do break from time to time, but I had guided one of these gentlemen and it was no secret why he had broken so many.

When we first met, I cringed as he pulled his rod from the trunk of his car. It was not in a tube and there were a variety of items piled on top of it. I’ve seen a lot of rods break over the years, but I’ve never seen a single one break while it was in the tube. If you knew him, it would come as no surprise that he forgot to bring a reel for the rod, so he ended up using one of mine.

When he caught his first fish, he removed the hook and literally threw the rod on a rocky bank about ten feet away in preparation for a photo.   I let it slide but when it happened again on the second fish, he got the “lecture.” Not only was he damaging the rod every time he did that but also the reel. Actually, he wasn’t doing the fly line any favors either!

Whether it’s cars, tools, fly fishing gear, or anything else, I was always taught that if you take care of your gear, your gear will take care of you. While taking care of your gear often means simply handling it responsibly in the field, simple maintenance out of the field can greatly extend the life of valuable fishing gear and insure that it’s ready to perform when you need it to. And what better time than winter for inspection and a little preventive maintenance?

Rods:

Fly rods don’t require a lot of maintenance. Basically, don’t heave them into rocks every time you catch a fish and keep them in a tube for storage and travel. However, be careful not to store them wet for an extended amount of time in an airtight tube. Simple off-season maintenance includes checking rod guides and wraps for any damage. If you notice a loose guide or a wrap beginning to fail, you can send it back to the manufacturer for a preventive repair, rather than waiting for the guide to come off while you’re fishing. When you are doing this, also check the ferrules (where the rod pieces join) for a good, snug fit. If any seem loose, apply a small coating of wax to the male end.

Reel Lube

Reels:  Fly reels are pretty low maintenance, too. First, check to make sure the reel is turning smoothly. If it’s not, be sure that there’s not too much line on it. If there’s not excessive line preventing it from turning smoothly, you likely have a bent frame or dented spool. If it’s minor, your local fly shop might be able to fix that. Otherwise, it will need to go back to the manufacturer.

Assuming the reel is turning properly, all it really needs is a cleaning and “tune-up.” Remove the spool and rinse it and the frame with water. Wipe away any excessive grime build-up and apply a small amount of reel lube around the gears. Allow the reel to dry before putting back into storage.

Fly Line Dressing

Fly Lines:  Fly lines probably require more maintenance than any other piece of equipment. You don’t have to completely remove it from the reel, but pull out at least the first forty feet of fly line. You can pull out the entire amount if you wish, but most people don’t use more than the first forty feet and it’s what will need the most attention.

Spread it out someplace other than the ground, such as between a couple of trees in the back yard. Take a small container and fill it with water and a couple drops of dishwashing liquid. Dip a clean cloth or paper towel in the liquid and run the cloth back and forth over the fly line. You’ll likely see a dark, grimy stain on the cloth after you do. Repeat this process with a clean cloth until you no longer see a stain, then do it one more time with just water and no soap.

Now that your line is clean, you’ll want to treat it with something to keep it slick and prevent cracking. There are specific fly line treatments available at fly shops for this. Just rub into the line using the same method described above. Or something I like to use is ArmorAll. You buy the wipes and simply run the wipe up and down the line several times.

These steps should keep your line floating better, allow it to shoot through the rod guides better, and simply make it last longer. It wouldn’t hurt to do this periodically throughout the year, but at least once a year. It depends on how much you fish and where you fish. Fly lines used on scummy lakes and ponds will need more frequent attention than lines used in clear mountain streams.

Waders:  Most wader care needs to happen throughout the season and that mostly involves being careful of thorns, etc. Probably the most damage occurs to waders when people are putting them on or taking them off at the truck. I regularly see fishermen put on their stockingfoot waders and then walk around looking for the boots or other items. This is just an invitation for gravel or other pointy objects to puncture the feet of the waders. The feet of my waders never touch the ground – boots are on the ground ready, foot goes into wader, wader goes into boot. If you’re not comfortable doing the “one leg hop,” keeping a mat to stand on is a great idea.

Also be sure not to store waders wet. Hang them to dry when you get home, preferably not in direct sunlight. Occasionally washing them through the year will help with their breathability and water repellency. Wash them on gentle cycle with a mild detergent. I recommend Ivory Snow, a detergent commonly used for baby clothing.

Winter is a great time to repair any leaks and/or treat with DWR. If you have major punctures or tears in your waders, you’re probably better off sending them to the manufacturer for repair or replacement. But most folks just encounter minor leakage caused by a pinhole or seam leak, and that’s pretty easy to fix yourself.

First, try to narrow down the location of the leak. For instance, if you’ve been getting damp on the inside of your right leg from the knee down, chances are pretty good that the leak is somewhere around the inside right knee. Sticking with that example, make sure the waders are completely dry, turn them inside out, and generously spray rubbing alcohol all around the suspected leak area. Still keeping the waders inside out, fill the right leg past the knee with water and look closely in the area where you sprayed the alcohol. You should see discoloration where the leak is. Mark that spot with a permanent marker.

Now that we know where the leak is, it’s time to repair. Again, allow the waders to dry completely. Where you made the mark with the marker, liberally smear Aquaseal on the area. Aquaseal is available at most fly shops and many camping/outdoor stores, and often, a small tube of it comes with your waders. Put the treated area of the waders in direct sunlight to cure. When the Aquaseal feels “solid,” the waders should be immediately ready to go. However, I’d move them inside to a dry place and wait 24 hours before using.

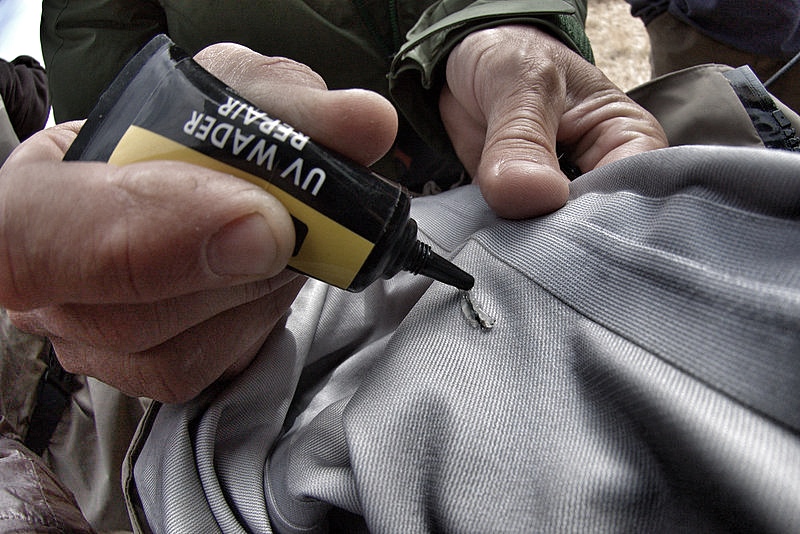
Treating your breathable waders with a DWR is a great winter project. As a matter of fact, if you have a breathable rain jacket, grab it and treat it at the same time.   DWR (Durable Water Repellant) is basically going to allow the water to “bead” and roll off the fabric rather than absorb into it. I’ve had old waders and jackets that I never treated that, even though they were still waterproof, were absorbing so much water that they felt heavy and even clammy. DWR is good stuff. There are a few brands out there and can usually be found at camping/outdoor stores. I’ve personally had good luck with ReviveX Spray-on Repellant.

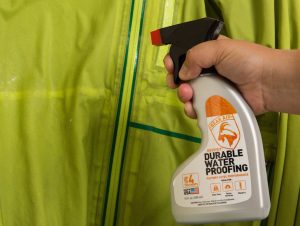
Start by washing the waders and/or jacket with a mild detergent as described above. Hang the garment(s) and spray evenly and thoroughly with DWR while the garment is still wet. I usually apply a little heavier around seams and stress areas such as the knees and crotch area on waders. On jackets, I put a little more emphasis on the shoulder area. You can then simply allow it to air dry where it’s hanging or put it in the dryer on low/medium for about an hour.

That about covers the big stuff. I also like to use winter to go through fly boxes and remove rusty hooks. Those have a way of contaminating the entire box after a while. And it’s a great time to go through your first aid kit and make sure everything is up to date, put new batteries in the flashlight, etc. Then, when spring rolls around, all you have to do is fish!

Keeping Your Dry Fly Floating High

A buoyant Humpy dry fly

In April, dry fly fishing really starts to turn on in the Smokies. Not only are there a significant number of hatches, but water temperatures are getting ideal and fish are just looking up, even when no hatches are present. Presenting a dry fly that rides high on the water, not only tends to produce more strikes, it is much easier for you to see. Here are a few tips to keep your fly floating high in the fast moving currents of the Smoky Mountains.

First off, if you don’t tie your own flies, be sure buy high quality dry flies. It can be tempting to find Internet companies or box stores that offer really cheap prices on flies, but they are cheap for a reason. These dry flies often have less hackle and/or use a very low-grade hackle, and they are simply not going to float as well. Bushy, heavily hackled flies will float the best, as will flies that utilize foam and/or deer hair. These are all great for most of the riffles and pocket water you encounter in the Smokies. However, if you’re fishing to slow water risers in a slick pool, you may want to use a more slender, low profile fly like a parachute or comparadun pattern.

Treat your flies before you fish them. There are a number of great products on the market that accomplish this and are generically referred to as fly floatant. The most common are silicone based and have a gel consistency. Just squeeze a drop on your finger and rub it into your fly. Orvis, Aquel, Loon and Gink are probably the most common brands. They’re all probably about the same but everyone seems to have their favorite. I use Orvis Hy-Flote.

Fly Floatant

Once you’ve selected your high quality dry fly and gooped it up with fly floatant, the worst thing you can do to it is catch a fish! They take it under water and slime it up to the point where it doesn’t want to float as well, especially after you catch 2 or 3 fish. When this happens, a mistake a lot of anglers make is to re-apply the same gel floatant they used to pre-treat the fly. However, you’re often just trapping moisture in to the fly at this point. You need to remove as much of the moisture from the fly as possible.

On bigger rivers such as tailwaters, your false cast can keep a lot of moisture out of the fly, even after several fish. But in places like the Smokies, frequent false casting is often not an option due to the tighter quarters, and is often not desired because of the increased risk of spooking fish. There are a number of methods I use to dry a saturated fly in these environments.

Dry Shake

One is to press the fly against an absorbent material. Amadou is a material sold at many fly shops that works great for this. You can carry a patch on your vest or pack and just squeeze the fly in it. Chamois cloth is another good option. If you’re in a pinch and don’t have either, just press the fly against your shirt. After employing this method, blow on your fly. Finally, consider carrying a second, powder based floatation product. These are desiccants, similar to what’s found in the small, “do not eat” pouches packaged with some clothing and electronics. Again, there are numerous brands. Frog’s Fanny is a favorite of many anglers. My favorite is Shimazaki Dry-Shake. It has a large-mouthed bottle that allows you to drop the fly in while still attached to the tippet. Close the lid, shake vigorously and remove. It will be floating like new.

The final tip for keeping that fly floating high is technique. What causes flies to get waterlogged more than anything else, especially with novice anglers, is drag. When your fly doesn’t drift naturally with the current, and instead pulls unnaturally against the current, not only will you not catch many fish, your fly is going to become more waterlogged and require far more maintenance to keep it floating.

Think about what you’re doing. Instead of dragging the fly through the run 2 or 3 times before making a good drift, read the water. Identify the varied currents that will pull your line at a different speed than the fly and try to position yourself where you can eliminate them. If you can’t eliminate them through position, think about how, when, and which direction you’ll need to mend BEFORE you make the first cast. And pick your fly up when it reaches the end of the target area, rather than letting it drift (drag) into the fast shallow riffle at the bottom of the run.

Keeping the line off the current lip at the rear of the pool provides a drag free drift through the sweet spot

Experienced anglers often do most of this instinctively, so it looks like they’re just casually moving around casting. The good ones always make it looks easy! If you’re newer to fly fishing or even if you’ve done it awhile but only get out a few times a year, it won’t be instinctive and you’ll have to think about it. This is just good advice, period. If you execute a good cast and drift in the right place the first time, you’ll not only keep your fly floating better, you’ll catch more fish!

Finally, on a similar note, carry your fly in your hand when you move from spot to spot. I see a lot of people who will let their fly drag behind them in the water as they wade up to the next pocket or run. If you do this, the best-case scenario is that you’re going to waterlog your dry fly. More often than not, you’re also going to hang your fly up on every rock and stick in the river!

How Stuff Works: Stripping Baskets

Plastic Stripping Basket

When you’re doing any type of fly fishing that involves stripping in great amounts of line after each cast, keeping that slack line under control can be a challenge. In streams and rivers, it’s usually not too big of a problem because the line will usually rest neatly in the water by your side. In a boat that is not equipped with some sort of stripping deck, it can be a little bit of a problem as your line wants to snag and tangle on absolutely everything in the boat. The biggest challenge is surf fishing because the constant rushing approach and retreat of the tide repeatedly wraps this slack line around your legs.

Mesh Stripping Basket

Stripping baskets are designed to solve this problem. I’ve seen larger, freestanding stripping baskets used in boats. But the most common stripping baskets are smaller and are worn around your waste. After you cast and you’re retrieving line, you simply strip and feed the line into the basket. They are basically just a bin with a series of upright “posts.” The posts help prevent the line from tangling inside the basket. There are also baskets made of mesh, but many note that these are often not durable.

Stripping baskets are pretty simple devices that have been around for decades, and they can be purchased from most fly fishing suppliers. If you don’t want to fork over $40-$90 for a plastic tub on a belt, you can also make your own. I did and it works great.

Start with a hard plastic bin like you find in the storage sections at Wal-mart, Home Depot, etc. It should be approximately 16”x 11” and about 5 or 6” deep. You’re also going to need a drill, a sander, some zip ties, wire cutters, and a bungee cord. The bungee cord will be used to secure the bin around your waist, so the length needed will be dependent on your size. You want it to be tight enough to keep the bin from falling off you but not so tight that it’s digging the bin into you.

Bottom View of Homemade Stripping Basket

Begin by drilling approximately ten 3/32” holes in the bottom of the bin near the edges. These will serve as drain holes for your stripping basket to keep water from accumulating inside. Next drill nine 3/32” holes spread equally in the middle of the bin. And drill another nine 3/32” holes right next to the ones you just drilled. These will serve as attachment points for your zip ties (the zip ties will act as the “posts” inside the box that help keep your line from tangling). Finally, drill two larger, approximately 3/16” holes (big enough to accept the hooks on your bungee) on the front of the bin, one near each top corner. This is where your bungee cord will attach. With light sand paper, smooth the front and back of each hole you drilled.

Interior View of Homemade Stripping Basket

Next, attach nine 4” zip ties through the “double holes” you created in the bottom of the bin, allowing the end of the zip tie to point upward into the interior of the bin. With your wire cutters, snip the tips off each zip tie so that you’re left with a 2” post that stands at an approximate right angle from the base of the bin. Hook one end of the bungee into one of the larger front holes. Bring the bungee around your waist and hook the other end into the second hole. I actually use two shorter bungees because I think it’s easier to attach and detach. You’re ready to go fishing!

Where you position the basket is a matter of preference. I typically see them positioned on the front of the body, but I prefer to wear mine closer to my left hip so I can feed line into the basket with a more natural stripping motion. I always use it when surf fishing and very frequently when I’m fishing from the canoe.

How Stuff Works: Strike Indicators

There seems to be few things in the fly fishing world that provoke as much debate as strike indicators. The mere existence of strike indicators in the sport of fly fishing can inspire rants from fly fishing purists that rival any political rant of that friend you just hid from your Facebook feed. But even among the firmly pro indicator crowd, nymphers will argue fiercely about the superiority of one type of indicator over another.

For newbies to the sport, a strike indicator is something that is often used while fishing with nymphs (sub surface flies). It is a brightly colored, floating object that is affixed to the leader intended to give the fisherman a visual indication when the fish hits his submerged fly, or nymph. Since the nymph usually can’t be seen under the water, and since it is usually fished with a slack line to achieve a dead drift, the strike can be difficult to detect without the visual aid of a strike indicator. Strike indicators can also be helpful in making sure the nymph is drifting properly (without drag) and at the desired depth.

The obvious question usually arises when hearing this description, “Isn’t that just a bobber?” Pardon the bobber pun, but that opens a whole other can of worms. There are a number of fly fishermen who will stop just short of taking a swing at you if you call a strike indicator a bobber. I assume this animosity stems from the association of bobbers with bait fishermen and fishing live bait; and fly fishermen don’t like to think anything they do might resemble bait fishing. So they call them strike indicators. The truth is that while strike indicators are typically smaller, lighter, and made from different materials than bobbers, they pretty much accomplish the same thing.

I use the term strike indicator because I think there is enough of a difference to specify, kind of like I don’t refer to a hamburger as a sandwich. It’s just different enough. But I won’t be offended if you call a hamburger a sandwich and it won’t offend me if you call a strike indicator a bobber!

Getting re-focused specifically on strike indicators, there are a lot of different kinds, and that’s what I want to focus on here. As mentioned before, most fly fishermen have their favorites, and a lot about selecting strike indicators will boil down to

personal preference. I personally don’t think there is such a thing as the perfect strike indicator. They all have pros and cons and I use different ones for different situations. Often I don’t use one at all, but that’s a topic for another article. Below is a list of some of the more common or popular strike indicators with a description of how they work and some of their strengths and weaknesses.

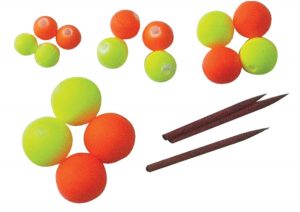
Hard Toothpick Indicators: These are usually made of cork, or balsa, or something similar. They are typically round or oval with a hole drilled in the center. The leader/tippet is inserted through the hole and the indicator may be moved to any position on the leader. Once the desired position is determined, the provided “toothpick” is inserted into the hole to hold the indicator in place.

These are great because they are buoyant, highly visible, reusable, and can easily be adjusted up and down the line to set the nymph at different depths. However, they tend to make more disturbance when they land on the water and can spook more skittish fish. Additionally, their mass makes them difficult to cast when placed on the tippet portion of the leader for shallow nymphing, though smaller ones can be purchased. They are best for deep to mid-depth nymphing and for quick and easy depth adjustment.

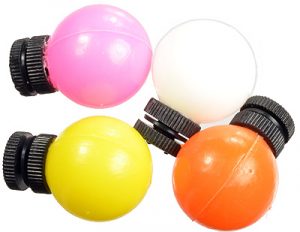
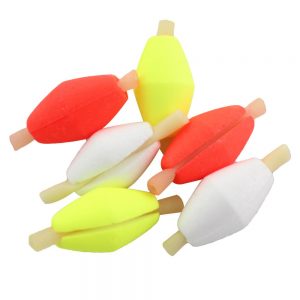
Hard Rubber Band Indicators: These are typically oval in shape and made from the same materials as the hard toothpick type indicators. Instead of having a hole and a toothpick, they have a slit that contains athick rubber band. The leader is inserted into the slit and the indicator is then rotated, allowing the rubber band to twist around the leader to hold the indicator in place.

They have pretty much the same pros and cons as the toothpick indicators. One additional advantage is they can be added or removed while the fly is still attached. However, they have a tendency to kink the leader when twisted on, and they come off the line more easily than other indicators when casting.

Thingamabobber

Balloon Style Indicators: The best known versions of these are the Thingamabobber and Air Lock. These are basically small, plastic balloons. They float great, are highly visible, and can be easily adjusted. They are particularly good if you need an indicator that will suspend larger, heavier flies. The Thingamaboober attaches by looping the leader through a hole and around the indicator. The Air Lock has a slot in the base where the leader is inserted and a separate piece that screws on to hold the indicator in place.


Air Lock

Much like the other hard indicators, when this indicator is set in the tippet section of the leader for shallow nymphing, it is difficult to cast and can create more tangles. It also lands hard on the water. It is more durable and floats better than the other hard indicators.


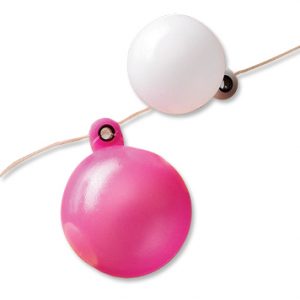
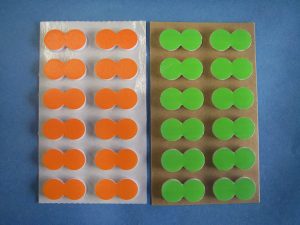
Stick-On Indicators: These are small round or oval pieces of foam that peel off and stick on to the leader. Their greatest value is that they cast easily, even when placed on the tippet and they make very little commotion on the water. So they are a great indicator for shallow nymphing. They float great and multiple indicators can be added to the line to support more weight.

The biggest downside to these is they are not reusable and they are not easily adjusted. When moved they lose a lot of their stick and then have a tendency to slide down the leader. They can usually be moved a few times before you have to trash them. Some complain that they also leave a sticky residue on the leader but I haven’t found that to be a problem.

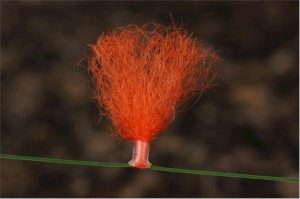
Yarn Indicators: These are made from a buoyant yarn that is often pre-treated with a waterproofing agent, but floatant may also be added. There are a number of different versions of yarn indicators, but most attach by using some sort of slip knot or loop knot. Like the stick-ons, yarn can be attached to the tippet end of the leader without the worry of a hard landing or a lot of tangles. So this is another good choice for shallow nymphing. Yarn indicators are also very sensitive, so they are great for detecting subtle strikes.

On the downside, I find them difficult to add and remove from the line and when removed, they regularly leave kinks in the line. Larger yarn indicators can be wind resistant and difficult to cast in tight places and they require a little more maintenance to keep them floating.

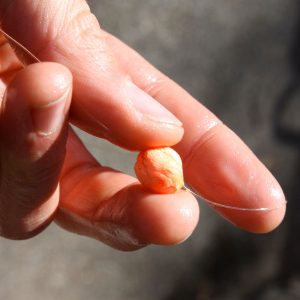
Putty Indicators: Strike putty comes in a small tub and resembles Play-Doh. You pull out a small gob or big gob depending on how big you want your indicator to be, and you smoosh and roll it on your leader. One of the benefits it that you can smoosh more on if you need more flotation for bigger, heavier flies, or you can pick some off for smaller flies and spookier fish.

I’m trying to be impartial here but I don’t like this stuff. It always comes off, especially in warm weather. It leaves a permanent indicator-colored smudge on your line when you remove it. Finally, every bit of dirt in the vicinity attaches to it, so what starts as orange strike putty soon becomes and greyish, brownish, greenish, orange strike putty.

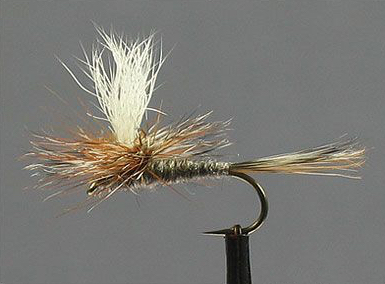
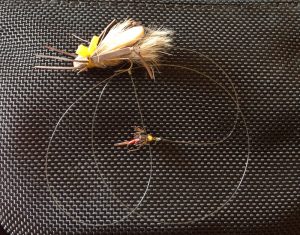
Dry Fly: In the right situations, a dry fly can serve as an edible strike indicator by adding a nymph “dropper” to it. For many, this is the go-to method because you’re essentially doubling your chances… or so it might seem. Just like any other strike indicator, a dry fly has its pros and cons.

Obviously, one of the big perks is that you have the potential to catch a fish on the nymph or the indicator, since the indicator is a fly. However, most dry flies don’t have near the buoyancy as an actual strike indicator, so if you’re needing to get heavier nymphs near the bottom of a deeper run, the dry fly will routinely get dragged under. In such a scenario, you’re not fishing the dry fly or the nymph very well, and hardly doubling your chances.

The best scenario for fishing a dry fly with a dropper is when you don’t need to get your nymph very deep, and you can fish a dry fly buoyant enough to support the nymph’s weight. I immediately think of pocket water. Another scenario might be in flatter water during a hatch, where you could put a nymph with little to no weight behind a dry fly to suggest an emerger.

The takeaway from all of this should be that there is not one strike indicator that is going to be perfect for every situation. You will likely need a variety to meet a variety of conditions. As with most things, much of it will boil down to personal preference and you should play around with a few different types to find what best meets your needs.